
You've probably got the kit on the counter right now, still in the box, and the product photos made it look simple. Open jar, inject culture, wait, harvest. That's the sales version.
This version is still beginner-friendly, but it's closer to baking sourdough than watering a pothos. A Cordyceps growing kit asks for clean hands, steady temperatures, patience, and the discipline not to fuss with it every few hours. If you can give it that, it's a satisfying grow. If you treat it like a novelty project, it usually teaches that lesson fast.
What to Expect from Your First Cordyceps Grow
Your first surprise will be how hands-on the process is. A syringe-based kit usually takes about 50 to 60 days from start to harvest, and the routine includes wiping the injection port with alcohol, inoculating cleanly, then managing fruiting conditions at roughly 65 to 70°F with 12+ hours of indirect light during the fruiting phase, as shown in this cordyceps kit walkthrough.
That doesn't mean it's hard in the abstract. It means the kit only works if you respect the sequence. Cordyceps rewards precision more than enthusiasm.
What the process actually feels like
Most beginners expect visible action right away. Cordyceps doesn't work like that. Early on, your job is mostly restraint.
A normal first run usually involves:
- Clean setup: alcohol, a stable surface, and enough space to inoculate without bumping things around
- A quiet incubation period: leaving the container alone while the culture gets established
- A controlled fruiting phase: introducing the right light and temperature when the kit is ready, not when you're impatient
- Daily observation without overhandling: checking for progress, moisture balance, and any obvious signs that something's off
Practical rule: Touch the kit less than you want to. Most beginner mistakes come from unnecessary interference.
What works and what doesn't
What works is boring. Stable room conditions. Clean inoculation. A consistent spot in the house. Following the kit's timing instead of improvising.
What doesn't work is moving the jar from room to room, placing it in direct sun, opening things repeatedly to “help,” or guessing your way through the light cycle. Cordyceps is less forgiving than many common home mushrooms because the fruiting phase depends on a narrow handoff from colonization to the next stage.
A better mindset is to treat the kit like a small indoor lab project. You don't need professional equipment for a basic grow, but you do need to care about cleanliness and routine.
The commitment is small, but real
The daily labor isn't huge. The mental commitment is the bigger part. You're watching for changes, resisting the urge to rush, and making small adjustments instead of dramatic ones.
If that sounds appealing, you'll probably enjoy growing cordyceps. It's a compact project with a clear rhythm. Once you understand that rhythm, the kit stops feeling mysterious and starts feeling manageable.
Choosing the Best Cordyceps Growing Kit for You
Some kits are easier than others. The mistake is shopping by price or by the nicest product photos. For a first grow, the better question is: How much of the process has already been handled for me, and how good is the substrate?

Two common kit styles
Here's the practical split most buyers will see.
| Kit type | Best for | Trade-off |
|---|---|---|
| Pre-prepared jar or all-in-one style | Beginners who want fewer moving parts | Easier workflow, but you still need clean inoculation and environmental control |
| Multi-component kit with separate pieces | Growers who want more control | More flexible, but more chances to make a mistake early |
If this is your first attempt, I'd lean toward the simpler format. Fewer decisions upfront means fewer places to drift off-course.
A multi-part setup can be great later, once you know what healthy colonization and proper fruiting timing look like. On a first grow, simplicity is an advantage.
Why substrate quality matters more than the label copy
Marketing language often gets slippery, especially concerning cordyceps. “Nutrient-rich” can sound vague, but in cordyceps cultivation the substrate really does matter.
A study on Cordyceps militaris found that substrate composition changed cordycepin output dramatically. Cordyceps grown on Allomyrina dichotoma produced 34 times the cordycepin yield of cordyceps grown on Bombyx mori pupae, and adding oleic acid increased cordycepin content by 51.4% compared with no oleic-acid treatment, according to this PMC study on substrate effects in cordyceps cultivation.
That's why the substrate isn't filler. It's the engine.
When you compare kits, pay attention to whether the seller tells you what the nutrient base is. If you want a broader grounding in how mushroom substrates function, this guide on magic mushroom substrates is a useful primer on what growers should look for.
What to look for before you buy
A strong beginner kit usually gives you enough detail to judge it without hype. Look for:
- Clear substrate description: rice-based or other prepared nutrient media should be explained, not hand-waved
- Defined workflow: you should know whether you're receiving a ready jar, a syringe-based setup, or multiple components
- Specific environmental instructions: vague directions like “keep cool” or “place in light” aren't enough
- Visible sterile design features: injection ports, sealed containers, or other signs the process was designed to reduce contamination
A good kit doesn't promise effortless results. It makes the hard parts clearer and harder to mess up.
If a product page sounds too easy, assume the work has been hidden in the fine print. The best Cordyceps growing kit for you is the one whose instructions match your actual experience level.
Creating the Ideal Environment for Your Fungi
Your jar can look perfect on day one and still stall a week later because the room runs hot in the afternoon, the lid gets handled too often, or the culture sits under harsh window light. That gap between marketing and reality trips up a lot of first-time growers. Cordyceps rewards consistency more than effort.
Pick the grow spot before you inoculate. Then leave it alone as much as possible.

Build the space before you inoculate
A workable home setup has three traits. It stays clean, it stays steady, and it does not invite constant tinkering.
That usually rules out kitchen counters, busy living rooms, windowsills, and any shelf above electronics that throw off heat. A spare room is great. A quiet bedroom shelf can work too. The main goal is a place where temperature and light stay predictable from morning to night.
Set up these basics first:
- Stable room temperature: avoid spots that heat up during the day or cool off sharply at night
- Indirect light for later fruiting: enough ambient light to support the fruiting phase, without direct sun on the container
- Low traffic: fewer people, pets, and dust passing by means fewer contamination opportunities
- A clean prep surface nearby: helpful for inoculation and any careful checks you need to make
- Sanitation supplies within reach: alcohol, clean paper towels, and clean hands do more for a small grow than extra gadgets
If you are starting with liquid culture, it helps to understand how the culture itself is prepared and maintained before it ever reaches your kit. This overview of liquid culture media for mushroom cultivation gives useful background on why clean inputs matter so much.
What conditions matter most
Temperature, light, fresh air, and handling habits all interact. Beginners often fixate on one and miss the others.
For fruiting, many home growers aim for cool, steady room conditions, usually around the mid-60s Fahrenheit to low 70s. Warm spikes cause more trouble than slightly cool conditions. A room that jumps from cool mornings to hot afternoons can slow growth, dry the surface, or stress the culture enough that weak contaminants get a foothold. In practice, a boring room beats a clever setup.
Light should be gentle and regular. Cordyceps does not need intense light, and direct sun is a common mistake. Sun through glass can heat a jar fast, especially on a windowsill, and that heat build-up is harder to notice than people expect.
Leave strong airflow out of the equation too. Normal room air is fine. A fan blowing directly at the jar dries surfaces and creates unnecessary fluctuation.
Stable conditions beat “better” conditions that keep changing.
A simple home setup that usually works
Most first grows do well on an ordinary shelf with a little discipline. No tent. No elaborate chamber. No constant adjustments.
| Element | Good choice | Avoid |
|---|---|---|
| Placement | Shelf or table in a stable room | Windowsill in direct sun |
| Light | Indirect room light or a gentle timed light | Bright lamp pressed close to the jar |
| Airflow | Normal room circulation | Fan blowing directly at the kit |
| Handling | Brief visual checks | Repeated moving, opening, or rotating |
I usually tell new growers to check the jar with their eyes before they touch anything. If the room is holding steady and the kit looks normal, leave it alone. Cordyceps is not hard because it needs fancy equipment. It is hard because small environmental mistakes keep repeating for weeks.
Navigating the Cordyceps Growth Cycle
The point where first-time growers usually get rattled is a week or two in. The jar looked fine, then nothing obvious happened, or the surface changed and they assumed something was wrong. With cordyceps, that middle stretch is where patience and clean habits matter more than optimism.
Cordyceps follows a predictable sequence, but kits often oversimplify it. You are not just waiting for orange clubs to appear. You are managing a culture through establishment, initiation, and fruiting without introducing contamination or pushing conditions too hard.

Start clean and stay clean
The growth cycle starts before you see any growth. It starts the moment the culture meets the substrate.
Penn State Extension's overview of mushroom production breaks cultivation into practical stages such as substrate preparation, spawning, spawn run, pinning, and cropping, which is a useful reminder that each step sets up the next one rather than fixing mistakes later on, as explained in Penn State Extension's introduction to mushroom cultivation. That matters with cordyceps kits because the sterile work is front-loaded. If contamination gets in during inoculation or early handling, no lighting schedule will rescue the jar.
Work on a wiped-down surface. Sanitize your hands and tools. Open the kit only as the instructions require, and close it back up promptly. Slow, deliberate movements beat nervous fiddling.
If you want a better sense of how growers judge inoculant quality, this overview of liquid culture media explains why the culture itself can make the difference between a clean start and a weak one.
Early establishment
After inoculation, the culture needs time to settle in and spread through the substrate. This stage is quieter than beginners expect.
You may see very little at first. That does not mean the grow has stalled.
A practical cultivation protocol published in the Journal of Fungi describes cordyceps production as a staged process that begins with mycelial colonization before growers induce stromata formation under controlled light and temperature conditions, which matches what home growers see in a kit when things are on track, according to this Cordyceps militaris cultivation study. The home version is simpler, but the principle is the same. Give the culture a short establishment window, then shift to fruiting conditions at the right time instead of leaving it in incubation indefinitely.
Beginners often make one of two mistakes here. They introduce light too early and keep moving the jar around, or they leave it untouched in the dark for too long because they are afraid to interfere. Both can slow fruiting.
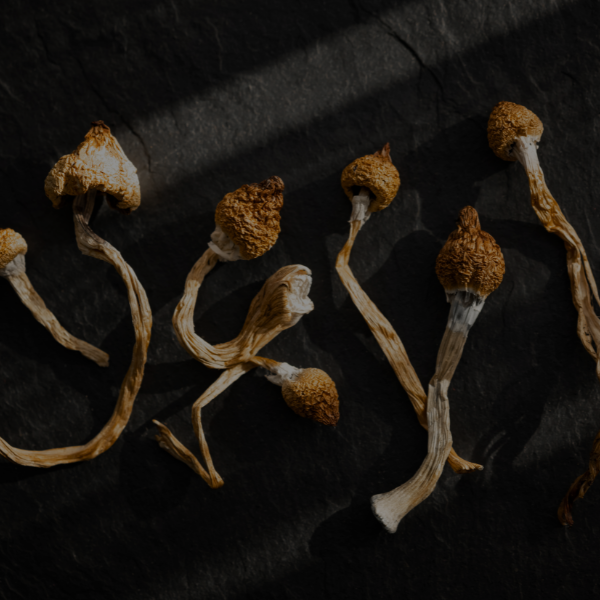
The fruiting transition
Once the substrate is established, the culture needs a consistent cue to begin forming fruiting bodies. At home, that usually means regular light, steady room temperatures, and less handling than you think.
This is the point where cordyceps stops looking like a jar of colonized substrate and starts showing structure. First you may notice a denser surface and small points of organized growth. Then those points begin stretching upward and taking on the familiar orange color.
Here's a useful visual guide to the process in motion:
Do not chase faster growth by adding more heat or stronger light. Cordyceps responds better to stable cues than aggressive adjustments, and a kit that gets handled every day often performs worse than one that is left in a steady spot.
What healthy progress looks like
Healthy progress has a sequence to it. The substrate becomes more uniformly colonized. The surface starts organizing rather than puffing up randomly. Then you get distinct developing structures that continue upward over time.
Problem jars usually drift away from that sequence. Growth stays flat and stagnant. The surface forms a thick mat and never transitions well. Or you see spreading colors and textures that clearly do not belong.
A simple checkpoint helps:
- Early stage: clean-looking substrate with gradual colonization
- Transition stage: surface becomes more structured, not messy or wet
- Fruiting stage: small orange formations appear and continue developing
- Warning signs: odd colors, sour smell, stalled surface, or fuzzy overgrowth that keeps spreading
If the jar looks questionable, resist the urge to keep opening it for a closer look. Repeated exposure creates new problems and rarely answers the old one. In my experience, cordyceps rewards growers who can tell the difference between observation and interference.
Harvesting and Preserving Your Cordyceps Crop
The first harvest often makes growers hesitate. The fruits finally look real, and it is easy to wait too long because you do not want to cut them early. Cordyceps usually rewards a clean, timely harvest more than a few extra days of wishful waiting.
Use the appearance of the fruits, not the calendar on the kit box. Marketing often makes these kits sound automatic, but harvest timing still depends on how cleanly the culture ran, how stable the temperature stayed, and whether the fruits developed evenly.
When to harvest
Mature cordyceps should look distinctly orange, upright, and fully formed for that kit's strain. They should feel firm, not wet or collapsing, and growth should be slowing down rather than stretching noticeably each day.
A few practical checks help:
- Strong color: the fruits have reached a clear orange tone rather than a pale yellow-orange
- Defined shape: they look like finished clubs, not tiny new pins
- Firm texture: they hold their shape when touched gently with a sterile tool
- Slower growth: the jar is no longer putting on obvious height every day
If a jar starts showing odd fuzz, off-colors, or a sour smell near harvest, do not treat it like a normal maturity question. Compare it against these common mycelium contamination pictures before deciding what to keep.
How to harvest cleanly
Use clean scissors or a sterile scalpel and cut close to the base of each fruit. Try not to dig into the substrate. Damaging the surface does not usually ruin the harvest you already have, but it does make the jar messier and increases the chance of contamination if you are watching for a second flush.
Gentle handling matters here. By harvest day, most of the result is already set by your earlier choices. Stable conditions, clean technique, and leaving the jar alone when it was developing all show up in the final quality.
Kits also vary more than beginners expect. Two jars grown in the same room can finish at different heights or densities, so judge readiness by the fruit bodies in front of you rather than by what another grower posted online.
Drying and storage
Fresh cordyceps spoils quickly, so dry it soon after harvest. A dehydrator is the easiest tool because it gives steady airflow and repeatable results. Use a low setting and let the fruits dry until they feel crisp and light, with no soft center left.
Air drying can work, but only in a clean, dry room with good circulation. In practice, it is less forgiving than many kit guides suggest. If the room is humid, the outside can feel dry while the inside still holds enough moisture to cause problems in storage.
Store dried cordyceps in an airtight jar in a cool, dark place. If you want extra insurance, add a food-safe desiccant pack. Check the container after a few days. If the fruits soften, they need more drying time.
Dried cordyceps is also much easier to measure, grind, steep, or blend later, which is one reason many home growers preserve the whole crop right away.
Solving Common Cordyceps Cultivation Problems
Cordyceps kits can feel finicky for a simple reason. This is still a relatively young commercial crop. Cordyceps militaris was first commercially cultivated in the 1980s and didn't appear in U.S. commercial cultivation until 2018, which helps explain why modern kits rely on tightly controlled indoor methods and why a home grow still takes roughly 50 to 60 days, as noted in this history of growing cordyceps at home.
That's useful context because it reframes failure. A bad run doesn't mean you're hopeless at cultivation. It usually means one part of a sensitive process slipped.

The usual problems and what they mean
| Problem | Likely cause | What to do |
|---|---|---|
| Green or black growth | Contamination from poor sanitation or dirty air | Isolate the kit and avoid spreading spores around your grow area |
| No visible progress | Weak culture, poor temperature control, or an early process issue | Verify conditions and give it time before making major changes |
| Overlay on the surface | The kit stayed in the wrong phase too long | Tighten your timing on the incubation-to-fruiting transition next run |
| Dry, stalled fruiting bodies | Too much drying air or poor moisture retention | Reduce harsh airflow and keep conditions more stable |
If you're unsure whether you're seeing bruising or contamination, visual examples help. This gallery of mycelium contamination pictures is useful for comparing common problem signs.
Troubleshooting without making things worse
The worst response to a problem is panic-adjusting everything at once. Don't change temperature, light, placement, and handling all in the same afternoon. You'll lose the trail of what caused the issue.
Instead:
- Change one variable at a time: otherwise you can't learn from the result
- Stop opening things unnecessarily: every extra interaction adds risk
- Write down what happened: dates, condition changes, and visible symptoms help more than memory
- Accept that some kits fail early: contamination and weak starts do happen, even with care
A first failed kit often teaches more than an easy success. You start noticing timing, surface changes, and environmental drift in a way product pages never show.
Cordyceps Growing Kit FAQ
Is it legal to grow cordyceps at home
Yes. Cordyceps is a legal functional mushroom grown for culinary and wellness use. For most home growers, the primary question isn't legality. It's whether you're ready for the clean technique and routine the kit requires.
How much can a Cordyceps growing kit yield
It depends heavily on the kit, the culture, and how well you control the process. In Cornell trials, yields ranged from 3.5 grams to 11.8 grams per jar in controlled cultivation work, which shows how much results can vary with strain and conditions. Treat any kit that promises a fixed result with skepticism.
Can I get more than one harvest from a kit
Sometimes, but don't count on a strong second round. Some substrates may produce additional growth after the first harvest if the kit remains healthy and the surface isn't damaged. In practice, the first flush is the one to focus on. If you want more reliability, it's often better to start a fresh kit and apply what you learned.
Do I need special equipment
Not always. Many beginners can complete a kit with basic sanitation supplies, a stable room, and careful handling. What you do need is consistency. Cordyceps doesn't ask for a huge tool budget, but it does punish sloppy process.
If you want to explore mushroom products and learn more from a retailer that also publishes educational resources, browse The Magic Mushroom Delivery. Their site covers a wide range of functional mushroom content and product options for adults in the United States.