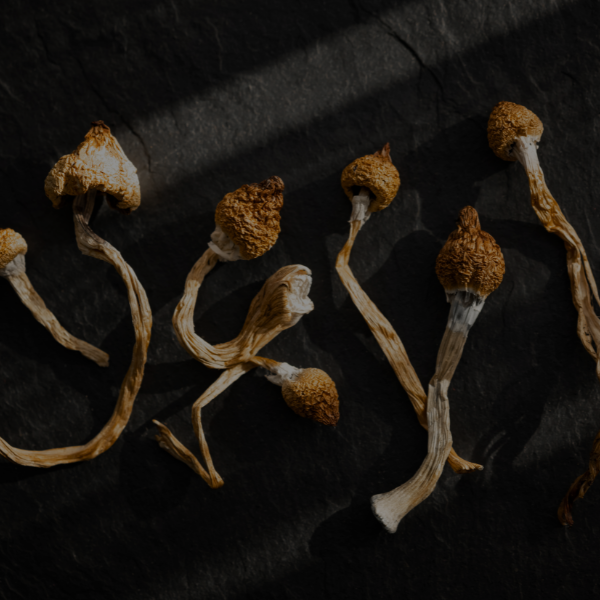
If you're serious about growing mushrooms, there's one skill that separates the hobbyists from the true experts: making your own spawn. This process is all about creating a living network of mycelium on a nutrient-rich base, which then acts as the “starter” for your entire crop. It’s the single most important skill for any dedicated cultivator.
Why Mastering Spawn Is Your First Step to Expert Cultivation
Before you can even think about harvesting beautiful gourmet or functional mushrooms, you need a powerful start. Think of mushroom spawn like a sourdough starter for a baker or seedlings for a gardener. It’s the living, breathing heart of your entire project—a dense web of mycelium ready to devour a food source like grain or sawdust.
Learning to make your own spawn is incredibly empowering. Sure, buying it pre-made is convenient, but it’s also expensive and locks you into whatever strains a supplier has on hand. Once you master making it yourself, you unlock a whole new world of control and consistency.
The Benefits of DIY Spawn Production
Creating spawn from scratch puts you firmly in the driver's seat. Here are the biggest advantages you'll see right away:
- Cost Savings: Making your own spawn can be up to 80% cheaper than buying it. A single liquid culture syringe can be expanded into pounds and pounds of spawn, bringing your cost per grow down dramatically.
- Genetic Control: This is a game-changer. You gain the power to select, isolate, and multiply the very best mushroom genetics. Found a mushroom that grew exceptionally fast or large? You can clone it and replicate those traits over and over.
- Endless Variety: You’re no longer stuck with what’s available commercially. You can start experimenting with hundreds of different gourmet and functional mushroom species, from classic Oysters to more exotic and challenging varieties.
This leap from buying spawn to creating it is what truly separates casual growers from cultivators who get consistent, amazing results. It's about taking ownership of the entire fungal life cycle, ensuring top-notch quality from the very beginning.
The interest in home cultivation has exploded, and the market reflects it. The global demand for mushroom spawn shot up from $250 million in 2020 to an estimated $300 million by 2024. Looking ahead, experts project this market will double to a massive $600 million by 2031, largely thanks to innovations that make it easier for enthusiasts to get started. You can check out more on this growth at HTF Market Intelligence.
Really understanding what mushroom spawn is and why it’s so vital is your first step. By learning to produce it yourself, you lay a strong foundation for every single batch of mushrooms you grow, leading to far more predictable and impressive harvests. This guide will walk you through exactly how to do it.
Here’s the rewritten section, designed to match the specified human-written style and expert tone.
Your Sterile Workspace and Cultivation Toolkit
When you get into mycology, you quickly learn one thing: “mostly clean” just doesn’t cut it. Contamination is the number one killer of mushroom spawn batches, which makes your workspace and tools your first and most important line of defense. Before you even start thinking about the recipe for mushroom spawn, you need to develop a 'sterile mindset'—a consistent ritual that makes cleanliness second nature.

This goes way beyond just tidying up. We're talking about creating a bubble where your mushroom mycelium can grow strong without having to fight off the invisible cloud of airborne bacteria, yeast, or the dreaded green mold that's literally everywhere. Your mission is to get your work area as close to a laboratory setting as possible, even if it’s just a quiet corner of your kitchen.
The Non-Negotiable Sterile Equipment
As you start putting together your cultivation toolkit, you'll find some items are absolutely essential. Without them, you’re pretty much guaranteeing yourself a front-row seat to a contamination horror show that will wipe out all your hard work. Think of these tools as an investment—they pay for themselves with every successful, clean batch of spawn you create.
Here are the absolute must-haves:
- Pressure Cooker or Autoclave: This is the heart and soul of any sterile operation. You need a pressure cooker that can hit and hold 15 PSI (pounds per square inch) to properly sterilize your grain or sawdust. Just boiling your substrate won’t work; only the extreme heat achieved under pressure can destroy tough bacterial endospores.
- Still Air Box (SAB): If you don’t have a fancy laminar flow hood, a Still Air Box is your new best friend. It’s a simple concept—just a clear box with armholes—but it creates a pocket of still air that dramatically cuts down the risk of contaminants falling into your spawn while you work. You can even build your own from a big plastic storage tote.
- 70% Isopropyl Alcohol: So many beginners think that 91% or 99% alcohol must be stronger and better, but it's a common mistake. The 30% water in a 70% solution is crucial. It actually helps the alcohol get inside a microbe's cell wall to kill it, instead of just flashing off the surface too quickly. Grab a spray bottle and use it on everything. And I mean everything.
Assembling Your Full Toolkit
Once you have the sterile big three, a few other pieces of gear will make your life a whole lot easier and your results more consistent. This is your complete workstation, set up to get you from a sterile culture to a fully colonized jar of spawn without any drama. It’s best to get all this stuff gathered and ready before you start.
Core Supplies:
- Glass Jars with Modified Lids: Good old Mason jars are the industry standard. You’ll need to modify the lids with a small hole for gas exchange (covered by micropore tape or a filter disc) and a second hole for inoculation (covered with a self-healing injection port).
- Scalpel or Sharp Knife: For working with agar cultures, a sterile scalpel is a must.
- Lighter or Alcohol Lamp: You’ll use this to flame-sterilize your scalpel or needle until it glows cherry red. Do this between every single transfer to make sure you’re not the one introducing contaminants.
- Nitrile Gloves and a Face Mask: These are to protect your spawn from you. Your hands and even your breath are huge sources of contamination. Wearing gloves and a mask is a simple step that makes a huge difference.
Remember, every single item that will come into contact with your culture or spawn must be sterilized. This includes your jars, grain, inoculation loop, and syringe needles. Your hands, work surface, and the air itself are the variables you control with gloves, alcohol, and a Still Air Box.
By getting your toolkit ready and committing to a strict sterile procedure, you create a perfect, controlled environment where your chosen mycelium gets a head start against any competitors. This careful prep work is the real secret to learning how to make mushroom spawn successfully, setting you up for a contamination-free journey from spore to harvest.
Choosing Your Spawn Medium: Liquid Culture, Grain, and Sawdust
Picking the right spawn medium is one of the first big decisions you'll make, and it really sets the stage for your entire project. It's not just about what works; it's about what works for you, your chosen mushroom species, and your goals. We'll walk through the big three: liquid culture, grain, and sawdust.
Getting this right is a huge part of learning how to make mushroom spawn that gives you consistent, healthy results. The techniques we use today have fueled an absolute explosion in mushroom cultivation, which has skyrocketed from a mere 0.17 million tonnes in 1960 to over 40 million today. This isn't slowing down, with the market projected to jump from $7 billion in 2025 to $9.8 billion by 2032.
Why the boom? A lot of it comes down to innovations like liquid culture, a method from the 1990s that can be up to 1000x faster than old-school agar transfers. Plus, learning to make your own spawn can slash your costs by up to 80%. You can explore more data on the rapidly expanding mushroom market to see just how big this has become.
Before we dive into the nitty-gritty of each type, here's a quick cheat sheet to help you compare them at a glance.
Mushroom Spawn Type Comparison
| Spawn Type | Best For | Colonization Speed | Contamination Risk | Key Advantage |
|---|---|---|---|---|
| Liquid Culture | Rapidly expanding genetics; inoculating many grain jars at once | Very Fast (for expansion) | High (if technique is not sterile) | Speed and massive scalability from a small sample. |
| Grain Spawn | Inoculating bulk substrates; grain-to-grain transfers; most species | Fast | Medium | The versatile, nutrient-rich industry standard. |
| Sawdust Spawn | Wood-loving species (Shiitake, Lion's Mane); inoculating logs | Medium to Slow | Low | Mimics natural habitat; great for outdoor grows. |
Each of these has its place, and many experienced growers use all three for different purposes. Now, let's get into the details.
Liquid Culture: Mycelium in a Bottle
Liquid Culture, or "LC," is essentially a living mycelial network suspended in a nutrient broth. Think of it as a mycelium starter on steroids. It's not typically used to fruit mushrooms directly but to expand a tiny bit of genetics into a massive volume of liquid inoculant.
Its real power is in scalability. With just one milliliter of a healthy liquid culture, you can inoculate dozens of grain jars or bags. This is because every drop is teeming with thousands of individual growth points, ready to spring to life.
How to Whip Up a Basic Liquid Culture:
- Make the Broth: Start by creating a simple nutrient solution. A classic recipe is mixing 400ml of distilled water with 16g (around 4%) of light malt extract or honey.
- Set Up Your Jar: Drop a magnetic stir bar or even a clean piece of broken glass into your jar. This is essential for breaking up the mycelial cloud later. Pour in your broth.
- Modify the Lid: You'll need a special lid with two key features: a self-healing injection port for adding your culture and a gas exchange filter (a hole covered with micropore tape) so the mycelium can breathe.
- Sterilize Everything: Pop the prepared jar in a pressure cooker and run it at 15 PSI for about 20-25 minutes. Let it cool down completely, and you're ready to inoculate.
The biggest advantage of liquid culture is speed and scalability. You can turn one petri dish into enough inoculant for a massive project in just a couple of weeks, making it a favorite for experienced growers.
Grain Spawn: The Industry Workhorse
When you hear growers talk about "making spawn," nine times out of ten, they're talking about grain spawn. It's the most versatile and common type, perfect for a huge variety of mushroom species. The individual grains, whether you're using rye, millet, or wild bird seed, serve as little nutrient-dense launchpads for the mycelium.
After it's fully colonized, you can use this grain to inoculate a bulk substrate (like pasteurized coco coir) or even more sterilized grain jars in what's called a grain-to-grain transfer. The high nutrient content fuels explosive growth, making it a solid choice for beginners and commercial farms alike.
Prepping Your Grain for Perfect Spawn:
- Soak It: First, submerge your grain in water for 12-24 hours. This kickstarts germination and gets the kernels hydrated.
- Simmer Gently: Next, let the grain simmer for 15-20 minutes. The goal is to get it hydrated all the way through but not burst. You want to be able to squish a kernel with your fingers, but it shouldn't turn to mush.
- Let It Dry: This step is critical. Spread the grain out on a screen and let the surface dry completely. If the outside of the grains is wet when you jar them, you're asking for bacterial contamination.
- Sterilize: Fill your jars about two-thirds full to leave room for shaking. Then, pressure cook them at 15 PSI for a full 90-120 minutes. Let them cool to room temperature before you even think about inoculating.
Sawdust Spawn: For the Wood-Lovers
For growing wood-loving species like Shiitake, Lion's Mane, Oyster, and Reishi, sawdust spawn is the undisputed king. It’s usually a blend of hardwood sawdust and wood chips, often supplemented with a nitrogen booster like wheat bran to give the mycelium some extra food.
You can use sawdust spawn to inoculate logs for an outdoor mushroom patch or simply fruit mushrooms directly from the bag. The mycelium treats the sawdust block just like a fallen log, colonizing it to form a dense, solid mass that's ready to produce beautiful flushes.
Getting the moisture right is everything here. You’re aiming for what growers call "field capacity." When you squeeze a handful of the prepared sawdust as hard as you can, it should feel damp, but only a drop or two of water should come out.
The Inoculation Process: Bringing Your Spawn to Life
This is where the magic really begins. After all that careful prep work and sterilizing, you're finally ready to introduce your living culture to its new, nutrient-packed home. Whether you're starting with a spore syringe, a slice of agar, or a liquid culture, this is the step that connects your sterile media to a soon-to-be-thriving mycelial network.
Think of inoculation as a delicate, surgical procedure. Your success rate is almost entirely dependent on keeping things sterile and handling your tools with a steady hand. This is why your Still Air Box (SAB) is your best friend—it creates a clean, calm workspace where airborne germs are much less likely to crash your party.
Transferring Culture with Sterile Technique
Before you even think about starting, get into a sterile mindset. Wipe down absolutely everything—your SAB, gloves, jars, and all your tools—with 70% isopropyl alcohol. Lay it all out neatly inside the box so you’re not reaching in and out, which is a common rookie mistake.
Now, let's talk about the actual transfer methods:
- Syringe (Spores or Liquid Culture): If your jars have self-healing injection ports, this part is a breeze. Flame-sterilize your syringe needle until it glows a nice cherry red, give it a few seconds to cool, and then inject directly through the port. For a standard quart jar, 1-2 ml of culture is all you need.
- Agar Plate: Grab your scalpel and flame-sterilize the blade. Cut a small, wedge-shaped piece of agar that’s covered in mycelium. As quickly as you can, open your spawn jar, drop the wedge inside, and seal the lid tight. Speed is your ally here; the less time the jar is open, the lower your risk of contamination.
This flowchart gives you a great visual of how a starting culture can branch out into different types of spawn.

As you can see, a single liquid culture can be your starting point for making both grain spawn (great for fruiting many species) and sawdust spawn for those that prefer growing on wood.
Key Inoculation Tips for Success
A couple of pro-level tips can make a world of difference. If your spore or culture syringe looks a little clumpy, don't sweat it. Just warm it up between your hands for a minute and give it a really good shake. This breaks up the mycelium or spores, ensuring you get little pockets of growth all throughout the grain instead of in one big blob.
Another game-changing move comes about a week or two into the process. Once you see that your grain jar is about 20-30% colonized with that beautiful, bright white mycelium, it's time for the "break and shake." You’ll want to gently but firmly break up the colonized clumps and shake the jar to spread them all around.
This one move drastically speeds up the whole colonization process. By distributing the established mycelium, you’re essentially creating hundreds of new inoculation points inside the jar. It can easily cut the remaining incubation time in half.
If you're still deciding on your starting material, it's worth understanding the pros and cons. Our guide on liquid culture vs. spore syringes breaks down the key differences in speed, reliability, and genetic consistency.
Observing Healthy Mycelial Growth
Once you’ve inoculated your jars, the waiting game begins. The first signs of life are usually faint, delicate, and wispy white strands. That's the mycelium starting to stretch its legs and dig into the nutrients. Over the next few days and weeks, these wisps will grow into a thick, dense, almost cottony-looking white network.
Healthy, fully colonized spawn should look like a solid brick of white mycelium, with every single grain covered. It will also have a clean, earthy, and distinctly mushroomy smell. Any off-colors—especially green, black, or slimy pink—or any sour, musty smells are red flags for contamination. If you see or smell anything funky, that jar needs to be discarded far away from your grow area.
Incubation and Troubleshooting Your Mycelial Nursery
Alright, you've done the hard part. You’ve carefully inoculated your jars, and now it's time to play the waiting game. This is the incubation period—the quiet, patient phase where those few specs of mycelium will hopefully explode into a fully colonized network.
Your main job now is to be a watchful guardian. You need to provide a stable, protected environment and keep a sharp eye out for any trouble.

Think of it like tending a fragile seedling. The mycelium needs the perfect conditions to thrive without any competition. Patience is really your most important tool here.
Creating the Ideal Incubation Environment
Mycelium isn't too demanding during incubation, but its needs are non-negotiable. You're basically trying to create the perfect underground hideout, safe from rival fungi and bacteria.
The single most critical factor is temperature. Most species colonize best in a steady range between 75°F and 81°F (24°C to 27°C). If you have to err, it's better to be a little too cool than too hot. Any temperatures climbing above 85°F (29°C) can stall growth or even kill your mycelium.
- Darkness is Key: Tuck your jars away in a dark spot, like a closet, a cupboard, or even just inside a cardboard box. Light is a trigger for fruiting (making mushrooms), and you want all that energy focused on colonizing the grain.
- Leave Them Be: This is the hard part for a lot of new growers. You have to resist the urge to constantly check, poke, and prod your jars. Every time you handle them, you risk introducing contaminants and disturbing the delicate mycelial threads. A quick peek every few days is more than enough.
During incubation, your role shifts from active participant to a watchful guardian. Providing a stable, dark, and warm environment is all that's required. The mycelium knows what to do; your job is to give it the peace and quiet to do it.
Identifying Common Contaminants
Even with squeaky-clean sterile technique, contamination is always a possibility. Catching it early is absolutely vital to protect the rest of your batch. Your eyes and nose are the best tools for the job. Healthy mycelium is bright, fluffy white and has a distinct, clean, earthy mushroom smell. Anything else should be treated with suspicion.
The most infamous intruder is Trichoderma, a nasty green mold that grows incredibly fast. It can be sneaky, often starting as a fluffy white patch that looks a lot like healthy mycelium. But it quickly turns a sickening shade of green as it sporulates. If you see green, the jar is a total loss.
Another common problem is bacterial contamination. This usually shows up as wet, slimy-looking patches on the grain. The grains will look overly moist or even like they're starting to rot. Give it a sniff (without opening the jar!) and you might detect a sour, funky, or sickly sweet smell. That's a dead giveaway that bacteria are winning the race.
To really train your eye, it helps to see examples of what you're looking for. Take a look at our guide with detailed mycelium contamination pictures to learn the difference between friend and foe.
Responding to Contamination
When you spot contamination, you have to be decisive. There is no such thing as "saving" a contaminated jar. Trying to scoop out the mold or waiting to see if the mycelium "wins" is a terrible idea—it will only release trillions of microscopic spores all over your grow space, dooming future projects.
Your only move is safe and immediate disposal.
- Do not open the contaminated jar indoors. Seriously. Don't do it. You'll unleash an invisible cloud of contaminant spores that will settle everywhere.
- Take the sealed jar outside, well away from your home and cultivation area.
- Dump the contents into a trash bag, seal it up tight, and get rid of it.
- You can reuse the jar, but it needs a serious deep clean. Soak it in a bleach solution before giving it a thorough wash with hot, soapy water. Then, it's ready to be sterilized for the next round.
Troubleshooting Common Grower Anxieties
Not every weird thing you see is a sign of total disaster. First-time growers, especially, tend to worry about a few common things that are actually perfectly normal.
One classic worry is slow growth. If your mycelium seems to be moving at a snail's pace, the first thing to check is the temperature. A room that's too chilly (below 70°F or 21°C) will put the brakes on colonization. Try moving the jars to a consistently warmer spot.
Another thing that often freaks people out is the appearance of a yellow or amber-colored liquid. Growers have affectionately dubbed this "myc piss." It’s just a metabolite, a liquid waste product the mycelium secretes as it digests its food or fights off minor competitors. A few small droplets are totally normal. If you see large pools of it, however, it could be a sign your mycelium is under stress, possibly fighting a hidden bacterial infection.
Your Most Common Spawn Questions Answered
Diving into making your own mushroom spawn is one of the most rewarding steps you can take in this hobby. But let's be real, once you start getting your hands dirty, the questions start piling up. It's totally normal.
Here, we'll tackle some of the most frequent hurdles and head-scratchers that growers face. Think of this as a chat with a seasoned grower, giving you the straight-up, practical advice you need.
Can I Reuse My Grain Jars After a Successful Colonization?
Absolutely! Well, the jar itself, anyway. The grain inside is another story. Once your mycelium has devoured a jar of grain, it has used up almost all the nutrients. That spent grain is now ready to become spawn, but it’s not going to feed another round of growth.
The glass jars, however, are your ticket to a sustainable setup. After you've moved that beautiful, colonized spawn to its new home (like a bulk substrate), it's time to get those jars ready for the next run.
- Scrape 'Em Clean: Get in there and make sure every last bit of leftover grain and mycelium is gone.
- Give 'Em a Good Scrub: A thorough wash with hot, soapy water is a must to get rid of any oily or starchy residue.
- Final Sanitize: Before you even think about the next batch, I like to run the jars through a dishwasher's sanitize cycle or even boil them for 10-15 minutes. Starting your sterilization process with truly clean gear is non-negotiable.
Always, and I mean always, start a new spawn run with fresh, perfectly prepared grain. This gives your next culture a full pantry of food and dramatically cuts down your risk of contamination right from the get-go.
My Mycelium Growth Has Stalled What Should I Do?
Seeing a jar just… stop… can be nerve-wracking. But don't reach for the bin just yet. More often than not, it's something simple you can fix. The first thing to check is always the temperature.
Mycelium is a bit like Goldilocks. If your incubation spot is too cold, say, dipping below 65°F (18°C), growth will slow to a snail's pace or halt altogether. Try moving your jars somewhere with a cozy and consistent temperature, ideally in the 75-81°F (24-27°C) sweet spot.
If the temperature is fine, it might be time for the "break and shake." If your jar is somewhere between 30-50% colonized and seems to be losing steam, a good, firm shake can work wonders. This breaks up the mycelial mass and spreads it all through the uncolonized grain, creating hundreds of new starting points for growth. It’s a simple trick that can kick things back into high gear.
But, and this is a big but, if you see zero new growth for a week after trying these tricks, you need to be a realist. If you spot any weird colors—green, black, pink—or catch a whiff of anything sour or funky, it's game over. Contamination has won this round. The only safe move is to toss the jar (without opening it!) and take a hard look at your sterile technique for next time.
What Is the Difference Between a Spore Syringe and a Liquid Culture?
Okay, this is a huge one. Getting your head around this will seriously level up your cultivation game and impact your speed and success rate.
A spore syringe is basically a shot in the dark, a genetic lottery. It's filled with millions of microscopic mushroom spores—think of them as seeds—suspended in sterile water. When you inject spores into grain, you're hoping two compatible spores land near each other, germinate, and fuse to create mycelium. It's a process that can be slow and wildly unpredictable.
A Liquid Culture (LC), on the other hand, is a whole different ballgame. An LC contains a living, established mycelial network that's actively growing in a nutrient broth. You're not starting from seed; you're taking a cutting from a mature plant. When you inject an LC, you're introducing a vigorous, growing organism directly to its food source.
This single difference means liquid culture inoculations are incredibly fast and reliable, often slicing your colonization time in half. While everyone starts with spores, graduating to using (and making) your own liquid cultures is how you start getting consistent, professional-grade results.
Ready to explore the amazing world of mushrooms for yourself? From potent raw varieties to delicious infused treats, The Magic Mushroom Delivery offers a premium, curated selection delivered right to your door. Discover top-quality products and start your journey today at https://themagicmushroomdelivery.com.