
Baking a great space cake is about so much more than just throwing ingredients in a bowl. It’s an art form, a science, and a ritual all rolled into one. The real magic starts before you even preheat the oven—it begins with a prepared mindset, a solid understanding of dosing, and picking your infusion method. You can go the classic route with homemade 'magic butter' or try modern shortcuts like using pre-infused chocolates from a trusted shop.
Your Journey Into Psychedelic Baking Starts Here

Welcome! You've found the ultimate guide to crafting your very own space cake. Think of this as more than just a recipe; it's your complete manual for creating a memorable, safe, and controlled psychedelic experience. We're going to demystify the entire process, starting with the crucial prep work you need to do long before you touch a mixing spoon.
Baking a space cake is a popular choice for good reason. Edibles take you on a journey that's totally distinct from other methods. The effects tend to build gradually and can last significantly longer, creating a smoother, more sustained adventure. It's an amazing option for anyone looking for a prolonged and gentle trip.
The Pre-Flight Checklist for Baking
Before we dive into the recipe itself, it’s absolutely essential to get your head in the right space. A successful psychedelic journey is built on a foundation of safety, intention, and understanding. Consider this your pre-flight checklist.
A few key points to get straight first:
- Intention: What are you hoping to get from this experience? Simply wanting to relax, explore your creativity, or connect with friends are all valid. Having a clear intention helps guide your journey.
- Setting: Your environment is a huge deal. Make sure you’re in a comfortable, familiar, and safe space where you can fully relax without any interruptions.
- Company: If you’re sharing your masterpiece, make sure it’s with friends you trust completely. It’s always a smart move to have a sober, supportive companion—a 'trip sitter'—present to keep the vibe positive.
The cornerstone of responsible enjoyment is precise dosing. Unlike other methods, the potency of an edible is locked in the moment it comes out of the oven. This guide will laser-focus on techniques to help you calculate and ensure a consistent dose in every single slice.
Why Edibles Are a Unique Experience
The journey with a magic mushroom edible is chemically different from other methods. When you ingest psilocybin, your liver gets to work converting it into psilocin, the compound that actually produces the psychoactive effects. This metabolic process is why edibles can take longer to kick in—often 60 to 90 minutes—but it’s also why the effects can feel deeper and last much longer.
This delayed onset demands patience. The most common rookie mistake is getting impatient and eating more too soon, which can lead to an overwhelmingly intense experience. Our instructions will hammer home the golden rule of edibles: "start low and go slow." By understanding these fundamentals, you’re setting yourself up for a fantastic and positive baking adventure.
Choosing Your Psychedelic Ingredient
The real soul of any space cake worth remembering comes down to the quality of your active ingredient. This is the decision that shapes everything else, from your cake’s potency and flavor right down to the entire vibe of your baking session. You’ve got a couple of roads you can travel here, and each has its own perks.
The main choice you'll make is whether you want to go the do-it-yourself route with dried mushrooms or lean into the sheer convenience of pre-made, perfectly dosed products. There’s no right or wrong answer—it all boils down to what you’re aiming for, your comfort level in the kitchen, and how much time you want to invest.
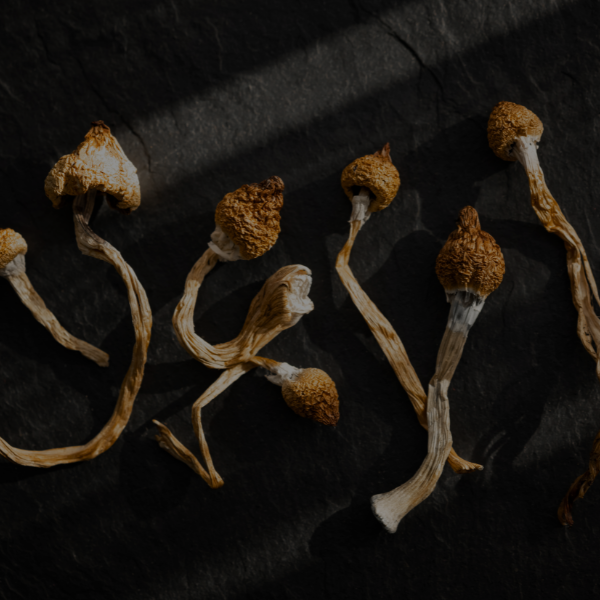
Dried Mushrooms: The Classic DIY Route
Using dried mushrooms is the OG method, the traditional path for psychonaut bakers. This approach puts you in the driver's seat, giving you total control over the entire process—from picking your favorite mushroom strain to grinding it down for infusion. A lot of people really love that hands-on connection to their bake.
If you’re going with dried shrooms, you’ll need to gather a few essential tools:
- High-Quality Dried Mushrooms: Always start with a source you trust. The way the mushrooms look, smell, and feel are usually solid clues about their quality.
- A Grinder: A basic coffee or spice grinder is your best friend here. The goal is to get a super fine, consistent powder. This maximizes the surface area, which is key for a good, even infusion.
- A Scale: This is non-negotiable. You need an accurate digital scale to measure your starting material precisely. This is mission-critical for calculating your dose later on.
To really get a handle on the differences and why dried is almost always the go-to for baking, check out our guide on Dried Mushrooms vs Fresh Mushrooms.
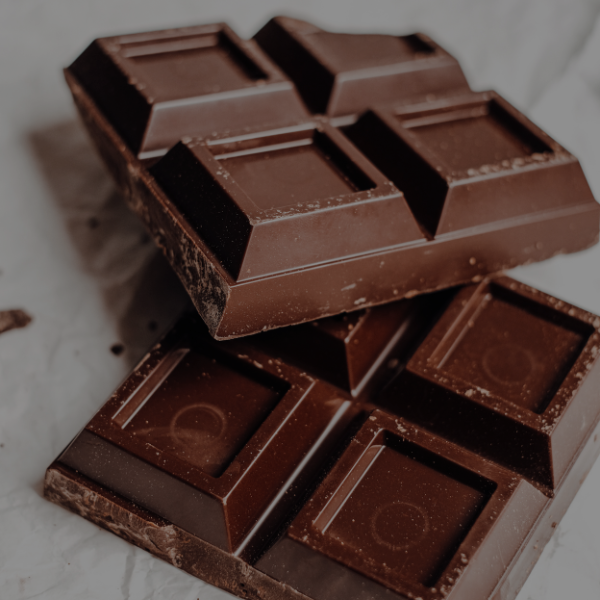
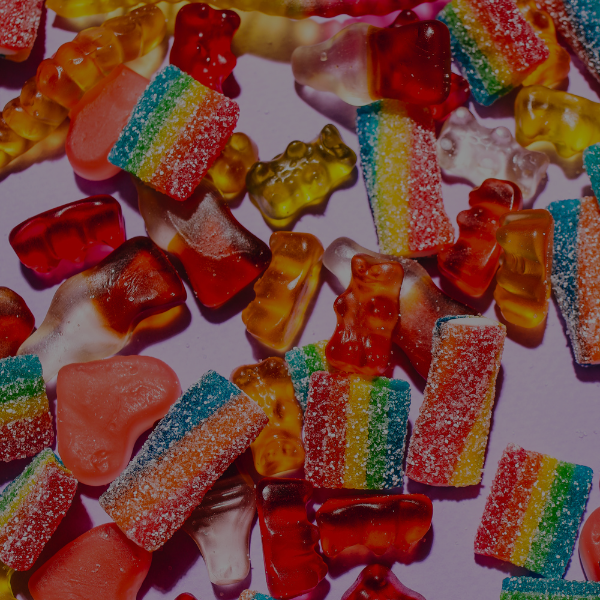
Modern Convenience: Infused Products
If the idea of grinding and infusing from scratch feels like a bit much, you're in luck. Modern infused products are a game-changer. Think pre-made psilocybin chocolates or gummies that offer incredible precision and save you a ton of time. You can just melt them down and mix them straight into your batter.
This method completely takes the guesswork out of dosing. Because these products are already standardized, you know exactly how many milligrams you’re adding. It makes portioning your final cake both simple and incredibly reliable.
The explosion in this market really shows how much people want dependable and easy-to-use options. The global Psychedelic Drugs Market was valued at USD 1.82 billion in 2025 and is expected to rocket to USD 5.16 billion by 2034, with a huge focus on consistency. Synthetic psilocybin, making up a whopping 63.80% of the market, is the engine behind these pre-made products, giving them a reliability that’s tough to match with wild mushrooms. You can dive deeper into these trends and the dominance of psilocybin on Fortune Business Insights.
In the end, what you choose is all about your personal style. The DIY baker might find a special ritual in preparing their own mushrooms, while someone who prioritizes ease and accuracy will see infused chocolates as the perfect shortcut to a flawless space cake.
How To Make Magic Butter For Your Cake

The real soul of a space cake isn't found in the baking aisle—it's crafted right on your stovetop. We're talking about the infusion, the process that turns regular butter into the potent, psychoactive heart of your edible experience: magic butter.
Getting this part right is all about patience and gentle heat. Think of it like coaxing out a delicate flavor; you can't rush it. The guiding principle here is always low and slow. This careful approach ensures you draw out all the active compounds from the mushrooms and into the fat, creating a perfectly smooth and effective base for your space cake recipe.
Getting Your Gear Ready
Before the magic begins, it’s a good idea to get your kitchen in order. A clean, organized workspace will make the entire process feel less like a chore and more like a fun science experiment.
Here’s what you’ll want to have on hand:
- A Slow Cooker or Saucepan: A slow cooker is your best friend here, as it keeps the temperature low and steady without you having to babysit it. A saucepan works too, but you'll need to keep a closer eye on it.
- Unsalted Butter: Go for the good stuff. High-quality, unsalted butter has the fat content you need for a powerful infusion.
- Water: This is a simple but crucial addition. Water helps regulate the temperature and stops your precious butter from scorching during the long simmer.
- Cheesecloth: Don’t skip this! You’ll need it to strain out the mushroom material later for a clean, great-tasting final product.
With your supplies ready, it's time to start the infusion. You’ll be simmering your ground mushrooms, butter, and water together for a few hours. A solid starting point is a ratio of 1 cup of butter to 1 cup of water for every 7-10 grams of finely ground dried mushrooms. Feel free to tweak this based on how potent you want your final cake to be.
Low heat isn’t just a friendly tip—it's the golden rule. You need to keep your infusion between 160°F and 200°F (71°C to 93°C). Any hotter, and you risk degrading the psilocybin, which will seriously weaken your magic butter.
The Infusion Process
If you're using the stovetop, just combine your butter, water, and ground mushrooms in a saucepan over the lowest heat setting you have. Let it gently simmer for at least 3 hours, giving it a stir every now and then. Whatever you do, don't let it boil. For slow cooker users, just toss everything in, set it to low, and let it ride for 4-6 hours.
Once the simmering is done, let the mixture cool down a bit so it's safe to handle. Drape a double layer of cheesecloth over a bowl or a large jar and carefully pour the mixture through. Give the cheesecloth a gentle squeeze to press out every last drop of that infused goodness. The leftover mushroom bits in the cloth can be tossed.
What you have in the bowl now is a mix of magic butter and water. Pop it in the fridge for a few hours. The butter will solidify into a beautiful green disc on top of the water. From there, you can just lift the solid butter right off, leaving the water behind.
And for anyone avoiding dairy, this method works just as well with other fats! You can swap the butter out for coconut oil to make a fantastic vegan alternative. We’ve got a whole guide on making a delicious coconut oil infusion if you want to explore that route.
Your magic butter is now officially ready for action. Use it in any recipe that calls for butter, and get ready to turn a simple baked good into an unforgettable space cake.
The Space Cake Baking Process From Start To Finish
Alright, you've got your perfectly infused magic butter ready and waiting. Now for the fun part—actually baking your space cake. We’re going with a simple, classic recipe that’s an absolute winner. It's not just easy; it creates a seriously delicious cake that’s the perfect foundation for your infusion.
This isn’t about being a master baker. Think of this as a casual cooking session where we’ll cover everything you need to know, from gathering your gear to that final, glorious bake. We'll focus on the little details that ensure your cake is not only tasty but, more importantly, consistently dosed.
Gathering Your Ingredients And Tools
Any good baker knows that a smooth process starts with having everything laid out. This is a straightforward recipe that uses basic stuff you probably already have in your pantry. No need for any fancy, hard-to-find ingredients.
Getting all your items ready before you even start mixing is a game-changer. It’s what the pros call mise en place, and it’s the secret to stress-free baking. This is especially true when you're working with your precious magic butter—the last thing you want is to be frantically searching for the baking powder mid-mix.
To make things easy, here’s a quick checklist of everything you'll need.
Psychedelic Baking Essentials Checklist
| Item Category | Specifics | Pro Tip |
|---|---|---|
| Dry Ingredients | 1 ⅔ cups all-purpose flour, ½ tsp baking powder, ½ tsp baking soda, 1 tsp kosher salt | Whisking these together first ensures the leavening agents are evenly distributed, leading to a perfect rise. |
| Wet Ingredients | ½ cup Magic Butter (melted & cooled), ¾ cup brown sugar, ¼ cup granulated sugar, 1 large egg, 2 tsp vanilla extract | Let your magic butter cool slightly after melting. If it's too hot, it can scramble the egg when mixed. |
| Add-Ins | 1 ¼ cups chocolate chips | While optional, chocolate chips are fantastic for masking any residual earthy flavors from the infusion. |
| Equipment | 9×13-inch baking pan, mixing bowls, whisk, spatula | Generously grease your pan with regular butter to prevent the cake from sticking. |
With your station set up, you're all set for the main event.
Mixing And Baking Your Masterpiece
Now that your ingredients are lined up, you’re ready to create some magic. The absolute key to a good space cake is even distribution. You need that magic butter mixed in perfectly so every single slice carries the same potency.
First, grab a medium bowl and mix your melted (and cooled!) magic butter with the brown and granulated sugars until they’re nicely combined. Then, whisk in your egg and vanilla extract. This wet base is the heart of your cake.
Next, slowly add your pre-mixed dry ingredients into the wet mixture. Use a spatula and mix only until it's just combined—and be very careful not to overmix. If you go too crazy here, you’ll develop the gluten in the flour and end up with a tough, dense cake. We’re aiming for light and tender.
The Most Important Step: Once the batter is almost mixed, it's time to fold in your chocolate chips. This is your final, critical chance to ensure even distribution. Use your spatula to scrape the bottom and sides of the bowl, folding everything together gently but thoroughly. Make sure every bit of that magic butter is incorporated.
Pour the batter into your prepared 9×13-inch pan, spreading it out evenly. Slide it into the oven and bake at 350°F (175°C) for 14-16 minutes. You'll know it's done when the edges look set and a toothpick stuck in the center comes out with just a few moist crumbs.
Now, for the hardest part: let the cake cool completely in the pan. Don't even think about slicing it yet. A warm cake is way too fragile and will fall apart, making accurate dosing impossible. Letting it cool all the way is non-negotiable for the precise portioning we’ll cover next, which is the key to a safe and predictable experience.
How To Dose And Serve Your Space Cake Safely
Alright, you’ve pulled that beautiful space cake out of the oven. The hard part is over, right? Well, almost. Now comes the single most crucial step of the entire process: dosing it correctly so everyone has a safe, predictable, and amazing time.
Think of portioning and serving not as a suggestion, but as the golden rule of responsible psychedelic use.
The mantra for any and all edibles is one you’ve probably heard before, but it’s worth repeating: start low and go slow. It can take up to 90 minutes—sometimes even longer—for the effects to fully kick in, especially depending on your metabolism or if you’ve recently eaten. Fight the urge to grab a second slice too soon. Trust me, patience is your best friend on this journey.
This simple diagram breaks down the core stages of the recipe, from mixing to the final cooldown.

As you can see, letting the cake cool completely isn't just about texture; it's a vital step for getting those perfect, evenly-dosed slices.
Calculating Your Dose
First things first, you need to know the total potency of your entire cake. Let's say you used 5 grams of dried mushrooms for the whole recipe. That’s your total dose. Now, you get to decide how to divide and conquer.
- For a standard experience: Slicing the cake into 10 equal pieces gives you a dose of roughly 0.5 grams per slice.
- For a microdose: You could cut it into 20 smaller squares, with each piece containing around 0.25 grams.
Break out a ruler if you need to. The goal here is consistency, making each slice as identical as possible so there are no unexpected surprises. This isn't the time for guesswork, especially if you're sharing with friends who are new to the experience.
Serving And Storing Your Space Cake
Once the cake is completely cool, it's time to slice it into your pre-calculated portions. If you’re enjoying this with friends, make sure everyone is crystal clear on exactly how much psilocybin is in a single serving. Open communication is everything for a good group experience.
For anyone trying this for the first time, I always recommend starting with just half a slice. You can always eat more later, but you can’t go back and eat less. To get a better handle on your personal sweet spot, our complete psilocybin dosage guide is a fantastic resource with more detailed info.
Proper Storage Is Essential: Never leave your space cake sitting out. To keep it fresh and potent, store your slices in an airtight container in the fridge. It’ll stay good for up to a week.
If you need to store it longer, the freezer is your go-to. Wrap each slice individually in plastic wrap, then pop them into a freezer-safe bag or container. They’ll maintain their potency for up to 3 months. And please, always label the container clearly with what's inside and the dose per slice. This simple step prevents any accidental mix-ups and keeps everyone safe.
Common Questions About Baking Your Space Cake
Diving into your first space cake adventure is exciting, but it's totally normal to have a few questions pop up. Whether you're wondering how to store your masterpiece or if you can swap out ingredients, a little extra guidance can go a long way.
Even if you're a seasoned baker, introducing infused ingredients changes the game. We've tackled the most common questions to help you sidestep any issues and bake with total confidence.
How Long Will The Space Cake Stay Fresh And Potent?
Proper storage is everything when it comes to keeping your cake both delicious and effective. For short-term enjoyment, an airtight container in the refrigerator is your best friend. Your cake will stay fresh and potent for up to one week.
If you want to save some for later, freezing is the way to go.
- First, wrap individual slices tightly in plastic wrap or aluminum foil.
- Then, pop the wrapped slices into a freezer-safe bag or container.
- They’ll stay good in the freezer for up to 3 months.
While freezing does an amazing job of locking in the potency, you might notice the cake's texture is a bit softer after it thaws. Most importantly, always label your container clearly—note what's inside and the dosage per slice to avoid any surprises.
Can I Use A Boxed Cake Mix Instead Of Baking From Scratch?
Absolutely! A boxed cake mix is a fantastic shortcut that saves a ton of time and makes the whole process much simpler, especially if you're new to this. You can easily adapt just about any box mix.
Just prepare your magic butter following our guide, then swap it one-for-one for the regular butter or oil the recipe on the box calls for. Make sure your infused butter is completely melted and has cooled down a bit before mixing it in. This simple step helps it blend evenly throughout the batter, ensuring every slice has a consistent dose.
Does Baking Destroy The Active Compounds in Mushrooms?
This is a huge—and very valid—concern for many bakers. While it's true that high heat can degrade the active compounds in magic mushrooms, our method is designed specifically to minimize that risk. The secret is in the two-step process.
By first infusing the compounds into butter at a low, controlled temperature, you gently extract them without causing damage. When you later bake the cake at a standard temperature, like 350°F (175°C), the batter acts as a protective buffer, shielding the psilocybin from the intense, direct heat of the oven. This is how we preserve the cake's potency.
This is exactly why we advise against just tossing raw mushroom powder into your batter. That approach can lead to a major loss of potency and an unreliable experience. People are increasingly seeking dependable edibles, a trend reflected in the growing professional market. The Psilocybin Assisted Therapy Market, valued at over USD 3 billion in 2026, is on track to hit USD 11.57 billion by 2035, with North America leading the demand for quality-controlled options. You can dive deeper into the growing psilocybin market at Market Research Future.
Ready to skip the baking and get straight to the magic? The Magic Mushroom Delivery offers a premium selection of expertly crafted edibles, from infused chocolates to perfectly dosed gummies. Explore our full range of high-quality, organic products and enjoy discreet nationwide shipping.