Making your own shroom chocolates is a fantastic way to level up the experience. The basic idea is simple: you grind dried mushrooms into a super-fine powder, melt some high-quality chocolate, and then mix the two together before letting it all set in molds. This process does more than just hide the mushroom's earthy taste—it turns it into a delicious treat and gives you precise, consistent dosing in every single piece.
It’s a game-changer for making the whole thing more predictable and, let's be honest, way more enjoyable.
Your Guide to Crafting Perfect Shroom Chocolates
Welcome to the only guide you'll need for creating your own perfectly dosed shroom chocolates right at home. We're going way beyond a basic recipe here. Think of this as a deep dive into the art and science of the process, covering everything from picking the right ingredients to tempering chocolate like a pro. Making them yourself has become a huge trend, and it's easy to see why.
The market for infused goodies is blowing up. For context, the U.S. psychedelic mushroom market was recently valued at a staggering USD 2.25 billion for a single year. That's a ton of consumer interest and shows just how mainstream this is becoming. If you're curious, you can learn more about the market's growth.
Before we jump into the how-to, let's quickly break down the key stages. This isn't rocket science, but paying attention to the details at each step is what separates a decent batch from a perfect one.
Shroom Chocolate Making at a Glance
| Stage | Key Objective | Crucial Tip |
|---|---|---|
| Preparation | Gather all your tools and ingredients. | A good coffee grinder is your best friend for getting that ultra-fine mushroom powder. |
| Dosing & Mixing | Accurately weigh and combine your mushroom powder with melted chocolate. | Even distribution is everything. Mix, mix, and then mix some more! |
| Tempering | Heat and cool the chocolate to achieve a glossy, snappy finish. | This step is optional but makes a huge difference in the final quality. |
| Molding & Setting | Pour the mixture into molds and let it cool until firm. | Silicone molds are easiest to work with. Pop them in the fridge to speed things up. |
| Storage | Store the finished chocolates to maintain freshness and potency. | Keep them in an airtight container in a cool, dark place away from heat and light. |
This table gives you the 30,000-foot view. Now, let's get into the nitty-gritty of why chocolate is the perfect vehicle for this journey.
Why Chocolate is the Ideal Choice
There's a reason chocolate is the go-to for infused treats. Its rich, deep flavor is a powerhouse at masking the funky, earthy taste of dried mushrooms. It turns something you have to get through into a genuinely delicious experience.
But the real magic is in the dosage control. When you evenly mix finely ground mushroom powder into a batch of melted chocolate, you can create individual pieces with incredibly reliable potency. This completely takes the guesswork out of the equation.
A well-made shroom chocolate means every square delivers the exact same experience, whether you're after a subtle microdose or a full-on journey.
What You Will Learn
This guide is designed to walk you through every single stage, so you'll feel completely confident by the end. We're going to cover:
- The essential gear and ingredients you'll want to have on hand.
- Simple, foolproof math for nailing your dosage every time.
- The secrets to tempering chocolate for that professional snap and shine.
- Proper storage techniques to keep your creations potent and fresh.
We'll even touch on the importance of mindset and responsible use because a positive journey starts long before the first bite. Let's get started on making a top-tier product right in your own kitchen.
Assembling Your Kitchen Essentials
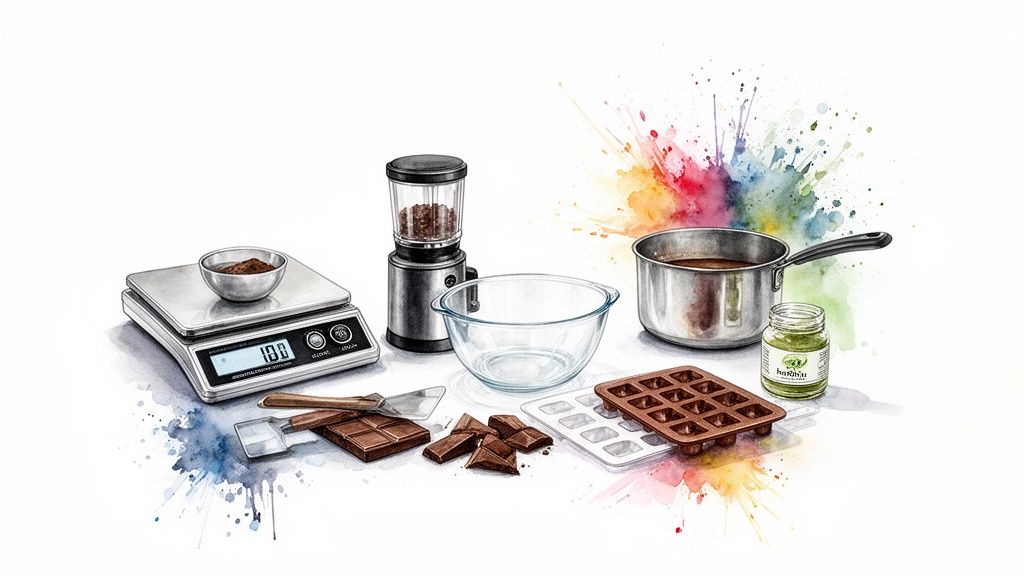
Before you even think about melting that first piece of chocolate, let's talk setup. Getting all your tools and ingredients in order is the secret to a smooth, stress-free process. Trust me, having everything clean and within arm's reach turns what could be a frantic mess into a calm, almost meditative culinary project.
This isn't just about making your life easier; the right equipment is what stands between you and a perfect final product. We're talking accurate dosing, silky-smooth texture, and chocolates that look like they came from a pro. Think of it like an artist setting up their palette before they start to paint. A little prep goes a long way.
Your Must-Have Equipment Checklist
The great news is you don't need a professional chocolatier's kitchen. You probably have most of this stuff in your cupboards already.
- High-Precision Digital Scale: This is the one item that's absolutely non-negotiable when you're learning how to make shroom chocolates. It's the only way to get accurate, consistent doses every single time. Look for one that measures down to at least 0.01 grams.
- Dedicated Coffee or Spice Grinder: To get that perfectly smooth chocolate, you need to grind your mushrooms into an ultra-fine, talc-like powder. Using a separate grinder means you won’t get any funky mushroom notes in your morning coffee.
- Double Boiler (or a DIY version): Gentle, indirect heat is the only way to melt chocolate without scorching it. No double boiler? No problem. A simple heatproof bowl (glass or stainless steel) set over a saucepan of simmering water works just as well.
- Silicone Molds: These are a game-changer. They’re flexible, a breeze to use, and come in tons of fun shapes. They make popping your finished chocolates out effortless, leaving them with that clean, glossy finish you're after.
- Silicone Spatula: Don't underestimate this simple tool. It's essential for scraping every last bit of that precious chocolate out of the bowl so nothing goes to waste.
A common mistake I see people make is getting lazy with the grind. A coarse powder will leave you with a gritty, sandy texture that completely ruins the creamy smoothness of the chocolate. Take the extra minute to get it to a flour-like consistency—it's so worth it.
Choosing Your Core Ingredients
With your tools ready to go, let's get to the good stuff. The quality of your ingredients has a massive impact on the final taste and texture of your homemade chocolates.
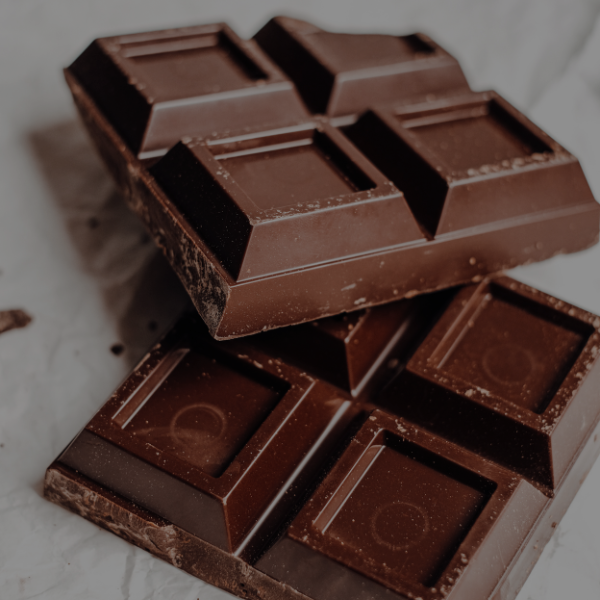
First up, the chocolate. Do yourself a favor and get high-quality chocolate wafers or bars. Standard chocolate chips often contain stabilizers that can mess with the melting process. Dark chocolate is a fantastic choice; its rich, intense flavor does an expert job of masking the earthy taste of the mushrooms.
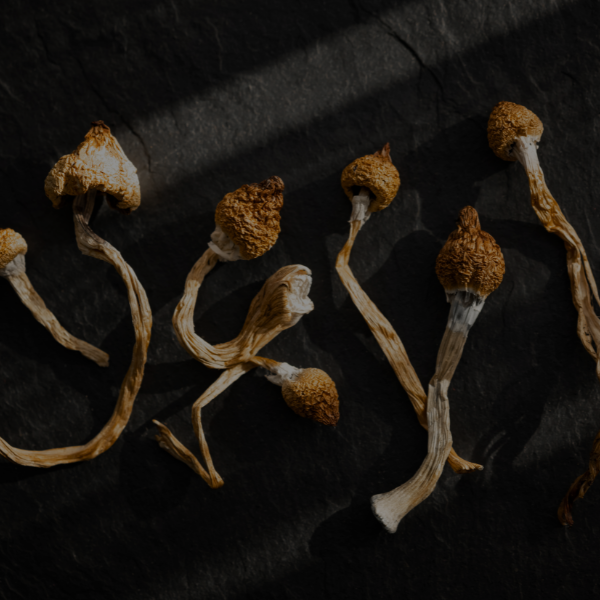
Next, of course, are the mushrooms themselves. It's absolutely crucial that they are completely dry—what's often called "cracker dry." Any hint of moisture can cause your chocolate to seize up into a clumpy mess and will dramatically shorten the shelf life, making them susceptible to mold. To get the full picture, you can learn more about the differences between dried vs fresh mushrooms and see why dry is the only way to go here.
Finally, think about some optional flair to make the recipe your own. A tiny pinch of sea salt can make the chocolate flavor pop, while a dash of cinnamon or cayenne can add a surprising warmth. These little touches are how you take a basic recipe and turn it into something special.
Calculating Potency for a Consistent Experience
Getting your dosage right is probably the single most important part of making shroom chocolates. It's the difference between a reliable, predictable experience and one that’s either disappointingly weak or uncomfortably intense. The good news? The math is dead simple, and with a good precision scale, you can nail it every single time.
This level of precision is exactly why chocolates have become such a popular method. One study found that a staggering 91.3% of stores carried these types of chocolate products, which shows you just how much people prefer them. Chocolate does a fantastic job of masking the mushroom flavor and allows for discreet, perfectly controlled doses. You can dig into the data and see why chocolate is a dominant format in the market.
Before you even think about melting chocolate, you need to know what kind of experience you’re aiming for. Each dosage tier offers something completely different.
Understanding Common Dosage Levels
Dosing is always a personal thing—it depends on your body weight, tolerance, and what you're trying to get out of the experience. Still, there are some generally accepted ranges that work as a great starting point.
Microdose (0.1g – 0.3g): This is a sub-perceptual dose. The goal here is to boost mood, creativity, and focus without any noticeable psychedelic effects. It's something people often incorporate into a regular wellness routine.
Standard Dose (1g – 2.5g): This is where most people start for a classic trip. You can expect noticeable visual and sensory shifts, changes in emotion, and a deeper sense of connection.
Heroic Dose (5g+): Reserved for the experienced and only in a safe, controlled setting. A dose this high can lead to some truly profound and transformative experiences, but it is absolutely not for beginners.
Just remember, potency can vary wildly between different mushroom strains. A gram of one variety might feel worlds apart from a gram of another.
Pro Tip: If you're using a new or unfamiliar batch of mushrooms, always start with a lower dose than you think you need. It’s way better to be a little underwhelmed and try again another day than to get completely steamrolled by a batch that's stronger than you expected.
The Simple Formula for Perfect Dosing
Once you've decided on the dose for a single chocolate, figuring out the total amount of mushroom powder you need is just simple multiplication. This is where that precision scale becomes your best friend.
The formula couldn't be easier:
(Desired Dose per Chocolate) x (Number of Chocolates in Your Mold) = Total Mushroom Powder Needed
Let’s walk through a quick example. Say you have a silicone mold that makes 12 chocolates, and you want each one to contain a 1-gram standard dose.
- 1 gram (your target dose) x 12 chocolates (your batch size) = 12 grams (of total powder needed)
That's it. You'd weigh out exactly 12 grams of your finely ground mushroom powder to mix into the melted chocolate. This ensures every piece in that batch is dosed with accuracy.
The math stays the same no matter what you're making. Let's say you want to create a microdose batch, with each chocolate containing 0.2 grams, using that same 12-cavity mold:
- 0.2 grams (your target dose) x 12 chocolates (your batch size) = 2.4 grams (of total powder needed)
This simple calculation is the key to making shroom chocolates with total confidence. If you want to play around with different scenarios, our magic mushroom calculator is a handy tool for planning your creations.
Sample Dosing Calculations per Batch
To make things even clearer, here's a quick reference table. Use it as a guide to figure out how much powder you'll need for different batch sizes and potencies.
This table shows you exactly how much mushroom powder you’ll need based on the dose you want in each chocolate and how many chocolates your mold makes.
| Desired Dose per Chocolate | Number of Chocolates in Mold | Total Mushroom Powder Needed |
|---|---|---|
| 0.25 g (Microdose) | 24 | 6.0 g |
| 0.5 g (Light Dose) | 15 | 7.5 g |
| 1.0 g (Standard Dose) | 12 | 12.0 g |
| 1.5 g (Standard Dose) | 10 | 15.0 g |
| 2.0 g (Strong Dose) | 8 | 16.0 g |
When you follow this straightforward approach, you remove all the guesswork from the equation.
You can create batches perfectly tailored to any occasion, knowing that each chocolate will deliver exactly the experience you intended. That level of control is what makes homemade shroom chocolates the best way to go.
Bringing It All Together: Infusion and Tempering
You've got your ingredients, and you've nailed down the dosage. Now for the fun part. This is where we fuse the magic with the chocolate, turning raw components into something truly special: a smooth, perfectly potent, and delicious chocolate bar.
We'll focus on two critical processes. First is preparing the mushrooms, which is all about getting the texture just right. Nobody wants gritty chocolate. Then, we’ll get into the fine art of tempering the chocolate itself. This is the secret to that professional, glossy finish and satisfying snap.
Grinding Your Mushrooms Into the Perfect Powder
To make sure your chocolate is silky smooth, your mushroom powder needs to be as fine as you can possibly get it. I'm talking about a consistency like flour or cocoa powder, not coffee grounds. A super-fine powder suspends evenly in the melted chocolate, which is non-negotiable for consistent dosing in every single square.
If you use a coarse grind, you'll end up with a sandy texture and, even worse, "hot spots"—where one piece is way stronger than another. Trust me, you want to avoid that.
Your best friend for this job is a dedicated coffee or spice grinder.
- Start by breaking your cracker-dry mushrooms into smaller pieces so they'll fit neatly in the grinder.
- Grind in short bursts of 5-10 seconds each. This keeps the motor from getting too hot and helps everything break down evenly.
- Between pulses, give the grinder a good shake to move the contents around.
- Keep going until you have a powder that’s completely uniform. You shouldn't see any little chunks left.
Pro Tip: For a truly velvety texture, sift the powder through a fine-mesh sieve after grinding. It’s an extra step, but it catches any stubborn larger particles and guarantees an incredibly smooth final product.
The Secret to a Perfect Snap: Tempering Chocolate
Ever wonder what gives high-quality chocolate that glossy shine, firm texture, and crisp "snap" when you break a piece? It’s all in the temper. Tempering is just a fancy word for heating and cooling chocolate to specific temperatures, which stabilizes the cocoa butter crystals. It sounds technical, but it’s actually pretty straightforward with a double boiler.
To set up a double boiler, just fill a saucepan with an inch or so of water and bring it to a low simmer. Place a heatproof bowl on top, making sure the bottom of the bowl isn’t touching the water. This gives you the gentle, indirect heat you need to melt chocolate without any risk of scorching it.
Add about two-thirds of your chopped chocolate to the bowl and stir it constantly with a silicone spatula as it melts. Keep a close eye on the temperature with a digital thermometer. The exact temperature you're aiming for depends on the type of chocolate you're using:
- Dark Chocolate: Melt to 115-120°F (46-49°C).
- Milk Chocolate: Melt to 110-115°F (43-46°C).
- White Chocolate: Melt to 105-110°F (40-43°C).
Once your chocolate hits that target, take the bowl off the heat. Now it's time to "seed" the chocolate by adding the remaining one-third and stirring until it's completely melted. Keep stirring as the mixture cools down to about 82°F (28°C).
For the final step, place the bowl back over the simmering water for just a few seconds at a time. Stir until it comes back up to its final working temperature:
- Dark Chocolate: 88-90°F (31-32°C).
- Milk & White Chocolate: 84-86°F (29-30°C).
And that's it! Your chocolate is officially tempered and ready for the mushroom powder. You’ll want to move fairly quickly from here to make sure it stays in temper.
This handy flowchart breaks down how to figure out exactly how much powder you'll need.
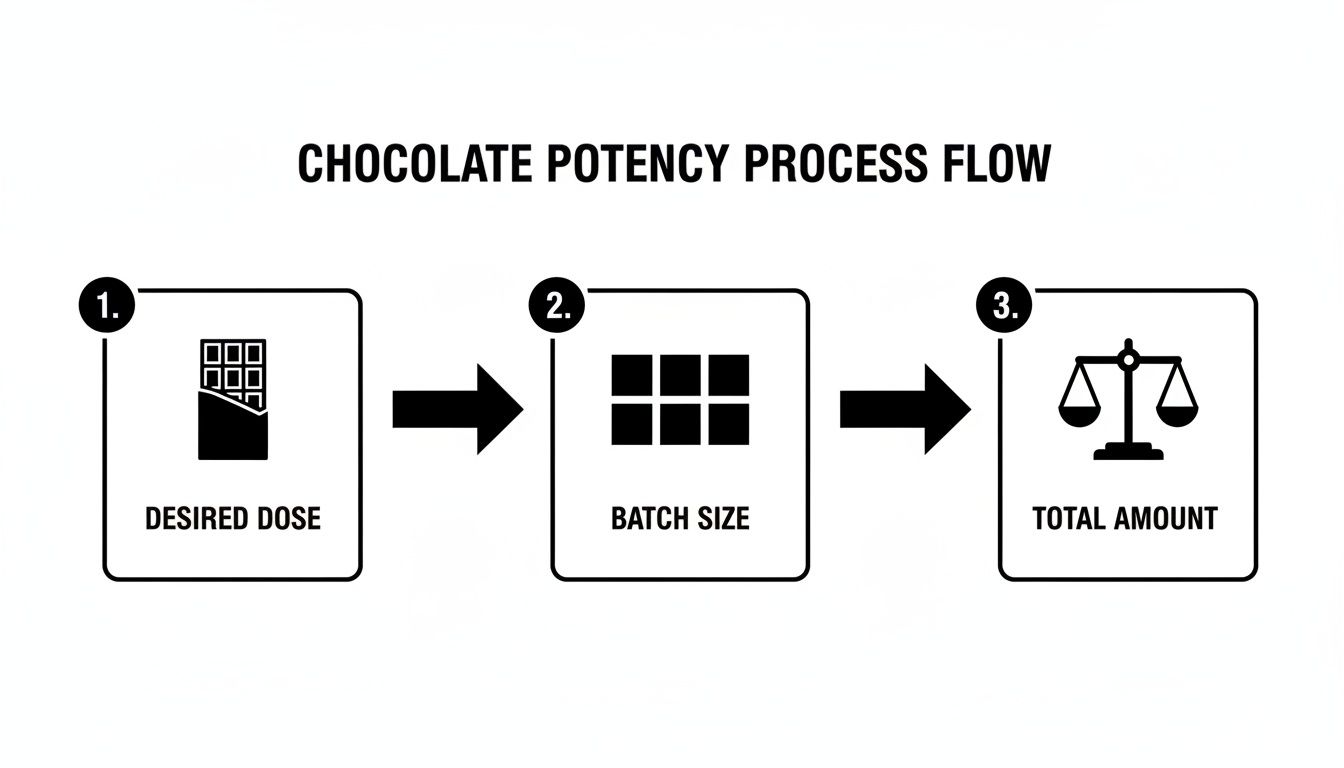
As you can see, the dose you want in each piece and the number of pieces you're making will tell you the total amount of powder to infuse.
Time to Infuse the Magic
With your chocolate beautifully tempered and at the right temperature, it’s time to mix in the magic. This part is simple, but you need to be thorough.
Carefully add your pre-weighed, ultra-fine mushroom powder into the bowl of tempered chocolate. Use your silicone spatula to stir everything together until it’s completely incorporated. Make sure to scrape the sides and bottom of the bowl so no clumps are left behind. Mix for at least a solid minute—even distribution is everything when it comes to consistent dosing.
Once it's perfectly mixed, your infused chocolate is ready to pour into molds.
If you're exploring other recipes down the line, it's worth knowing about alternative methods. For example, some creations work better with a coconut oil infusion, which is a versatile technique for all sorts of edibles.
Molding and Storing Your Homemade Chocolates
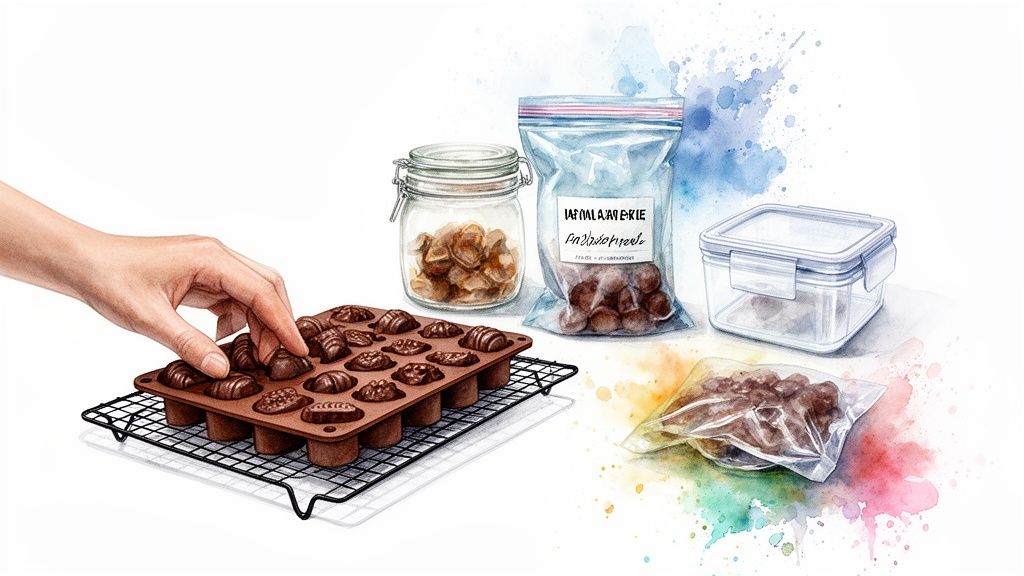
You've navigated the trickiest parts of the process. All that's left now is molding and storing your chocolates, which is the final step standing between you and a perfect batch of homemade treats. Nailing this last stage is what ensures your creations look fantastic, taste great, and hold their potency for as long as possible.
Think of the chocolate as a protective shell for the active ingredients. Proper storage maintains that shield, protecting your hard work from the elements that can degrade it over time. It's a simple step, but it makes a world of difference in the final quality.
Achieving a Flawless Finish in Your Molds
With your infused and tempered chocolate ready, it’s time to pour. This part is all about being careful and using a bit of technique to get that smooth, glossy look everyone loves.
First, lay out your clean, dry silicone molds on a flat surface like a baking sheet. This little trick makes them way easier to move around without spilling. Then, carefully pour or spoon the chocolate mixture into each cavity, filling it right up to the top.
Here’s a pro tip: once the molds are full, gently tap the whole tray flat against your countertop a few times. You’ll see tiny air bubbles rise to the surface and pop. This simple move gets rid of any trapped air, which prevents those ugly little holes and gives you a solid, flawless chocolate.
The Cooling and De-Molding Process
Patience is everything during the cooling stage. The goal is to let the chocolates set completely solid. While you could leave them at room temperature, the refrigerator is really your best bet for a quick, reliable set.
Place the filled molds (still on their baking sheet) into the fridge for at least 20-30 minutes. You’ll know they’re ready when they feel totally firm and the bottoms look a bit cloudy, which means they've started to pull away from the mold.
A classic mistake is getting impatient and trying to pop them out too soon. If the chocolates feel even a little bit soft, they can break or get misshapen. Just give them a few more minutes in the fridge—it’s always better to be safe.
Getting them out of a flexible silicone mold is a breeze. Just peel the mold away from the chocolate or give a gentle push from the bottom of the cavity. If they're properly tempered and cooled, they should pop right out, showing off that perfect, glossy shine.
Best Practices for Optimal Storage
Now that your chocolates are done, storing them correctly is the top priority. The main enemies of both potency and flavor are light, heat, moisture, and air. You have to protect your creations from all of them.
How you store them really depends on how long you plan to keep them around.
- Short-Term Storage (Up to a few months): An airtight container is your best friend here. Just place the chocolates inside a glass or plastic container and stash it in a cool, dark, and dry place, like a pantry. Try to avoid the fridge for short-term storage, as condensation can sometimes cause issues.
- Long-Term Storage (Up to a year or more): If you want maximum preservation, the freezer is the only way to go. Wrap the chocolates individually, put them in a vacuum-sealed bag to get all the air out, and then pop them in the freezer. This method can keep them fresh and potent for 12+ months.
The growing excitement around homemade edibles like these is part of a much bigger trend. The global mushroom chocolate market was valued at roughly USD 2.2 billion in a recent year, which just goes to show how popular these functional treats have become. You can discover more about the mushroom chocolate market trends to see how this space is growing. By following these storage tips, you’re making sure your homemade version stays a top-quality product.
Got Questions About Shroom Chocolates?
Even with the best guide in hand, you’re bound to have questions when you try something for the first time. Making your own shroom chocolates is no exception. We’ve pulled together some of the most common questions and troubleshooting snags people run into, with answers straight from seasoned creators.
Think of this as your go-to FAQ to help you nail your technique and get that perfect batch every single time.
Can I Use Any Type of Chocolate?
Technically, yes, but the quality of your chocolate makes a huge difference in the final result. You’ve got options—dark, milk, white—but if you want that professional finish, you absolutely want to grab some high-quality couverture chocolate. It has a higher cocoa butter content, which is the secret ingredient for getting a beautiful temper, a glossy shine, and that satisfying snap when you bite into it.
Your standard chocolate chips, on the other hand, are usually packed with stabilizers and other additives to help them keep their shape in cookies. Those same ingredients can mess with the melting and tempering process, often leaving you with chocolate that’s soft, dull, or has a weirdly waxy feel.
A lot of people lean toward dark chocolate for two big reasons. First, its deep, slightly bitter flavor is a champ at masking the earthy taste of the mushrooms. Second, it typically has a higher melting point, which makes it a little more forgiving to work with. The choice is yours, but springing for good chocolate is the easiest upgrade you can make.
Will Heating the Chocolate Harm the Mushrooms?
This is easily one of the most common worries, but you can relax. The active compounds in magic mushrooms are tougher than you think. The temperatures you need to melt and temper chocolate are pretty low—usually staying well under 120°F (or 49°C). That’s a safe zone, far below the point where you'd see any real drop in potency.
The trick is to always use gentle, indirect heat. This is exactly why the double boiler method is your best friend. It stops the chocolate from scorching and ensures it melts slowly and evenly, never getting hot enough to damage the goods.
The one thing you absolutely must avoid is direct, high heat. Don't even think about microwaving your chocolate on full blast or melting it straight in a pot over a flame. That kind of intense, out-of-control heat is the real danger and could definitely compromise the potency of your final product. Stick to the double boiler, and you’ll be golden.
How Long Do Shroom Chocolates Stay Potent?
If you store them right, your homemade shroom chocolates can stay potent for a surprisingly long time—we’re talking a year, maybe even longer. Your mission is to protect them from their four biggest enemies: heat, light, moisture, and oxygen. Any of these will speed up the degradation process.
The chocolate itself is a fantastic natural preservative. It creates a built-in airtight and light-proof shield that protects the active compounds from UV damage and oxidation. For short-term storage (up to a few months), just pop the chocolates in an airtight container and stash them in a cool, dark spot like a pantry.
For the long haul, the freezer is your best bet. To do it right, wrap each chocolate individually, then place them all in a vacuum-sealed bag. This sucks out all the oxygen and gives them an extra layer of protection. Stored this way, they’ll easily maintain their kick for over a year.
Why Do My Chocolates Look Dull or Have White Streaks?
Ah, the dreaded chalky finish or weird white streaks. If you’re seeing that, you're looking at a classic case of a bad temper. It’s a phenomenon called "fat bloom," and it happens when the cocoa butter separates from the cocoa solids and creeps up to the surface. Your chocolates are still totally safe to eat and just as potent, but they won't have that professional-looking sheen or crisp snap.
The culprit is almost always temperature control—or a lack thereof. If the chocolate gets too hot or doesn't cool down correctly, the cocoa butter crystals can't form a stable structure, and you get bloom. This is where a good digital thermometer becomes a total game-changer, taking all the guesswork out of the process.
To dodge this, you have to be meticulous. Follow the specific temperature guidelines for whatever type of chocolate you're using. Dark, milk, and white chocolates all have their own unique temperature targets for melting, cooling, and reheating. Hitting those marks is the secret to a flawless, glossy finish every time. It might feel a bit tedious at first, but it’s what separates the amateur stuff from seriously impressive homemade chocolates.
Ready to skip the DIY and get straight to the good stuff? At The Magic Mushroom Delivery, we offer a curated selection of premium, expertly crafted mushroom products delivered right to your door. Explore our range of delicious chocolates, gummies, and more at https://themagicmushroomdelivery.com.