
So, you're thinking about growing your own magic mushrooms. It’s a fascinating process that really connects you to the world of mycology, and honestly, it’s one of the most rewarding hobbies you can pick up. There's a real sense of accomplishment that comes from watching life sprout and develop right in front of you, all thanks to your patience and care.
This guide is designed to give you a solid, high-level overview of the entire journey, from the first spore to the final harvest. We'll walk through what you can expect, so you feel ready to dive in.
Your Journey Into Home Mycology
Welcome to the incredibly engaging world of mycology. Growing mushrooms at home isn't some obscure, niche hobby anymore—it’s gone mainstream. More and more people are discovering the satisfaction that comes from getting their hands dirty and understanding a life cycle from start to finish. For many of us, it’s less about the end result and more about the incredible process itself.
Cultivating mushrooms is a unique way to connect with the natural world. It’s a practice in patience and precision, where you learn to create and control a perfect little micro-environment. From the moment you introduce spores to a sterile substrate to watching that delicate, root-like mycelial network spread, every single stage is a hands-on biology lesson. Seeing the first tiny "pins" pop up and mature into full-grown mushrooms is a truly amazing experience.
The Growing Fascination With Cultivation
This boom in home cultivation isn't happening in a vacuum. It’s part of a bigger cultural shift toward self-sufficiency and natural wellness. People want to be more involved with the source of their food and wellness products, and mycology fits that desire perfectly. The process takes fungi from being something mysterious and unknown to a tangible, manageable project right in your own home.
This trend is also reflected in the numbers. The U.S. psychedelic mushroom market hit an estimated USD 2.25 billion in 2024 and is expected to grow at a compound annual rate of 11.5% between 2025 and 2030. That growth is being driven by changing public perceptions and major policy shifts, like decriminalization in cities such as Denver and Oakland, and even state-level programs in places like Oregon. You can find more insights on this expanding market over on grandviewresearch.com.
What To Expect On Your Path
Before you start, it’s helpful to get a bird's-eye view of the road ahead. The whole process can be broken down into a few main phases, each with its own goals and challenges.
- Inoculation: This is square one. It’s where you introduce mushroom spores into a nutrient-rich home, known as a substrate.
- Colonization: This is the quiet phase. The mycelium—the white, root-like network of the fungus—grows and spreads, consuming all the nutrients in its environment.
- Fruiting: Once the substrate is fully colonized, you’ll change the environment by introducing things like light, fresh air, and humidity. These are the triggers that tell the mycelium it's time to produce mushrooms (the fruiting bodies).
- Harvesting: This is the payoff for all your hard work, where you carefully pick the mature mushrooms.
Success in mycology really boils down to three things: obsessive cleanliness to keep contaminants out, a whole lot of patience during the slow growth phases, and sharp observation skills to give your mushrooms what they need.
Getting these fundamentals right is far more important than having fancy, expensive gear. If you can focus on creating a sterile workspace and keeping a close eye on temperature and humidity, you’re setting yourself up for a successful and satisfying grow. We'll walk through each of these elements to make sure you feel confident and ready for your mycology adventure.
Understanding The Mushroom Life Cycle
If you want to succeed at growing magic mushrooms, you have to learn to think like a fungus. Before you do anything else, getting a feel for the biological journey you’re about to oversee is the single most important step. It’s a fascinating process that takes microscopic spores and guides them into the complex mushrooms you eventually hope to harvest.
Grasping this progression helps you anticipate what your fungi need at each critical phase. This isn't about following a rigid recipe; it's about creating the perfect environment for a natural process to do its thing. Each stage has its own unique demands for temperature, humidity, and even light.
The Four Key Stages of Fungal Growth
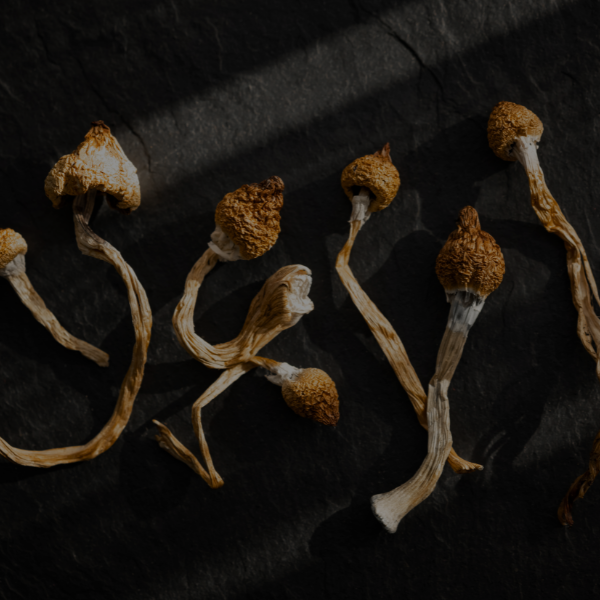
The whole show kicks off with spores—think of them as the seeds of the fungal kingdom. These tiny cells hold all the genetic information for a new mushroom. Out in the wild, a mature mushroom releases billions of them from its gills to catch the wind. For our purposes, you'll be introducing them to a sterile, nutrient-rich home to get them started.
From there, the spores germinate and start weaving together to form mycelium. This is the true body of the fungus, a brilliant white, thread-like network of cells. If a mushroom is the apple, mycelium is the tree's entire root system. It spreads unseen, breaking down nutrients and gathering energy. During this "colonization" phase, the mycelium loves complete darkness and a steady, warm temperature to really take over its food source (the substrate).
This diagram gives you a great visual of how things progress from a simple spore to a fully grown mushroom.
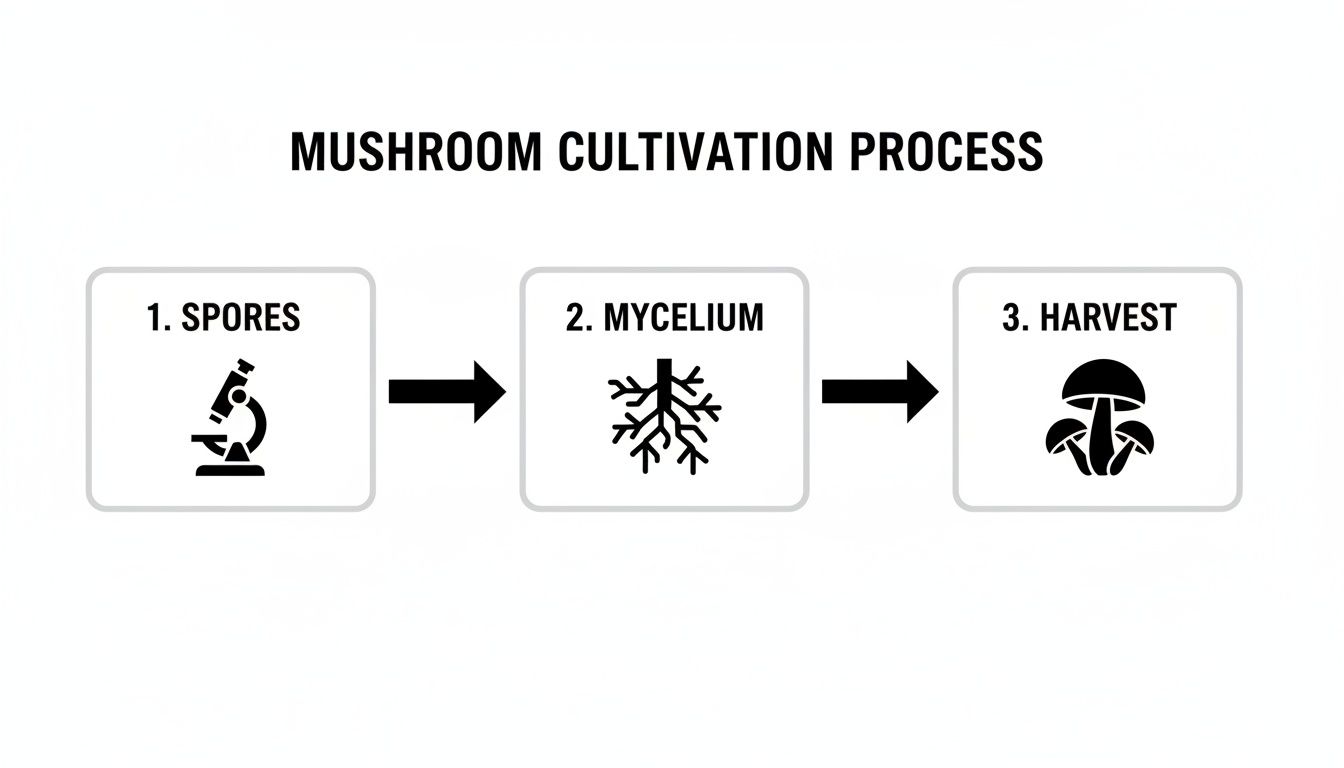
As you can see, cultivation is a linear path. Each stage has to be successful for the next one to begin, all leading up to the final harvest.
Triggering The Fruiting Phase
Once the mycelium has completely taken over its substrate, it's time to send a signal that it's time to change gears. The next step is encouraging the formation of primordia, which are essentially baby mushrooms. You might hear them called "pins" because that’s what they look like—tiny little pinheads that are the very first signs of a future mushroom. To make this happen, you need to introduce a few specific environmental triggers.
These triggers are your way of mimicking the conditions a fungus would encounter in nature when it's time to reproduce. The key changes are:
- A slight drop in temperature, which simulates the changing of seasons.
- An increase in humidity to give the primordia the moisture they need to grow.
- The introduction of indirect light, which gives the mycelium a direction to grow towards.
- An increase in fresh air exchange to lower the CO2 levels that have built up.
This combination of factors essentially tells the mycelial network, "Okay, the food is running out, it's time to make a fruit and spread some spores."
The switch from a vegetative, root-like network (mycelium) to a reproductive body (the mushroom) is driven entirely by environmental cues. Your job as a cultivator is to provide these signals at just the right moment.
The final stage is the development of the fruiting body—what we all recognize as a mushroom. Those tiny pins will explode in growth, sometimes even doubling in size overnight, as they develop into mature mushrooms with distinct caps and stems. This is where all your patience pays off. If you're curious about the incredible variety out there, it's worth exploring the many different types of psychedelic mushrooms and what makes each one unique.
Knowing when to harvest is crucial, and it’s all about watching the thin veil under the mushroom’s cap. This entire cycle, from a single spore to a full harvest, is a beautiful and rewarding process that connects you directly to the fundamentals of mycology.
Creating The Ideal Cultivation Environment
Getting your mushrooms to flourish is all about creating their perfect little world. Think of yourself as the architect of a miniature ecosystem. Nailing this setup from the very beginning is single-handedly the most important thing you can do to guarantee a healthy, rewarding harvest.
The first rule of mycology, and one you'll hear over and over, is that sterility is everything. The nutrient-packed environment you're preparing for your mycelium? It's also a five-star buffet for any stray mold or bacteria spores floating around. Your job is to give your chosen fungus a clean head start with zero competition.

This is why sterile technique isn’t just a friendly suggestion—it’s the golden rule. A single contaminating spore can quickly outcompete your mycelium, ruining the entire project. Before you even think about starting, give your workspace a thorough cleaning, scrub your hands and arms, and seriously consider wearing gloves and a face mask to keep airborne particles at bay.
Mastering The Big Three: Temp, Humidity, and Air
Beyond a clean start, your success boils down to juggling three key environmental factors: temperature, humidity, and fresh air. Getting this trio in perfect harmony is what convinces the mycelium to stop growing and start producing mushrooms.
Temperature is a huge trigger. During the initial colonization phase, when the mycelium is busy spreading through its food source, a cozy temperature of around 75-80°F (24-27°C) will encourage it to grow like wildfire. Later, when you want it to fruit, a slight drop in temperature acts as a natural signal that it's time to make mushrooms.
Next up is humidity. Mushrooms are more than 90% water, so a consistently moist, humid environment is non-negotiable. During the fruiting stage, you’ll want to aim for a relative humidity of 90-95%. This can be as simple as misting the inside of your growing chamber with a spray bottle or as high-tech as using an automated humidifier.
Finally, we have fresh air exchange (FAE). As mycelium grows, it breathes out CO2. High levels of CO2 are perfectly fine—even beneficial—during colonization. But once you want pins (baby mushrooms) to appear, they need oxygen to breathe. Regularly introducing fresh air is the cue that tells them to pop up.
Think of yourself as the stage manager for the mushroom life cycle. By tweaking temperature, humidity, and airflow, you're providing the precise environmental cues that trigger each new phase of growth.
Beginner Cultivation Methods At A Glance
For newcomers, choosing a cultivation method can feel overwhelming. Each approach has its own learning curve, setup costs, and potential for success. The table below breaks down some of the most common starting points to help you figure out which path makes the most sense for you.
| Method | Primary Substrate | Typical Yield | Complexity Level | Key Advantage |
|---|---|---|---|---|
| PF Tek | Brown Rice Flour (BRF) & Vermiculite | Small to Moderate | Low | Very forgiving and great for learning sterile technique. |
| Monotub | Grains (Rye, Oats) + Bulk Substrate (Coir) | Moderate to Large | Medium | High yield potential for the amount of space used. |
| All-in-One Grow Bag | Sterilized Grain & Substrate in a sealed bag | Small to Moderate | Very Low | The most hands-off method, minimal setup required. |
Ultimately, the best method is the one you feel most comfortable managing. Many growers start with PF Tek or a grow bag to learn the fundamentals before moving on to bulk methods like the monotub.
Choosing Your Substrate: The Mushroom's Food
The substrate is simply the food source your mycelium will consume. Your choice here depends on your experience level, the method you're using, and how big of a harvest you're aiming for. Different substrates offer their own mix of nutrients, moisture retention, and resistance to contamination.
Here are a few popular options for those just starting out:
- Brown Rice Flour (BRF): When mixed with vermiculite and water, BRF creates the classic "PF Tek" cake. It’s cheap, widely available, and famously forgiving for beginners.
- Rye Grain: This nutrient-dense grain is a long-time favorite among cultivators for its ability to support strong, fast-growing mycelium. It does, however, require proper sterilization, which usually means using a pressure cooker.
- Coco Coir: Made from ground coconut husks, coco coir is fantastic at holding moisture and is naturally resistant to mold. It’s the go-to for most bulk grows aimed at producing larger yields.
This decision is also where the financial benefits of home cultivation really shine. While psilocybin mushrooms can run anywhere from $20 to $50 per dried gram, growing your own with a bulk substrate like coco coir can produce hundreds of grams annually, dropping your cost to less than $1 per gram after the initial investment in equipment. Given that psilocybe species dominate the global market due to their therapeutic potential, understanding these fundamentals is key. You can learn more about the psychedelic mushroom market dynamics to get the full picture.
Setting Up Your Space
Don't worry, you don't need a sterile laboratory to get started. Many successful home cultivators begin with a simple setup like a "monotub" or a "shotgun fruiting chamber" (SGFC). These are usually just large, clear plastic tubs that have been modified with holes to help manage humidity and airflow.
The main idea is to create an enclosed, manageable environment that isn't easily affected by the changing conditions in the rest of your home. While a dedicated grow tent offers the ultimate level of control, a simple tub tucked away in a clean closet or a temperature-stable corner of a room is more than enough to get your foot in the door. By focusing on these core principles—sterility, environmental control, and a quality food source—you’re building a solid foundation for a successful journey into mycology.
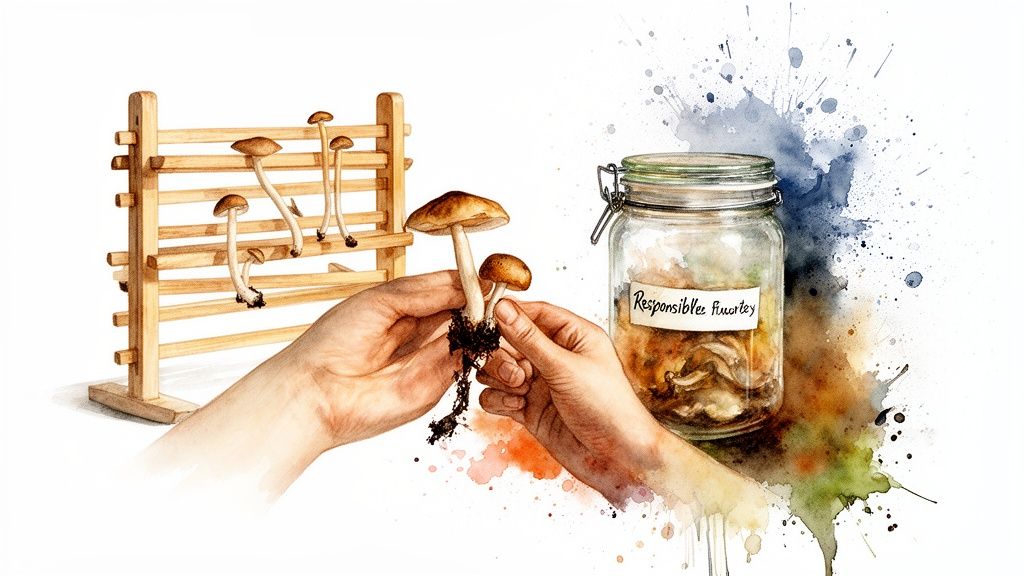
A Responsible Approach To Harvesting And Storage
After weeks of patient watching, the moment you’ve been waiting for is finally here. Knowing exactly when and how to harvest your mushrooms is a skill that’s part science, part intuition. Get this part right, and you'll lock in the quality of your harvest while setting the stage for future growth.
Timing is everything. The perfect moment to pick is just as the thin membrane, or veil, under the cap begins to stretch and tear away from the stem. Harvesting at this peak moment ensures the mushrooms have hit their full maturity.
If you wait too long and the veil breaks completely, the mushroom will drop its dark spores all over the substrate. This isn't the end of the world, but it can signal to the mycelium that its reproductive job is done, which might slow down subsequent crops, or "flushes." It also just makes things look a bit messy.
Gentle Harvesting Techniques
When it's time to pick, your main goal is to remove the mushroom without messing up the mycelium underneath. A healthy, intact mycelial block is your ticket to getting multiple harvests from a single grow. The best way to do this is the classic "twist and pull" method.
Just grab the mushroom at its base, as close to the substrate as you can get. Gently twist it while pulling upward. It should pop right off, leaving the surface pretty clean.
For stubborn clusters or mushrooms in tight spots, a small, sterilized knife or scissors will do the trick. Just snip them at the base. This also keeps any disturbance to the substrate at a minimum.
Remember, the mycelium is the living heart of your grow. A gentle harvest that keeps it happy is the best way to encourage it to produce another round of fruits for you.
Preparing For Future Flushes
One of the coolest parts of this hobby is getting multiple flushes from a single cake. After you've harvested all the mature mushrooms from your first flush, the mycelium is thirsty and needs to rehydrate for the next round.
This is usually done by soaking the substrate in clean, cool water for several hours—a process often called "dunking." This simple step replenishes all the moisture lost during the first fruiting cycle. After a good soak, drain the excess water, and pop the substrate back into its fruiting chamber to start the process all over again. You can often get 2 to 4 flushes from one block, though each harvest will likely be a bit smaller than the last.
The Critical Importance of Proper Drying
Fresh mushrooms are over 90% water and will start to go bad incredibly fast. Drying them properly isn't just a suggestion; it's absolutely essential for long-term storage and maintaining their quality. The goal is to get them "cracker dry"—so brittle they snap when you try to bend them.
There are a couple of ways to get this done:
- Simple Air-Drying: You can lay your mushrooms on a screen or paper towel in a well-ventilated spot, maybe with a small fan pointed at them. This works, but it can take a few days and might not get them perfectly dry.
- Using a Food Dehydrator: This is, by far, the most reliable method. A dehydrator gives you consistent, low-temperature airflow that pulls moisture out efficiently without degrading the good stuff. Set it to a low temperature, around 95-105°F (35-40°C), and let it run for 6-12 hours until the mushrooms are completely bone-dry.
Long-Term Storage Solutions
Once properly dried, your mushrooms can be stored for months, or even years, without losing their punch. You just have to protect them from their three main enemies: moisture, oxygen, and light. Your storage setup needs to handle all three.
The gold standard is to place your cracker-dry mushrooms in an airtight glass mason jar. If you want to go the extra mile, toss a food-grade desiccant packet in there (those little silica gel packs you find in beef jerky). This will soak up any leftover moisture and keep things perfectly dry. For very long-term preservation, some people even use a vacuum sealer.
Once they're sealed up, store the jar in a cool, dark place like a cupboard or pantry. For a deeper dive into all the preservation tricks, you can read more about the best way to store shrooms to keep your harvest in prime condition. Following these careful steps honors all the effort you put in and ensures your mushrooms are perfect for whenever you might need them.
Expanding Your Skills With Functional Mushrooms
Once you’ve pulled off a successful cultivation project, you’ve picked up a seriously valuable and transferable skill set. Think about it: the principles of sterile technique, environmental control, and the sheer patience you’ve mastered are universal in the world of mycology.
This opens up a fascinating new door—growing functional and culinary mushrooms right at home. The world of fungi is incredibly diverse, and tons of other species offer unique wellness benefits and amazing flavors. It's the perfect next step to keep honing your craft in a way that’s both rewarding and delicious.
Applying Your Knowledge To New Species
The best part? The core process is remarkably similar. Whether you're growing Lion's Mane for its cognitive perks or gourmet Oyster mushrooms for dinner, you're still working with spores or liquid culture, a substrate, and a controlled fruiting environment. Your hard-won understanding of how to prevent contamination and trigger pinning is directly applicable.
It’s a bit like learning to bake bread. Once you get the hang of how yeast, flour, and water work together, you can easily adapt your skills to make everything from a simple loaf to complex pastries. Mycology works the same way; that foundational knowledge is your key to cultivating a huge range of fascinating fungi.
The main differences you'll run into are the specific environmental preferences of each species.
- Substrate Choice: While many mushrooms grow on similar stuff, some are pickier. For example, Reishi mushrooms are happiest on hardwood sawdust, while Oyster mushrooms are famously versatile and can grow on anything from straw to used coffee grounds.
- Fruiting Conditions: Different mushrooms have slightly different "sweet spots" for temperature, humidity, and fresh air. A little research will tell you exactly what your new species needs to flourish.
The skills you've gained are a passport to the entire kingdom of fungi. By branching out, you're not just growing mushrooms; you're expanding your understanding of mycology and building a deeper connection to the natural world.
Discovering The World of Functional Fungi
Functional mushrooms are species valued for their health-supporting properties that go way beyond basic nutrition. They've been used for centuries in traditional wellness practices and are now getting major attention for their potential benefits.
For many growers, cultivating their own functional mushrooms is particularly empowering. It gives you a direct line from soil to supplement, ensuring you have a fresh, high-quality supply of these amazing fungi. It's a fantastic way to deepen your mycology practice and connect your passion to the broader world of natural health.
Popular Functional Mushrooms To Grow At Home
If you're ready to give something new a shot, a few species are especially well-suited for home cultivators and offer a great introduction to the world of functional fungi.
Lion's Mane (Hericium erinaceus): This unique, tooth-like mushroom is celebrated for its potential to support brain health and cognitive function. It has a mild, almost seafood-like flavor and is as delicious as it is beneficial.
Reishi (Ganoderma lucidum): Known as the "mushroom of immortality" in traditional Chinese medicine, Reishi is often used to support the immune system and promote a sense of calm. It has a woody texture and is typically brewed into a tea or used for extracts.
Oyster Mushrooms (Pleurotus ostreatus): While often seen as purely culinary, Oyster mushrooms are packed with nutrients and are one of the easiest species for beginners to grow. They come in a variety of beautiful colors, including pink, blue, and yellow.
Learning about the specific advantages of these and other species is a fascinating journey in itself. If you want to dive deeper, you can read our detailed guide on the many functional mushrooms benefits and how they can support a healthy lifestyle.
This journey from mastering the basics to cultivating a diverse garden of functional and gourmet species is a deeply gratifying one. It transforms a single project into a lifelong hobby, constantly offering new challenges, new flavors, and new opportunities to learn.
Common Questions About Growing Mushrooms
As you start exploring the world of mycology, you're bound to have some questions. It’s totally normal. Getting into growing your own magic mushrooms can feel a little complicated at first, but with the right info, you’ll find it’s a straightforward and deeply rewarding process.
Let's dive into some of the most common questions we hear from beginners to help you get started with confidence.
What Is The Most Common Reason A First Grow Fails?
Hands down, the number one killer of a first grow is contamination. It's a tough lesson many of us learn the hard way.
Think of it like this: your workspace is a constant battleground against invisible enemies. The air all around you is full of microscopic mold spores and bacteria just waiting for a nutrient-rich, humid place to land—which is a perfect description of the substrate you've so carefully prepared for your mushrooms.
Even a tiny slip-up in your sterile procedure can let in a contaminant like the dreaded green mold, Trichoderma. Once that stuff gets a foothold, it spreads like wildfire and will almost always overpower your mycelium, ruining the whole project. This is why being absolutely meticulous about sanitation isn't just a suggestion; it's the golden rule of cultivation.
How Long Does The Entire Growing Process Take?
Mycology is a great teacher of patience. The total time from start to finish can vary quite a bit, depending on the mushroom species, the cultivation method you're using, and how well you dial in the growing conditions.
As a general rule of thumb, you should plan on a timeline of about 4 to 8 weeks from the day you inoculate your substrate with spores to your first harvest. This window usually breaks down into two main phases:
- Colonization (2-4 weeks): This is the quiet part of the process. The mycelium is busy spreading throughout the substrate, gathering the energy it needs for the next big step.
- Fruiting (2-4 weeks): Once the substrate is fully colonized, you’ll switch to fruiting conditions. This is the exciting part where the mushrooms themselves will start to pin and then mature into a full crop.
Can I Reuse My Substrate After The First Harvest?
You absolutely can! Getting multiple harvests, or "flushes," from a single substrate block is one of the most satisfying parts of the hobby. After you pick your first round of mushrooms, that mycelial network is still very much alive and has plenty of fuel left in the tank.
To kickstart a second flush, you'll need to rehydrate the substrate. This is often called "dunking." By soaking the block in cool, clean water for a few hours, you're replenishing all the moisture it used to produce the first flush. After a good soak, just drain it, put it back in your fruiting chamber, and you can expect another 2 to 4 flushes. Just know that each one will likely be a little smaller than the one before it.
Your mycelium is a surprisingly resilient organism. A little care and rehydration after each harvest can go a long way in maximizing your yield.
Do I Need Expensive Equipment To Get Started?
Not at all. While you can certainly go down the rabbit hole of high-tech gear like laminar flow hoods and massive sterilizers, many amazing growers got their start with simple, low-cost setups. You can get fantastic results with stuff you can find at any grocery or hardware store.
A classic beginner-friendly method can be pulled together with things like mason jars, a big plastic tub for a humidity chamber, and a simple substrate mix like brown rice flour. Honestly, the most valuable "equipment" you can possibly have is a serious commitment to cleanliness and a sharp eye for detail. Mastering sterile technique will always beat having the most expensive gear.
At The Magic Mushroom Delivery, we provide everything you need to explore the world of mycology, from educational resources to high-quality mushroom products. Discover our curated selection of gummies, chocolates, and more, all delivered discreetly to your door.
[Shop our full collection today at https://themagicmushroomdelivery.com]