
Diving into the world of growing psilocybin mushrooms is a rewarding journey into mycology, a fascinating blend of science and patience. It’s an incredibly accessible hobby that gives you a deep, hands-on connection to the entire life cycle of fungi.
Why Grow Your Own Mushrooms at Home?
Embarking on the journey of growing psilocybin mushrooms at home is so much more than a hobby. Think of it as a hands-on science project that brings a unique sense of accomplishment. You get to control the entire process—from spore to harvest—which means you can be confident in the purity and quality of your mushrooms. This direct involvement is also a front-row seat to the fascinating life cycle of fungi.
The appeal of home cultivation has exploded recently, and it’s easy to see why. People are getting more curious about the potential of psilocybin, and that curiosity is fueling a desire to understand these organisms on a much deeper level. Growing them yourself is an unparalleled learning experience.
The Benefits of Home Mycology
For many, growing mushrooms at home is really about self-sufficiency and knowledge. You're not just a consumer; you're the producer, and that's an empowering feeling. This practice demystifies the fungal kingdom and connects you to natural processes that are usually hidden from sight. Some of the biggest advantages include:
- Purity and Control: You manage every single variable, from the makeup of your substrate to the humidity and temperature. This control ensures a clean, predictable result.
- Educational Experience: Cultivation is an incredible way to learn about biology, sterilization techniques, and the delicate balance required for fungal growth.
- Cost-Effectiveness: Over time, growing your own mushrooms is far more economical than buying them, especially if you plan on multiple harvests.
This surge in personal interest mirrors a much larger trend. The global psychedelic mushroom market was valued at about USD 7.12 billion in 2024 and is projected to hit USD 18.27 billion by 2032. You can find more insights on this market expansion over at databridgemarketresearch.com.
While the legal status of magic mushrooms varies wildly depending on where you are, understanding the cultivation process is a valuable skill for any enthusiast. If you're curious, you might be interested in our detailed guide on the current legal landscape.
Building Your Home Mycology Lab
So, you're ready to set up your own mushroom cultivation space. The good news is you don't need a high-tech laboratory worthy of a sci-fi movie. A clean, dedicated spot in a closet, a spare room, or even a quiet corner of your kitchen can work wonders. Your main goal here is to create a controlled environment where you can defeat the single biggest threat to any grow: contamination.
Think of this area as your personal clean room. Before you bring in a single piece of gear, give the space a deep clean. I’m talking top to bottom—wipe down the walls, scrub the floors, and get rid of as much dust as you can. A little elbow grease now will save you a world of heartbreak later by stopping nasty molds and bacteria from crashing your party.
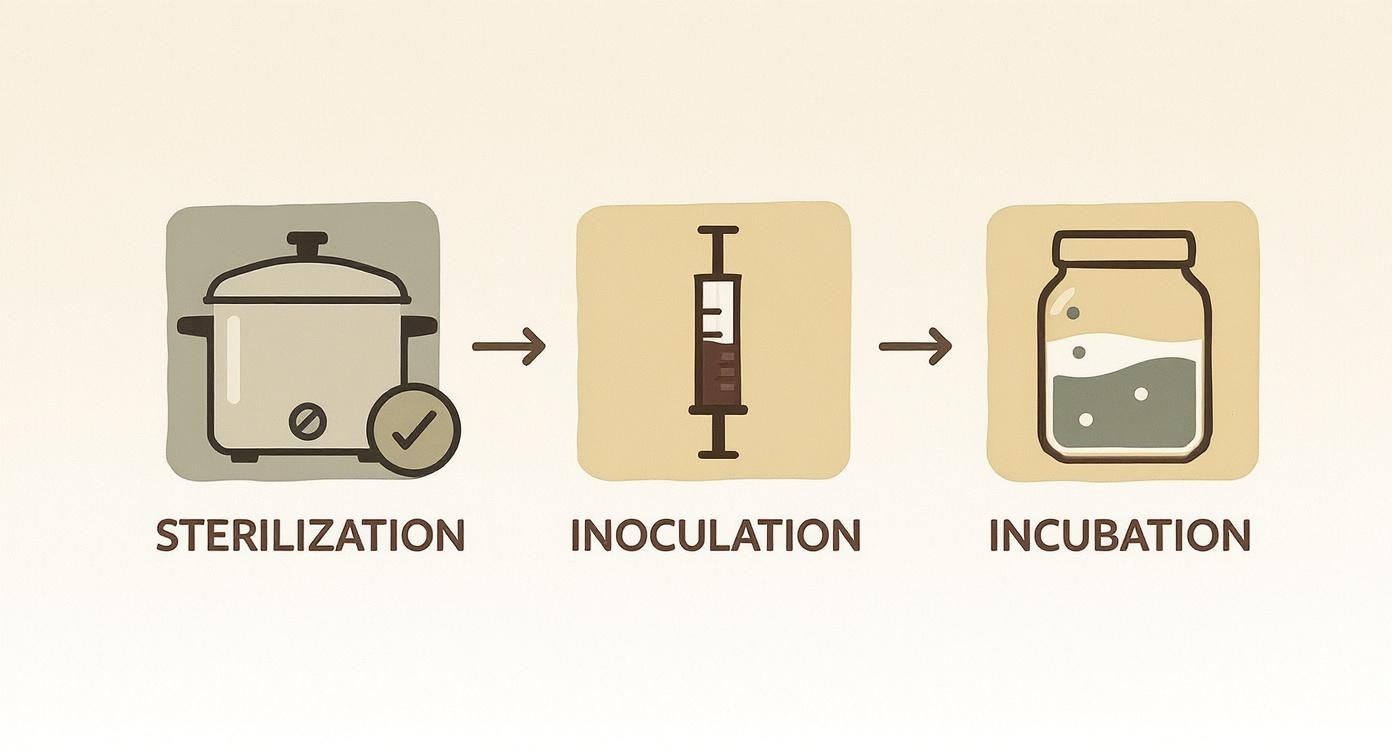
Core Equipment for Sterilization and Inoculation
A few pieces of equipment are absolutely non-negotiable for keeping things sterile. First on that list is a good pressure cooker. This is your number one weapon against contaminants. It's what you'll use to sterilize your grain jars and substrate, wiping out any microscopic baddies that could ruin your project. You'll want one that can reliably hit and hold 15 PSI—that's the gold standard for killing everything you don't want in your jars.
Next, you need a clean space to do your work, like inoculating jars. While a professional laminar flow hood is the dream setup, a Still Air Box (SAB) is a cheap and incredibly effective alternative for home growers. It's usually just a clear plastic tub flipped upside down with armholes cut in the sides. This simple box creates a pocket of still air, dramatically reducing the chances of airborne contaminants landing where they shouldn't.
Essential Supplies for Cultivation
Once you have your core gear, you'll need the consumable supplies. These are the building blocks that provide the home and food for your mycelium to flourish.
- Cultivation Containers: Mason jars are a classic for a reason. Wide-mouth pint jars are especially great for beginners because they're easy to fill and get your colonized grain out of. Specialized mycology bags are another solid option.
- Spore Syringes or Liquid Culture: This is your mushroom genetics. It is absolutely crucial to buy your spores or liquid culture from a reputable, trusted supplier. Starting with clean, viable genetics is half the battle.
- Substrate Ingredients: This is the "food" your mycelium will eat. The classic beginner-friendly recipe is the PF Tek, which uses brown rice flour, vermiculite, and water. You can find all of these at most garden or grocery stores.
- Fruiting Chamber: This is where the magic really happens and your mushrooms actually grow. A "shotgun fruiting chamber" (SGFC) is a simple, effective choice. It's just another large plastic tote with holes drilled on every side for air exchange, plus a layer of damp perlite on the bottom to keep the humidity up.
I can't stress this enough: never underestimate the importance of a clean workspace. I've seen people with perfectly sterilized jars lose entire batches because a single stray mold spore floated in during inoculation. Always, always do your sterile work inside your Still Air Box.
Before you start, it’s a good idea to gather all your supplies. Having everything on hand prevents last-minute scrambles and helps you maintain a smooth, sterile workflow from start to finish.
Cultivation Starter Kit Checklist
Here’s a handy checklist to make sure you have everything you need to get started.
| Category | Item | Purpose | Beginner Tip |
|---|---|---|---|
| Sterilization | Pressure Cooker (15+ PSI) | Kills contaminants in grain & substrate. | Check thrift stores or online marketplaces for affordable used ones. |
| Sterile Workspace | Still Air Box (SAB) | Provides a clean area for inoculation. | You can easily make your own from a large plastic tote. |
| Containers | Wide-Mouth Mason Jars | Holds grain/substrate for colonization. | The wide mouth makes it much easier to get the colonized cake out. |
| Genetics | Spore Syringe/Liquid Culture | Introduces mushroom genetics to the grain. | Always buy from a reputable vendor with good reviews. |
| Substrate | Brown Rice Flour & Vermiculite | The nutrient source for your mycelium. | The "PF Tek" recipe is a time-tested classic for beginners. |
| Fruiting | Large Plastic Tote & Perlite | Creates a humid environment for mushrooms. | This will become your Shotgun Fruiting Chamber (SGFC). |
| Sanitation | 70% Isopropyl Alcohol, Gloves | Disinfects surfaces, tools, and hands. | 70% alcohol is more effective at killing germs than 91% or 99%. |
| Tools | Lighter or Alcohol Lamp | Sterilizes the needle of your syringe. | A butane torch lighter works best for getting the needle red-hot quickly. |
Having this kit ready will set you on the right path and give you the confidence to tackle your first grow.
Creating Your Dedicated Workspace
With all your gear collected, it's time to set up your lab. Designate a specific table or shelf for your mushroom work. Keep your clean supplies (unopened syringes, alcohol wipes, gloves) in a sealed container, separate from everything else.
A logical flow helps a lot. For example, keep your pressure cooker in the kitchen where it belongs, but bring the cooled, sterile jars into your dedicated clean space for the inoculation step inside your SAB. Avoid setting up near open windows, fans, or AC vents that create drafts. This kind of systematic approach is key to maintaining sterility and dramatically increases your chances of a successful harvest.
Mastering Aseptic Inoculation Techniques
Once you’ve got your home lab assembled, we move into the part of the process where cleanliness and precision are everything. This is the inoculation stage—the moment you introduce life into your sterile substrate.
In the world of mycology, your biggest enemy is contamination. You’re constantly fighting a battle against invisible airborne bacteria and mold spores. Mastering aseptic (sterile) technique isn't just a good idea; it's the one fundamental skill that separates a successful, heavy harvest from a tub full of green, fuzzy disappointment.
This whole process requires a calm, methodical approach. Rushing things or cutting corners on sterilization is a guaranteed recipe for failure. Think of it like you're a surgeon in an operating room. Every single tool, surface, and movement has to be deliberate and clean. Your one job is to create a perfect, competitor-free environment where only your chosen mycelium can flourish.
The Beginner-Friendly PF Tek Method
If you're just dipping your toes into growing psilocybin mushrooms at home, the PF Tek (short for Psilocybe Fanaticus Technique) is a classic, time-tested method to get you started. It's incredibly straightforward and uses ingredients you can find almost anywhere: brown rice flour (BRF), vermiculite, and water. That simple recipe provides all the nutrients the mycelium needs to colonize, all neatly packed into standard canning jars.
The real beauty of PF Tek is its simplicity. The substrate is a breeze to mix up, and the whole process is designed to minimize contamination risks, which makes it perfect for beginners who are still getting the hang of things with basic equipment.
While there are plenty of more advanced techniques out there, getting a few successful PF Tek grows under your belt will give you a rock-solid foundation in sterile procedure and a real feel for the mycelial life cycle. If you'd rather skip the prep work, grabbing a pre-made magic mushroom growing kit is another great way to jump in, since the components often come pre-sterilized.
Preparing and Sterilizing Your Substrate
Your first big task is to mix the substrate. The tried-and-true PF Tek ratio is 2 parts vermiculite, 1 part brown rice flour, and 1 part water. Always mix the dry ingredients together first, then slowly drizzle in the water until you get what's called "field capacity." It should feel moist, but not soaking wet. When you grab a handful and squeeze, only a couple of drops of water should come out.
Once it's mixed, you’ll loosely pack the substrate into your canning jars, making sure to leave about a half-inch of space at the top. The key word here is loosely—don’t pack it down tight. The mycelium needs room to breathe and expand. Finish each jar by topping it off with a thin layer of completely dry vermiculite. This dry layer is a brilliant little trick; it acts as a natural filter, protecting the moist substrate underneath from any airborne nasties that might try to sneak in later.
Key Takeaway: You absolutely cannot cut corners on sterilization. It's non-negotiable. A single surviving mold spore can easily out-compete your mycelium and ruin a whole batch of jars. Be patient with your pressure cooker—it's your best friend in the war against contamination.
Next up, sterilization. Set your filled jars on a rack inside your pressure cooker and add a few inches of water to the bottom. Lock the lid, fire it up, and bring the pressure up to 15 PSI. The moment it hits pressure, you start a timer for 60-90 minutes. This combination of sustained high heat and pressure will kill any and all competing organisms inside those jars, creating a perfectly clean slate for your spores.
When the timer goes off, kill the heat and just let the cooker cool down on its own. This can take hours, so be patient. Do not try to speed this up or open a hot pressure cooker. Seriously.
Working Inside a Still Air Box
The Still Air Box (SAB) is your personal cleanroom for the most critical part of this whole process: inoculation. It’s usually just a simple clear plastic tote with a couple of armholes cut into it, but its purpose is crucial. It creates a pocket of still air, which dramatically reduces the chances of contaminants just drifting down onto your sterile materials.
Before you start, douse the inside of the SAB, your jars, syringe, lighter, and alcohol wipes with 70% isopropyl alcohol. Wipe everything down thoroughly.
Here’s a simple workflow for a clean inoculation:
- Get Set: Place your cooled sterile jars, your spore syringe, a lighter, and some alcohol wipes inside the SAB. Douse your gloved hands in alcohol before you put them through the armholes.
- Sterilize the Needle: Use your lighter to heat the needle of the spore syringe until it glows red-hot. Let it cool for about 15-20 seconds inside the still air of the box. Don't let it touch anything while it cools.
- Inoculate: Carefully poke the needle through the lid of a jar (either through pre-drilled holes or a layer of foil) and inject around 0.25-0.5 cc of the spore solution. It helps to aim the needle toward the glass so you can easily spot the first signs of growth in a few days. Repeat this for all your jars, making sure to flame-sterilize the needle between each and every one.
You’ve done the meticulous, sterile work of inoculation. Now comes the part that’s all about patience and observation. This is where you find out if your careful prep paid off, as the mycelium begins its slow, silent journey of colonization. Getting the incubation and fruiting stages right is what separates a cabinet full of contaminated jars from a successful harvest.
The incubation period is the quiet before the storm. Your jars or bags need a dark, undisturbed spot with a consistently warm temperature. You're essentially creating the perfect underground nursery for the mycelium to wake up and start spreading. This is the real foundation for growing psilocybin mushrooms at home.
The Incubation Phase: Nurturing Mycelial Growth
With your jars inoculated, the colonization race has begun. The sweet spot for most Psilocybe cubensis strains is a steady temperature between 75-80°F (24-27°C). This warmth is the single biggest factor in encouraging fast, healthy growth.
A classic rookie mistake is plopping jars right on a heating mat, which almost always creates hot spots that cook the bottom and dry out the substrate. A much smarter approach is to gently warm the air in a small, enclosed space, like a closet or a big storage tote. A small space heater hooked up to a thermostat is the perfect way to provide that gentle, even warmth.
Over the next few weeks, you’ll start to see the first beautiful signs of life. Healthy mycelium looks like bright white, rope-like strands (rhizomorphic) or sometimes fluffy, cottony patches (tomentose) spreading out from where you injected the spores. It's a truly amazing process to watch this delicate network slowly take over its food source.
Patience is a Virtue in Mycology: It's so tempting to check your jars every day, but you have to resist the urge. Disturb them as little as possible. A standard pint jar can take anywhere from three to five weeks to fully colonize. Don't even think about shaking the jars unless you're doing a "break and shake" to speed things up, which is best done when the jar is about 30% colonized.
You'll know your jars are ready for the next phase when the entire substrate is covered in a thick, solid blanket of white mycelium. You shouldn't see any uncolonized grain or substrate patches. If you get impatient and move to the fruiting stage too early, those exposed patches are an open invitation for contamination to move in. Keep in mind that different Psilocybe cubensis strains can have different looking mycelium, so it helps to know what to expect from your specific genetics.
Transitioning to the Fruiting Stage
Once your substrate is a solid block of white, it's time to signal that the party's over and it’s time to make mushrooms. This transition involves a very specific set of environmental triggers that basically tells the mycelium, "Winter is coming, make babies!" Think of it like mimicking a cool, rainy autumn day after a warm summer spent underground.
The key triggers for fruiting are:
- A slight temperature drop down to around 70-75°F (21-24°C).
- Introducing indirect light on a regular cycle (a simple 12 hours on, 12 hours off works great).
- A huge jump in humidity up to 90-95% RH.
- Lots of Fresh Air Exchange (FAE) to get rid of CO2 buildup and provide oxygen.
This step is often called "birthing." You'll be moving your colonized mycelium cakes out of their jars and into a fruiting chamber. A simple but effective DIY option is a Shotgun Fruiting Chamber (SGFC)—just a big plastic tote with holes drilled on all sides, sitting on a layer of damp perlite to keep the humidity sky-high.
Daily Care During Fruiting
With your cakes birthed into their new home, your daily job is to maintain that delicate dance of high humidity and fresh air. This is definitely the most hands-on part of the whole grow, and consistency is everything.
You’ll need to mist and fan the chamber several times a day. Misting is done with a fine-mist spray bottle; you want to spray the inner walls and the perlite, but try to avoid spraying the mycelial cakes directly. This keeps the relative humidity where it needs to be for pins to form.
Right after misting, it's time to fan. Grab the lid of the tote or a piece of cardboard and fan fresh air into the chamber for about 30-60 seconds. This does two critical things: it brings in the fresh oxygen mushrooms crave, and it helps evaporate a tiny bit of moisture off the cake's surface—a primary trigger for pinning. A solid routine of misting and fanning 3-5 times a day is a great place to start.
Within 5 to 14 days, you should see the moment you've been waiting for: tiny mushroom "pins" erupting from the surface of your cakes. These are the baby mushrooms, and once they appear, they grow shockingly fast, often doubling in size every day. At this point, you're just a few short days away from your very first harvest.
Harvesting and Preparing for Your Next Flush
After weeks of patient observation, the moment you've been working toward is finally here. Knowing exactly when and how to harvest your mushrooms is a skill that directly impacts both their quality and your ability to get more mushrooms from the same substrate. It's a delicate process, but getting it right is the key to a successful grow cycle.
Timing is absolutely crucial. The perfect moment to harvest is just as the veil—that thin membrane stretching from the cap to the stem—begins to tear. This is the sweet spot. It tells you the mushroom has hit peak maturity but hasn't yet dropped its spores.
If you wait too long and the veils break completely, the mushrooms will release a dark, purple-black layer of spores all over your substrate and their neighbors. While this isn't harmful, it looks messy and can actually inhibit the growth of future flushes on those specific areas. Timely harvesting is always the better strategy.
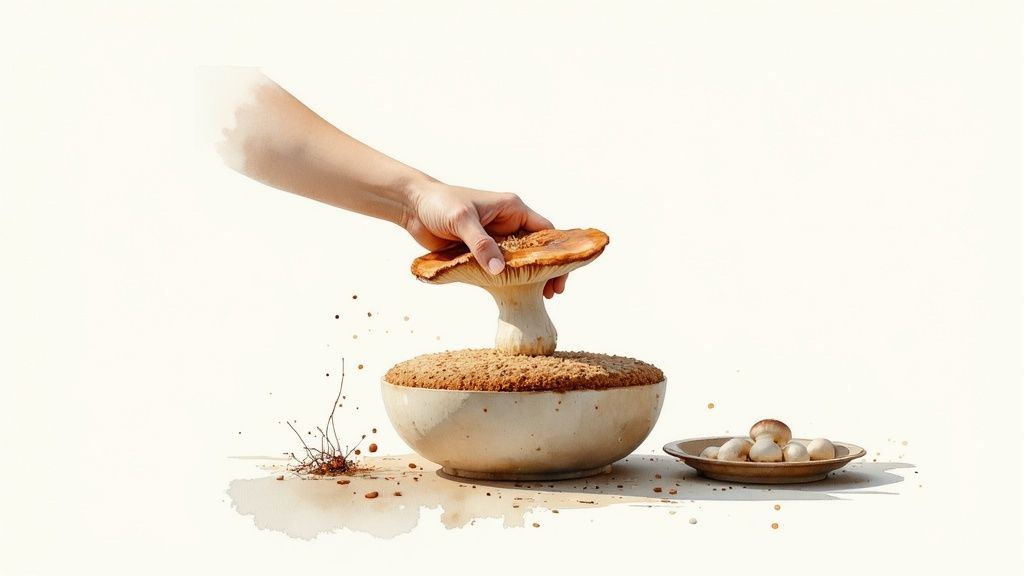
The Gentle Twist and Pull Technique
When your mushrooms are ready, the goal is to remove them without tearing up the underlying mycelium. Any damage to the substrate can slow down or even prevent subsequent harvests, so a gentle touch is essential.
The best method I've found is the classic "twist and pull." It's simple and effective.
- First, wash your hands thoroughly or put on a pair of sterile gloves.
- Grasp the base of the mushroom stem, getting as close to the substrate as you can.
- Gently twist the mushroom while pulling upwards. It should pop right off with a satisfying little pluck.
A quick word of advice: avoid cutting the mushrooms at the base with a knife. This leaves behind little stumps of stem that can easily rot and become a breeding ground for contamination, potentially jeopardizing your entire project.
Preserving Your Harvest
Fresh mushrooms have a very short shelf life, so proper drying and storage are vital if you want to preserve them. Your goal is to get them "cracker dry," which means they snap easily when you try to bend them. Any moisture left behind will lead to mold and a ruined harvest.
A food dehydrator set to a low temperature—around 95-115°F (35-46°C)—is by far the most efficient and reliable method. It provides consistent airflow and gentle heat, perfectly preserving the mushroom's integrity. If you don't have one, you can place them on a rack in front of a fan for a couple of days, though this takes longer and is far less consistent.
Once they're completely dry, store your mushrooms in an airtight container like a mason jar. Toss in a desiccant packet (the kind you find in vitamin bottles) to absorb any sneaky residual moisture. Kept in a cool, dark place, they will maintain their quality for a very long time.
Setting Up for the Next Round
One of the most rewarding parts of growing is getting multiple harvests, or "flushes," from a single substrate cake. After you've picked all the mushrooms from your first harvest, your mycelium cake is likely pretty thirsty and needs to be rehydrated.
To do this, simply submerge the entire cake in cool, clean water for 12-24 hours. You might need to use something to weigh it down so it stays fully underwater. This "dunking" process replenishes the water content the mycelium needs to produce another round of fruits.
After its soak, just place it back in your fruiting chamber and get back to your regular misting and fanning routine. With a little luck, you can often get two, three, or even more flushes from a single cake.
Answering Your Top Cultivation Questions
As you get your hands dirty in the rewarding world of mushroom cultivation, questions are definitely going to come up. It's totally normal. Having a quick, reliable answer can be the difference between a small learning moment and a grow-ending disaster.
This section is your go-to guide for those common "what if" and "how do I" moments. Think of it as having a seasoned grower in your corner, ready to help you troubleshoot and get the best possible results.
What Are The First Signs of Contamination I Should Look For?
Keeping a sharp eye on your jars and bags is the single best defense against contamination. Healthy, happy mycelium is a beautiful, bright, ropey white. Anything else is a red flag that you need to investigate immediately.
You'll want to be on the lookout for a few key signs:
- Weird Colors: Green, blue-green, or black spots are the classic giveaway for mold, usually the dreaded Trichoderma. If you see pink or orange streaks, that’s typically a bacterial problem.
- Off Textures: Is there a patch of gray, wispy, cotton-like fuzz that seems to be racing across your substrate? That's likely cobweb mold. Any areas that look slimy, wet, or gelatinous are also bad news.
- Funky Smells: Healthy mycelium has a clean, earthy scent, like fresh mushrooms. If you open a jar or bag and get hit with a sour, sweet, or rotten smell, you've got bacterial contamination. No question about it.
If you spot any of these intruders, get that contaminated jar or bag isolated right away. Don't hesitate. The goal is to stop it from releasing spores and infecting the rest of your projects.
How Can I Increase My Mushroom Yield?
Getting bigger harvests isn't about some secret magic trick. It's all about dialing in the fundamentals. Making small, smart adjustments to your process can lead to way bigger and more consistent flushes down the line.
Here’s where you should focus your energy:
- Great Genetics are Everything: Your harvest's potential is locked in from the very beginning. Always get your spores or liquid culture from a vendor with a solid reputation. Starting with strong, healthy genetics is half the battle.
- Nail Your Substrate Prep: Mycelium is picky about its home. Make sure your substrate is hydrated to "field capacity" – it should be damp enough to hold a drop of water when squeezed, but not dripping. The right moisture and nutrient balance is crucial.
- Perfect Your Fruiting Environment: This is where most people can make the biggest gains. You need to maintain consistently high humidity (around 90-95% RH), give your mushrooms plenty of fresh air exchange (FAE) to clear out CO2, and keep the temperature stable. This combo is what triggers big, healthy pins.
Here's a pro tip for bigger yields: Be patient and wait for 100% substrate colonization before you even think about introducing fruiting conditions. Rushing this step exposes uncolonized areas, which is like rolling out the welcome mat for contamination and always leads to smaller, weaker flushes.
How Long Does The Entire Process Take From Spore to Harvest?
Mycology teaches patience above all else. The journey from a microscopic spore to a mature mushroom isn't instant, and the exact timeline can shift based on the strain you're growing and your specific environmental conditions. Still, having a general roadmap helps you know what to expect.
Here’s a rough breakdown of a typical grow cycle:
- Inoculation to Colonization: This is the longest stretch. After you've inoculated your grain jars or bags, it'll generally take 3 to 5 weeks for the mycelium to completely take over. Keeping your temps in the sweet spot of 75-80°F (24-27°C) will help move things along faster.
- Pinning: Once your fully colonized substrate is moved to fruiting conditions, you should start to see the first little baby mushrooms, or "pins," pop up within 5 to 14 days.
- Fruiting to Harvest: The moment you see pins, things speed up dramatically. Your mushrooms will likely be ready for harvest just 5 to 7 days later.
All told, you can realistically expect to be holding your first harvest in about 6 to 8 weeks from the day you started.
What Is The Best Way to Store Mushroom Spores?
If you plan on doing this more than once, learning how to store your spores properly is key. Whether you're working with spore syringes or prints, the mission is simple: protect them from their three biggest enemies—light, heat, and moisture.
For long-term storage, your refrigerator is the perfect place.
- Spore Syringes: Just keep them in a sealed plastic bag or container inside the fridge. Stored this way, they'll easily stay viable for 6-12 months, and often much longer.
- Spore Prints: These are even more durable. Folded up and sealed in a Ziploc bag to keep them bone dry, a spore print can last for many years in the fridge.
One thing to remember: never freeze your spores. The ice crystals can tear the delicate spores apart. When you're ready to use them, just let the syringe or print sit out and come to room temperature before you start your sterile work. This prevents condensation from forming and introducing contaminants.
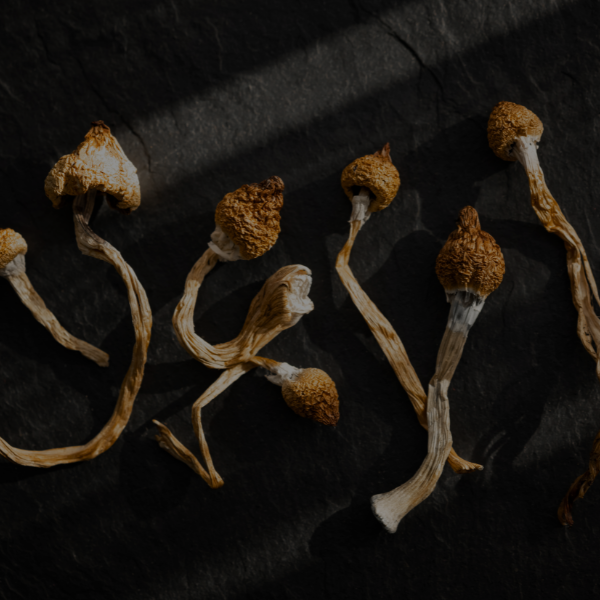
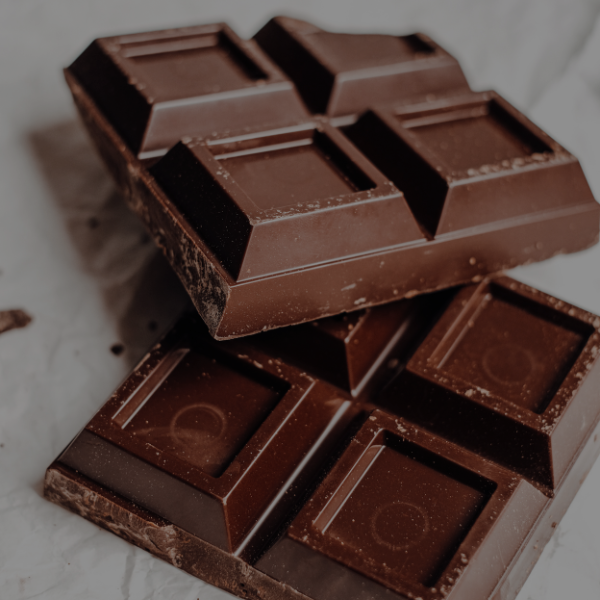
Ready to skip the cultivation process and explore high-quality mushroom products now? The Magic Mushroom Delivery offers a wide range of organic options, from chocolates and gummies to raw mushrooms, all delivered discreetly to your door.
Find your perfect product today at https://themagicmushroomdelivery.com.