Drying your harvest isn't just a suggestion—it's the most critical step for locking in the quality and potency of your Psilocybe cubensis. Think about it: fresh mushrooms are over 90% water. Getting that moisture out transforms a highly perishable crop into something stable and ready for long-term storage.
Why Proper Drying Is Everything for Potency
Harvesting your mushrooms is a huge milestone, but it's really only half the journey. The second you pick them, a clock starts ticking. The same biological processes that brought your mushrooms to life immediately begin working to break them down. Understanding why drying is so essential is the key to preserving the fruits of all your hard work.
The main goal here is to hit the pause button on natural decay. Fresh, wet mushrooms are a magnet for all sorts of environmental nasties.
- Bacterial Growth: That high water content is a five-star resort for bacteria. Leave them out, and you'll quickly have a slimy, unusable mess on your hands.
- Mold Contamination: Airborne mold spores are always looking for a damp place to land. It only takes a few days for fuzzy spots to appear, which not only ruins the batch but can be genuinely unsafe.
- Enzymatic Degradation: The mushroom's own enzymes get to work breaking down cell walls and, more importantly, the active compounds you're trying to preserve. This is a major source of potency loss.
Locking In the Active Compounds
Ultimately, the most important reason to dry your Psilocybe cubensis is to protect its precious alkaloids. These compounds are surprisingly fragile when exposed to oxygen and enzymatic activity in a wet environment. By removing the water, you effectively stop this degradation cold, locking in the potency at its peak.
This isn't just anecdotal grower wisdom; it's backed by solid science. A detailed stability study found that properly drying P. cubensis in a dark, room-temperature setting preserves the total tryptamine content remarkably well—showing no real reduction compared to fresh samples.
The research confirmed that after drying, concentrations stabilize at around 0.79 wt.% psilocybin and 0.01 wt.% psilocin. What does that mean for you? A simple air-drying method can maintain up to 100% of the alkaloids even after 15 months of proper storage. It's fascinating stuff, and you can dig into the psilocybin stability research yourself to see the data.
The bottom line is simple: wet mushrooms lose potency, fast. The "cracker dry" standard—where the mushroom snaps cleanly in half—isn't just a quaint term. It's the only way to be certain you've removed enough moisture to halt degradation in its tracks.
Drying is the crucial bridge between a successful harvest and a high-quality, stable final product. Without it, even the most perfectly cultivated mushrooms will degrade within days, losing the very properties that make them so valuable. For a deeper dive into these compounds, check out our guide on the differences between psilocin and psilocybin.
Comparing Practical Mushroom Drying Methods
Figuring out how you're going to dry your mushrooms can feel like a big decision, but it really just boils down to your goals and the gear you have on hand. There’s no single “best” way—only the right way for your specific situation.
Whether you're dealing with your very first harvest or processing a massive flush, understanding the trade-offs between speed, cost, and the final quality will help you make a solid choice. Let's break down the most common techniques so you can pick the perfect method every time.
The No-Cost Starting Point: Air Drying
If you're just starting out or only have a small batch to work with, air drying is the easiest and most accessible route. It costs nothing and uses one of nature's best tools: airflow. The whole idea is to simply spread your mushrooms out and let a gentle breeze do the heavy lifting of carrying away all that moisture.
All you really need is a well-ventilated space, ideally somewhere dark to protect those sensitive compounds from degrading in the light. A simple setup involves placing your mushrooms on a screen or rack and pointing a small fan in their direction—from a distance. The key is indirect airflow. You want to create a steady, gentle current moving around them, not blast them head-on.
This method is definitely slow and can take a few days, but it’s a great way to get most of the water out before a final finishing step. Just make sure to check on them daily and keep the humidity in your space low to stop any unwanted contaminants from crashing the party.
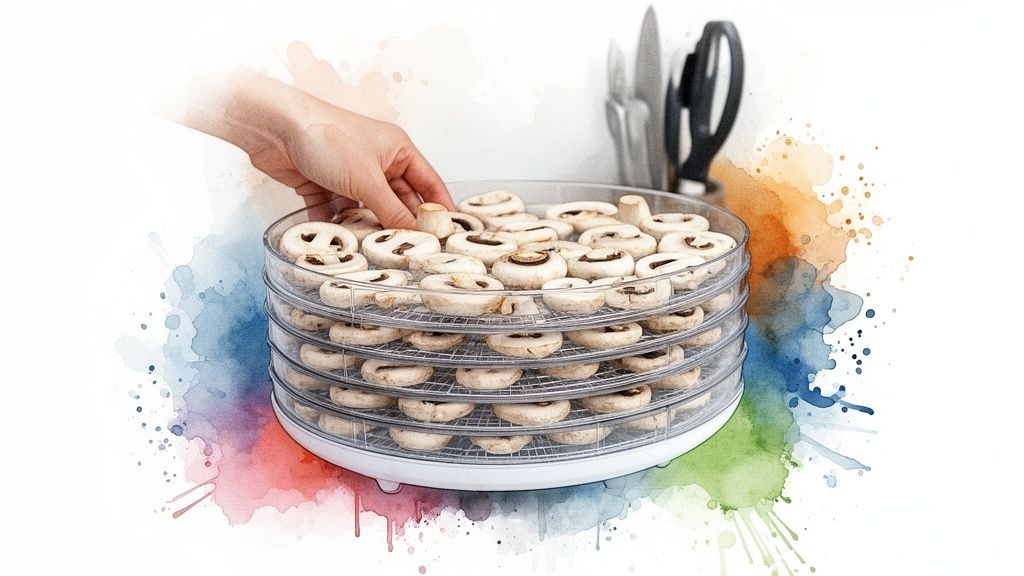
The Reliable Workhorse: Using a Food Dehydrator
When you need consistency and efficiency, a food dehydrator is the undisputed champ for drying psilocybe cubensis. These machines are literally built to circulate warm, dry air at a controlled temperature, making it a super reliable, hands-off way to get perfectly dried mushrooms, every single time. It just takes all the guesswork out of it.
A dehydrator is a lifesaver for bigger harvests where air drying just isn't practical. By setting a low temperature—usually between 95°F and 115°F (35°C to 45°C)—you can safely pull out moisture without risking heat damage to the active compounds. It's pretty much a set-it-and-forget-it approach that gives you cracker-dry results in 4 to 12 hours, depending on how big and dense your mushrooms are.
Pro Tip: Don't crowd the trays in your dehydrator. Giving each mushroom plenty of personal space ensures air can circulate freely around every surface, which means faster and more even drying.
This decision-making flowchart really sums up the choice you face right after harvest: preserve your mushrooms by drying them, or risk them spoiling.
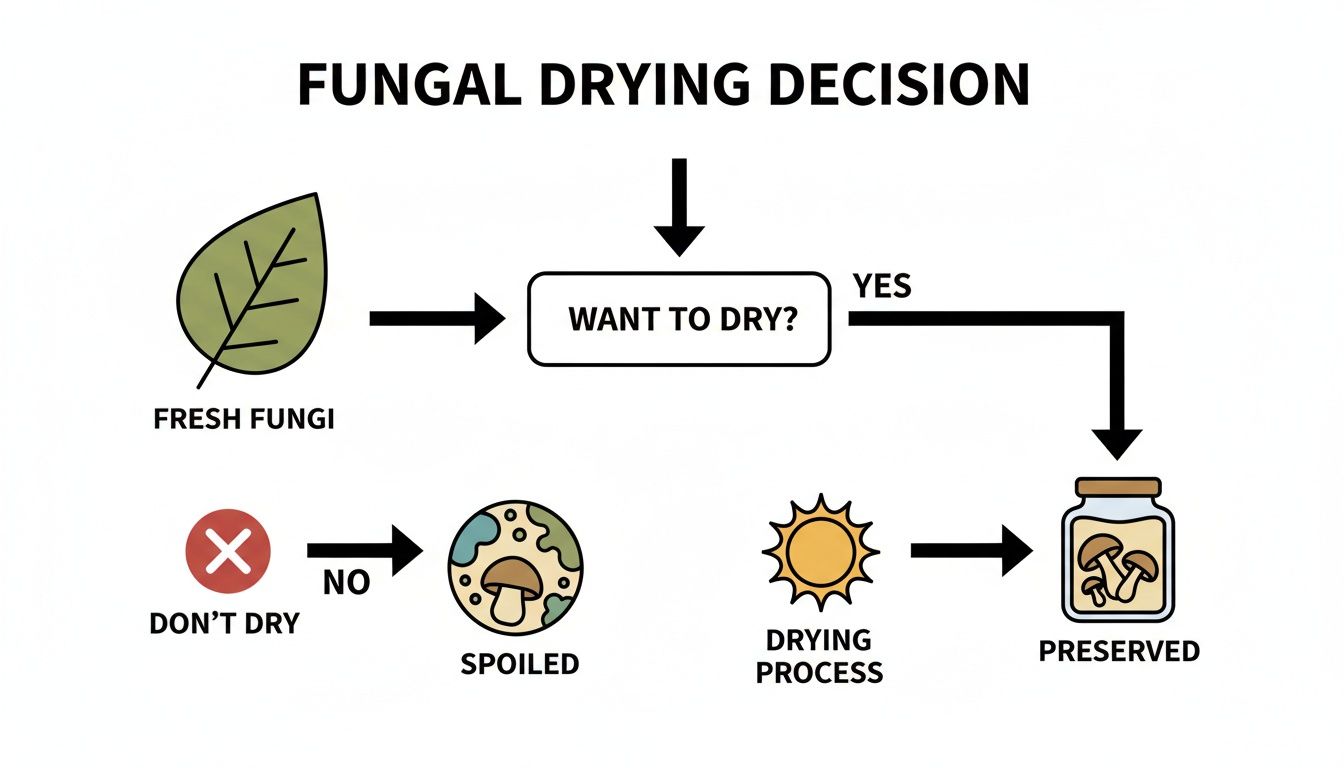
As you can see, drying is the only real path for long-term storage. It's what stops the clock on decay by getting rid of the moisture that fuels it.
Picking the right method depends entirely on what you're prioritizing. Here’s a quick table to help you compare the options at a glance.
Mushroom Drying Method Comparison
| Method | Cost | Drying Time | Potency Preservation | Best For |
|---|---|---|---|---|
| Air Drying | None | 2-5 days | Good | Small batches, beginners, pre-drying before finishing. |
| Food Dehydrator | Low to Moderate | 4-12 hours | Very Good | All batch sizes, consistency, reliability. |
| Desiccant Drying | Low | 1-2 days | Excellent | Finishing nearly-dry mushrooms to get them cracker-dry. |
| Freeze Drying | Very High | 24+ hours | The Best | Connoisseurs, commercial growers, maximum potency. |
Each method has its place. Your budget, timeline, and how much you value potency will ultimately point you in the right direction.
Finishing Touches with Desiccant Drying
Ever found one of those little "Do Not Eat" packets in a jerky bag or a bottle of vitamins? That's a desiccant, and it's an amazing tool for getting your mushrooms to that final, perfectly crisp state. Think of desiccant drying less as a primary method and more as a crucial finishing move.
After your mushrooms are mostly dry from the air or a dehydrator, they might still be holding onto a tiny bit of moisture. A desiccant, like food-grade silica gel, will pull out that last little bit. The process couldn't be simpler:
- Lay down a layer of desiccant at the bottom of an airtight container.
- Place a screen or rack over it so the mushrooms don't actually touch the desiccant.
- Arrange your almost-dry mushrooms on the rack.
- Seal it up tight and just wait a day or two.
This creates an incredibly dry environment inside the container, guaranteeing your mushrooms become truly cracker-dry and ready for long-term storage without any mold risk.
The Gold Standard: Freeze Drying
For those who put potency and appearance above everything else, freeze drying is the absolute pinnacle. The equipment is specialized and comes with a hefty price tag, but the results are second to none. The process, officially called lyophilization, involves freezing the mushrooms solid and then putting them in a strong vacuum to turn the ice directly into vapor.
This gentle technique avoids the cellular damage that can happen with heat-based methods. Research looking into different mushroom preservation techniques backs this up, showing that freeze drying is superior for maintaining both the structure and the bioactive compounds. That said, studies also show that dehydrators set at 35-40°C are excellent for practical purposes, producing mushrooms that rehydrate well with no loss of tryptamines when stored in the dark for up to 15 months. You can dive deeper into the science by checking out these mushroom drying findings.
The final product from a freeze dryer is an unbelievably light, porous mushroom that keeps its original shape, color, and a very high percentage of its active compounds.
Using a Food Dehydrator for Consistent Results
If you're after reliable, repeatable results every single time, a food dehydrator is the gold standard for drying psilocybe cubensis. This method takes all the guesswork out of the equation, creating a controlled environment that gently and efficiently pulls moisture from your harvest. For any grower who values consistency and wants to protect the quality of their mushrooms, it's really the only way to go.
A food dehydrator is a pretty simple device—it's basically a container that circulates low, steady heat. This constant, gentle airflow is the secret to its success, making sure every mushroom dries perfectly evenly from the cap all the way down to the stem. If you're dealing with more than just a small handful of mushrooms, a dehydrator is a massive time and effort saver compared to just air drying.
Setting Up for Success
Getting started is easy, but a few small details can make a world of difference in your final product. First things first: preparing the mushrooms. You absolutely do not need to wash them. In fact, adding more water is the very last thing you want to do.
A quick, gentle brush-off with a soft brush or a wipe with a paper towel is all you need to get rid of any substrate clinging to the base. For bigger, denser mushrooms, some growers like to slice them in half lengthwise to speed things up, but this is totally optional for most cubensis strains. Once they're clean, you can learn more about how to prepare magic mushrooms for different uses in our other guide.
Now, it's time to arrange the mushrooms on the dehydrator trays. The number one rule here is to avoid overcrowding. Airflow is everything.
- Give Them Space: Place each mushroom with enough room around it for air to circulate freely. Think social distancing for fungi.
- Don't Overlap: Make sure no mushrooms are touching or piled up. This traps moisture and leads to frustratingly uneven drying.
- Uniformity Helps: If you have a mix of big and small shrooms, try grouping them by size on different trays. The little guys will be done much faster than the big ones.
Finding the Perfect Temperature
The single most critical setting on your dehydrator is the temperature. The active compounds in Psilocybe cubensis are heat-sensitive, and blasting them with high temperatures is a guaranteed way to kill their potency. You want to go low and slow.
Set your dehydrator somewhere between 95°F and 115°F (35°C to 45°C). This is the sweet spot that pulls out the water without cooking the mushrooms or significantly degrading their precious alkaloids. Cranking the heat any higher is a common rookie mistake that you definitely want to avoid.
Research has shown that temperatures over 50°C (122°F) can cause a 10-15% loss of active compounds. On the flip side, sticking to a low-temp method not only preserves potency but can also improve the mushrooms' ability to rehydrate by 15-20%—perfect if you plan on making teas or edibles later.
This need for careful temperature control is exactly why a dehydrator is so much better than an oven, which almost never holds a temperature that low and steady.
Knowing When They Are Done: The Cracker Dry Test
So, how long is this going to take? Drying time can vary a ton, usually falling somewhere between 4 to 12 hours. It all depends on a few things:
- The size and thickness of your mushrooms.
- The humidity in the room.
- Your specific dehydrator model.
Because there are so many variables, you can't just set a timer and walk away. The real test of doneness is what we call the "cracker dry" standard. A perfectly dried mushroom should be completely brittle. When you try to bend it, it should snap cleanly in two, just like a saltine cracker.
If it bends, feels leathery, or has any give at all, it’s not done. That little bit of flex means there's still moisture hiding inside, and moisture is the mortal enemy of long-term storage. Toss it back in the dehydrator and check again in another hour or two. Only when every last mushroom passes the snap test is your batch truly finished and ready for storage. This last step is what ensures all your hard work pays off for months to come.
Mastering Air Drying and Desiccant Techniques
Got a fresh harvest but no dehydrator? No problem at all. Some of the most tried-and-true methods for drying psilocybe cubensis don't rely on expensive gear, just a little bit of patience and a solid understanding of how air and humidity work. When done right, these low-tech approaches deliver perfectly preserved mushrooms every time.
First things first, let's talk about air drying. The initial goal is to get the bulk of the water out of the mushrooms. And there’s a lot of it—fresh mushrooms are up to 90% water by weight. All you really need is a well-ventilated space, a basic fan, and something to lay the mushrooms on, like a screen or a rack.
The real secret to successful air drying is creating an environment with consistent, gentle airflow in total darkness. Why dark? Because light is the enemy of potency; it can degrade the very compounds you're trying to save. A closet or a seldom-used dark room is perfect for this.
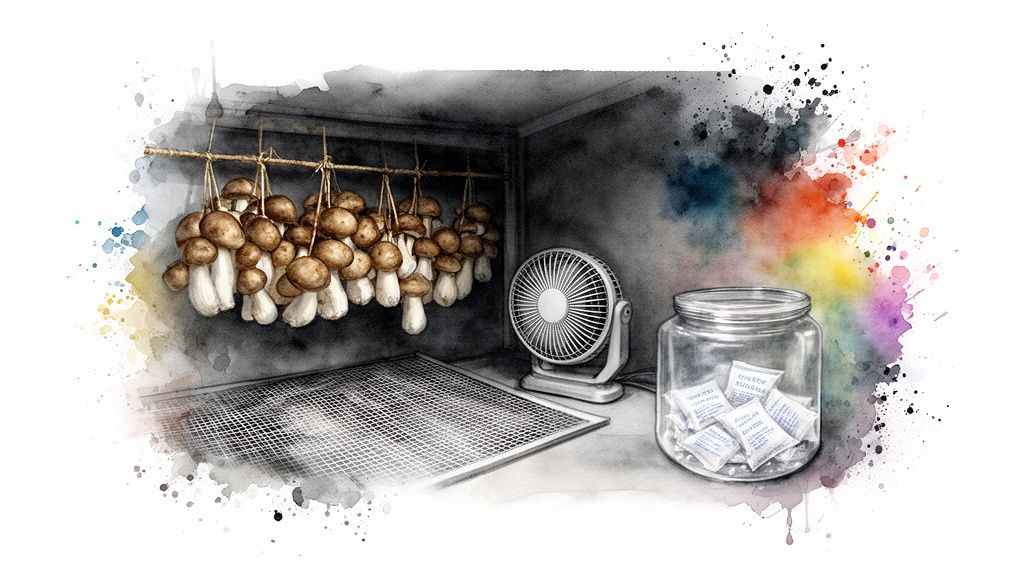
Setting Up Your Air Drying Space
Getting set up is incredibly simple. Spread your mushrooms out on a screen, a wire cooling rack, or even a piece of cardboard you've poked a bunch of holes in. The absolute most important part is making sure air can circulate freely around every single mushroom, top to bottom. Don't let them touch or pile up, because that just traps moisture and leads to soft spots that never seem to dry.
Next, place a small fan a few feet away from your rack. The idea is to create a gentle, indirect breeze that keeps the air moving, not a wind tunnel that might bruise or damage them. Just let it run for about two to four days, checking in on them every so often. You’ll know this first phase is done when they've shrunk considerably and feel leathery, but not wet.
Remember, air drying alone will almost never get your mushrooms to the 'cracker dry' state. It's a fantastic first step, but it's the finishing move that truly preserves them for long-term storage.
The Desiccant Chamber Finishing Move
Okay, so your mushrooms are mostly dry. Now it's time to bring in the secret weapon: desiccant. A desiccant is any material that aggressively sucks moisture right out of the air. This is how you pull out that last bit of stubborn water to get that perfect, brittle texture. For this job, food-grade silica gel packets are king—they're cheap, effective, and easy to find.
To finish the job, you'll create a "desiccant chamber." It sounds fancy, but it’s just an airtight container where the desiccant can do its thing in an enclosed space.
Here’s how to throw one together:
- Pick a Container: Find a large, truly airtight container. A big Tupperware-style tub with a good sealing lid or a large glass jar works great.
- Lay Down the Desiccant: Pour a thick layer of silica gel beads or toss a bunch of packets into the bottom. Don't be shy with it.
- Create a Barrier: Place a wire rack or a piece of screen mesh on top of the desiccant. This is non-negotiable—the mushrooms must not touch the desiccant directly.
- Load 'em Up: Arrange your air-dried mushrooms in a single layer on the rack.
- Seal and Wait: Snap that lid on tight and stash the container in a cool, dark spot for another 24 to 48 hours.
Inside that chamber, the desiccant will create an ultra-dry environment, pulling every last bit of moisture from your mushrooms until they're completely brittle. Check on them after a day. When you can snap one and it breaks with a clean, audible crack, they are perfectly preserved and ready for storage. This two-step process is a powerful, budget-friendly way to lock in potency and ensure your harvest lasts.
Proper Storage to Preserve Maximum Potency
Getting your mushrooms perfectly cracker-dry is a huge milestone, but the job isn't quite finished. All that careful work you put into drying psilocybe cubensis can go to waste in just a few weeks if you don't store them correctly.
Think of your dried harvest as a delicate treasure that needs protection from its three mortal enemies: oxygen, light, and moisture. Each one actively degrades the sensitive compounds you’ve worked so hard to preserve. Light breaks them down, oxygen oxidizes them, and any hint of moisture invites mold and bacteria right back into the picture.
The Foundation of Good Storage
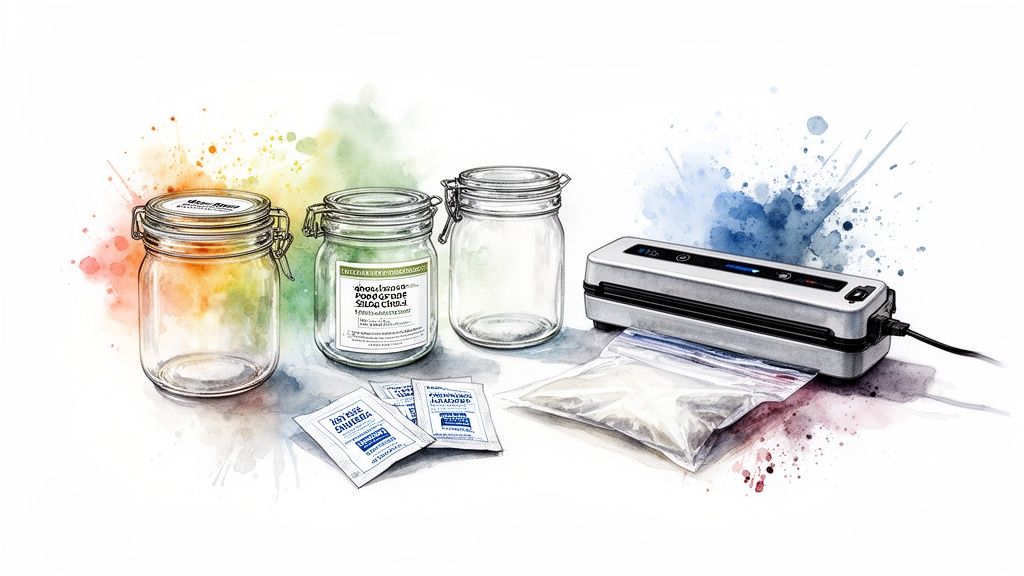
The go-to method for most growers is the simple, effective airtight glass jar—a classic Mason or canning jar is perfect. Glass is the ideal material because it's non-porous, meaning it won't let any air or moisture creep in over time.
Once your jar is full, just tuck it away in a cool, dark, and dry place. A pantry shelf or the back of a closet works great. This simple step alone is a solid defense against light and any new moisture.
But what about the air you trapped inside? That air is about 21% oxygen, which is more than enough to slowly chip away at potency. For short-term storage, say a month or two, this is totally fine. For anything longer, you'll want to step up your game.
If you want to dive deeper into keeping your harvest in prime condition, check out our detailed guide on the best way to store shrooms.
Upgrading Your Preservation Game
For serious long-term preservation, you need to actively control the environment inside that jar. This means adding a couple of cheap but incredibly powerful tools to your kit: desiccant packets and oxygen absorbers.
- Food-Grade Desiccant Packets: Think of these as your anti-moisture insurance. Even a tiny bit of humidity can make your mushrooms lose their snap and risk contamination. Tossing one or two of these into your jar will suck up any leftover moisture and keep things bone-dry.
- Oxygen Absorbers: This is the real game-changer for long-haul potency. These little packets are filled with iron powder that reacts with the oxygen in the jar, effectively removing it. An oxygen-free environment slows the degradation of the good stuff to a crawl.
Combine an airtight jar with these two additions, and you’ve created a nearly perfect preservation vault. Your mushrooms are now safe from all three of their enemies, keeping them fresh and powerful for a year or even longer.
Pro Tip: When you add an oxygen absorber to a sealed Mason jar, you might notice the lid suck down and "ping" after a day or two. That’s a fantastic sign! It means the absorber has done its job and created a partial vacuum.
The Ultimate Method: Vacuum Sealing
If you're looking for the absolute gold standard of preservation, vacuum sealing is the answer. A vacuum sealer pulls virtually all the air out of the storage bag before sealing it shut, locking in freshness and potency like nothing else.
Vacuum-sealed bags are also completely lightproof and moisture-proof, and they can be tossed in the freezer for years with minimal loss of quality.
The only potential hiccup is that the vacuum process can sometimes crush more delicate mushrooms. An easy workaround is to place your mushrooms in a glass jar first, then vacuum seal the entire jar inside a larger bag. This gives you the best of both worlds: crush protection from the jar and a perfect, oxygen-free seal from the bag.
Common Questions About Drying Psilocybe Cubensis
Even when you follow the steps perfectly, questions always pop up when you're drying psilocybe cubensis. This section is your go-to for troubleshooting the most common issues and making sure you get it right.
Think of it as the final check-in to guarantee all your patience and hard work pays off with a perfectly preserved harvest.
How Do I Know When My Mushrooms Are Perfectly Dry?
The gold standard is what growers call "cracker dry," and it's meant to be taken literally. A perfectly dried mushroom should be completely brittle, with zero flexibility.
Try to bend the stem. If it snaps cleanly with a satisfying crack, you're golden. But if it bends, feels even slightly leathery, or has any give, it’s not done. It still has moisture inside and needs more time. Even a tiny bit of water is an open invitation for mold during storage, so this test is absolutely non-negotiable.
Is It Safe to Use an Oven to Dry Mushrooms?
Honestly, we'd strongly advise against using a conventional oven. The biggest problem is the lack of reliable temperature control. Preserving the sensitive compounds in your mushrooms requires a consistently low heat, and most ovens are terrible at that.
Even on the lowest setting, ovens tend to have wild temperature swings, easily spiking high enough to cook and degrade the active compounds. This will absolutely nuke the potency of your final product. A food dehydrator or even just patient air-drying is a much safer, more reliable bet.
Key Takeaway: The heat instability in a regular oven is a massive risk to potency. You need a controlled, low-temperature environment, which makes a dehydrator the far superior choice for getting consistent, quality results.
Why Did My Mushrooms Turn Blue While Drying?
Seeing your mushrooms get blue or bluish-green spots can be a little alarming the first time, but it’s actually a great sign. This "blue bruising" is just a natural chemical reaction when the active compounds hit the oxygen in the air, usually from being handled or picked.
It is not mold or any kind of spoilage. In fact, a lot of growers see it as a visual confirmation of potency. The bruising can even become more obvious as the mushrooms shrink down and dry, so don't sweat it if you see it happening.
Can I Dry My Mushrooms in Direct Sunlight?
Sun drying is another method to avoid at all costs. It might seem like an easy, natural way to get the moisture out, but direct sunlight is your enemy here. The sun’s UV rays are notorious for rapidly breaking down psilocybin and other important alkaloids.
Leaving your harvest out in the sun will drastically reduce its potency. For the best results, always dry your mushrooms in a dark, or at least very dimly lit, place where you can control the airflow and keep them safe from light damage. A little patience in the dark goes a long way in preserving the quality you worked so hard to cultivate.
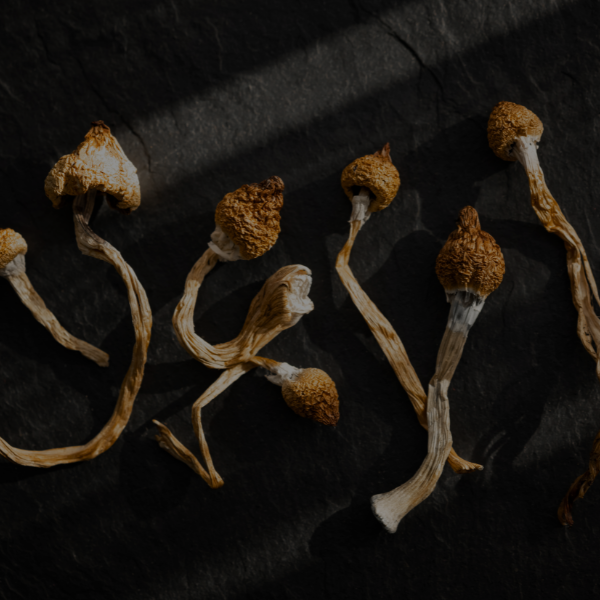
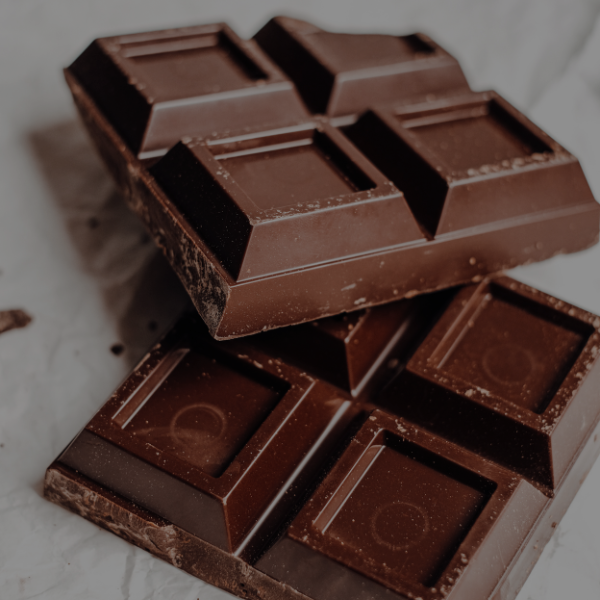
Ready to explore a curated selection of high-quality mushroom products? At The Magic Mushroom Delivery, we offer everything from infused chocolates to premium dried mushrooms, all delivered discreetly to your door. Discover your next favorite at https://themagicmushroomdelivery.com.