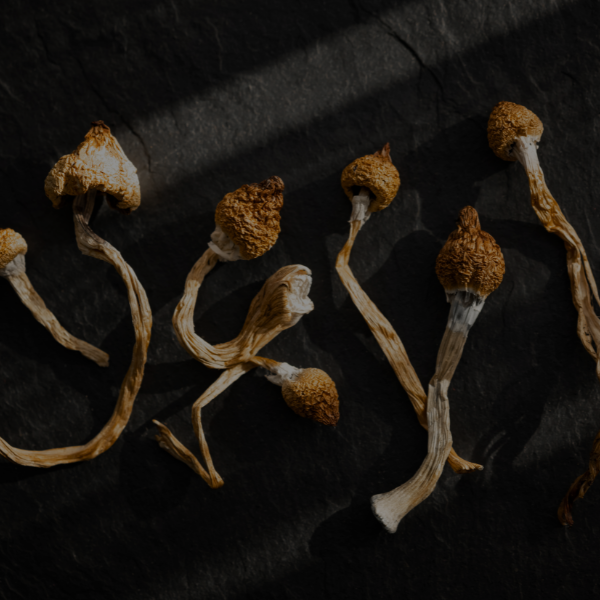
You absolutely have to dry your magic mushrooms after harvesting. There’s really no way around it. Fresh mushrooms are over 90% water, and that moisture is a ticking clock, inviting spoilage and destroying the very compounds you’re trying to preserve.
Proper dehydration is the single most important step for long-term storage. It’s what ensures your harvest stays potent and safe for whenever you plan to use it. Skip this, and you’ll have a moldy, degraded mess in just a few days.
Why Dehydration Is So Critical for Potency and Preservation
Think of freshly picked mushrooms like any other fresh produce. Their high water content makes them a perfect home for mold and bacteria, leading to rapid decay. Dehydrating your shrooms isn't just a good idea—it's an essential process that slams the brakes on degradation, effectively locking in their potency.
It's a lot like drying fresh herbs from your garden. If you leave them on the counter, they wilt and rot within days. But once they're properly dried, they can be stored for months, even years, without losing their essence. The same principle applies here, but instead of preserving flavor, you’re preserving the delicate psychedelic compounds.
The Science of Preservation
The whole point of dehydration is to create an environment where microbes simply can't survive. By getting rid of nearly all the water, you halt the biological processes that cause everything to break down. This simple technique delivers two huge benefits:
- Protecting Potency: The active compounds in magic mushrooms are fragile. They break down when exposed to air, light, and enzymatic activity in a moist environment. Drying stabilizes these compounds, protecting their integrity over the long haul.
- Massive Longevity: Properly dried mushrooms can last for a year or even longer when stored correctly. Fresh ones? You're lucky to get a week before they turn to mush. This gives you a stable, reliable supply without any rush.
We’ve created the following table to break down the key benefits of dehydrating your magic mushrooms.
Key Benefits of Dehydrating Magic Mushrooms
| Benefit | Description |
|---|---|
| Potency Preservation | Drying locks in the psilocybin and psilocin, preventing the rapid degradation that occurs in fresh, moist mushrooms. |
| Long-Term Storage | Dehydrated mushrooms can be stored for a year or more, while fresh ones spoil in less than a week. |
| Mold & Bacteria Prevention | Removing water eliminates the breeding ground for contaminants, ensuring your supply is safe to consume. |
| Accurate Dosing | Dried mushrooms have a consistent weight, making it much easier to measure precise, reliable doses. |
In short, taking the time to dry your harvest is non-negotiable if you care about safety, potency, and consistency.
Scientific studies back this up completely. One detailed stability study found that fresh mushrooms lost up to 94% of their psilocybin compared to samples that were dried immediately and stored in the dark. That's a staggering loss.
Key Takeaway: Dehydration is the foundation of preserving your harvest. It transforms a highly perishable fungus into a stable, long-lasting product by removing the water that fuels decay and kills potency.
Comparing Fresh and Dried Mushrooms
The difference is night and day. Fresh mushrooms are bulky, fragile, and a nightmare to dose accurately because their water weight is all over the place. Dehydration concentrates everything, making them light, sturdy, and incredibly easy to weigh for precise measurements. If you're curious about the nitty-gritty, you can learn more in our guide on whether shrooms lose potency over time.
This process is the critical bridge between a successful harvest and a well-preserved final product. Understanding why it’s so important is the first step to mastering the techniques that will keep your mushrooms perfect from the moment you pick them.
Choosing Your Ideal Dehydration Method
Picking the right technique to dry your magic mushrooms is a huge deal. It directly impacts the quality and potency of your final stash. The goal is always the same—get the water out to lock in the magic—but how you get there depends on your budget, how many you're drying, and how much hands-on control you want. Each method comes with its own set of pros and cons.
This quick visual guide can help you map out your plan, whether you're preserving a harvest or prepping for immediate use.
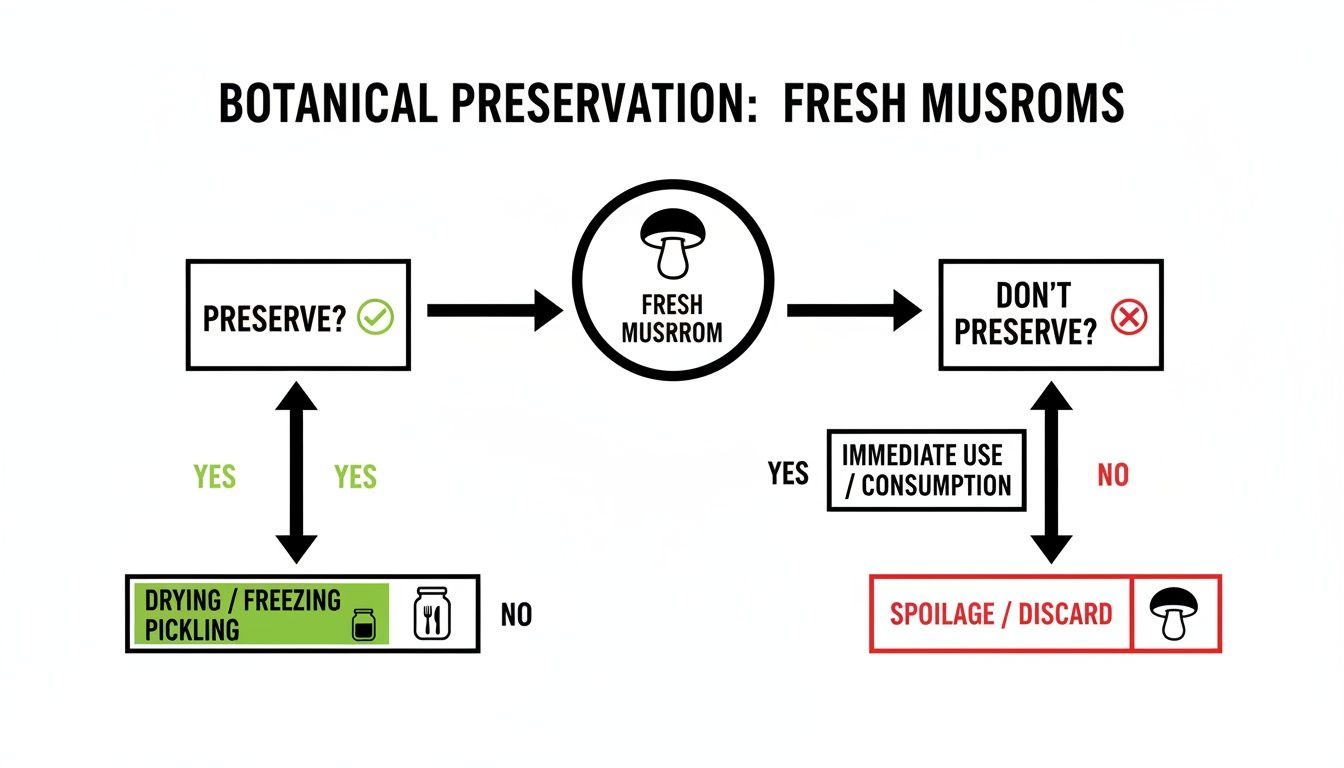
As you can see, if you're not using them right away, preservation is your next move. So, let's dive into the best ways to get it done.
The Food Dehydrator: The Gold Standard
If you're serious about getting consistent, high-quality results every single time, a food dehydrator is the undisputed champ. These machines are built for one thing: circulating low, steady heat for perfectly even drying. That's exactly what you need when you're dealing with delicate psychedelic compounds.
A good dehydrator gives you precise temperature control, letting you dial it into the sweet spot of 95–115°F (35–45°C). This precision is everything for protecting potency. The constant airflow also guarantees every part of the mushroom dries uniformly, so you don't end up with damp spots that could grow mold later.
Sure, it's an upfront investment. But if you plan on drying mushrooms more than once, the cost is easily worth it for the flawless, predictable outcome.
The Low-Heat Oven Method
No dehydrator? Your kitchen oven can work in a pinch, but you have to babysit it. The biggest challenge is that most ovens just aren't built to hold temperatures this low. Even the lowest setting can be too hot, which risks degrading the active compounds.
To pull this off, you absolutely must set your oven to its lowest possible temperature. You'll also need to prop the door open with a wooden spoon or something similar to let moisture escape and keep the heat from building up. An independent oven thermometer is non-negotiable here; you need to know the actual temperature inside.
Pro Tip: If your oven has a convection fan, use it. The moving air helps mimic a dehydrator's airflow, speeding things up and promoting more even drying. Just lay your mushrooms out on a baking sheet lined with parchment paper.
This method is basically free if you have an oven, but it's way less efficient and comes with a much higher risk of cooking your mushrooms. Think of it as a decent backup plan, not your first choice.
Desiccant Drying for Small Batches
The desiccant method is a completely passive, no-heat approach that's perfect for tiny batches. It involves using a drying agent, like food-grade silica gel packets, to slowly pull moisture from the mushrooms inside an airtight container. Because there's zero heat, it's incredibly gentle and preserves the compounds exceptionally well.
Here’s the simple setup:
- Lay down a layer of desiccant at the bottom of an airtight container.
- Place a wire rack or screen on top of the desiccant.
- Arrange your mushrooms on the rack, making sure they don't touch the desiccant itself.
- Seal it up tight and stick it in a dark closet or cabinet.
The major drawback here is time. This method can take several days, sometimes more than a week, to get your mushrooms truly "cracker-dry." It's best for finishing off mushrooms that are already partially air-dried or for preserving a handful from a small harvest. For anything more than that, it's just not practical.
For a side-by-side look at how these methods stack up, check out the comparison chart below. It breaks down the key differences to help you decide which one is right for your situation.
Dehydration Method Comparison Chart
| Method | Best For | Temperature Control | Drying Time | Potency Preservation |
|---|---|---|---|---|
| Food Dehydrator | Anyone wanting consistent, reliable results for any batch size. | Excellent, highly precise. | 4-12 hours | Excellent |
| Low-Heat Oven | Small, one-off batches when a dehydrator isn't an option. | Poor; requires constant monitoring. | 4-8 hours | Good to Fair (risk of degradation) |
| Desiccant Drying | Very small batches or finishing partially dried mushrooms. | Not applicable (no heat). | Several days to a week+ | Excellent |
Ultimately, the best method is the one that fits your needs and gives you a final product you can trust. Each path leads to a well-preserved harvest, but the journey there looks a little different.
And remember, drying is just one part of the process. If you're curious about other ways to work with your harvest, you might find our guide on how to prepare magic mushrooms useful.
Using a Dehydrator for Flawless Results
If you're serious about getting perfectly preserved mushrooms, a food dehydrator isn't just a good idea—it's the only way to go. Forget all the other hacks. This is the gold standard because it gives you absolute control over temperature and airflow, the two things that matter most for protecting potency. Other methods can be a total crapshoot, but a dehydrator is a reliable, set-it-and-forget-it tool for getting perfectly dried shrooms every single time.

The real magic is in the precision. A decent dehydrator holds a low, steady heat, so you never accidentally cook your harvest and destroy the good stuff. Plus, the built-in fan keeps the air moving, pulling moisture out evenly from every mushroom on every tray. That consistent environment is exactly how you get that perfect "cracker-dry" texture without sacrificing quality.
Prepping Your Mushrooms for the Dehydrator
Before you even plug the machine in, a little prep work makes a huge difference. The goal here is clean, uniformly sized pieces that will all dry at the same pace. Whatever you do, don't wash your mushrooms under the tap. They're like little sponges and will soak up water, which will seriously extend your drying time.
Instead, here’s what you do:
- Get Them Clean: Grab a soft-bristled brush (a pastry brush or even a new, soft toothbrush works great) and gently wipe off any substrate or dirt. If you have a stubborn spot, use a lightly damp paper towel, but make sure to pat the mushroom completely dry right after.
- Size Them Up: You can toss them in whole, but if you've got some bigger ones, slicing them into uniform pieces—about a quarter-inch thick—will really speed things up. It just helps ensure everything on the tray is ready at roughly the same time.
- Give Them Space: Lay the mushrooms out in a single layer on the dehydrator trays. Don't let them touch or overlap. Piling them up creates little moisture pockets and blocks airflow, which is the fast track to an uneven, disappointing result.
Taking a few extra minutes for proper prep really does set you up for success. It lets the dehydrator work its magic efficiently and gives you a much better final product.
Dialing In the Perfect Dehydrator Settings
The whole secret to preserving potency is a low-and-slow approach. High heat is public enemy number one for the sensitive compounds in magic mushrooms. You want to keep your dehydrator in the 95–115°F (35–45°C) range. Many models have a setting for "herbs" or other delicate foods, and that’s usually your sweet spot.
If your machine just has one high-and-mighty setting, it's a good idea to double-check the actual temperature with a separate thermometer. You want to be sure it’s not running too hot. Anything over 125°F (52°C) starts putting you in the danger zone for significant degradation. Trust me, patience is key here. A lower temperature over a longer time is infinitely better than trying to rush the job with more heat.
Research backs this up. While some commercial drying studies mention higher temperatures like 135–150°F, the consensus for home preservation of sensitive compounds consistently points to lower heat. This approach aligns with broader scientific findings on mushroom preservation, which show how carefully controlled drying parameters are crucial for quality.
This isn't just about getting water out; it's about actively protecting the mushroom's integrity.
Knowing When They Are Perfectly Dry
So, when are they actually done? You're looking for what everyone calls "cracker-dry." It means the mushrooms are so completely free of moisture that they snap clean in two when you try to bend them.
Here's how to be sure:
- The Snap Test: Grab one of the thickest pieces from the batch and try to bend it. Does it have any give? Does it feel leathery? It needs more time. It should break with a satisfying, crisp snap.
- No Sponginess: Give a mushroom a squeeze. There should be zero sponginess or soft spots. Any hint of give means there's still water hiding in there.
It's pretty common for smaller bits and stems to dry out faster than the big caps. You can pull those out as they're done or just wait for the largest pieces to pass the test. A word of advice: it’s always better to over-dry than under-dry. Even a tiny bit of moisture left behind can invite mold and ruin your entire batch in storage.
Once they all pass the snap test, switch off the dehydrator and let them cool down to room temperature completely before you put them in jars. This little step is crucial—it prevents condensation from forming inside your storage containers, making sure your perfectly dried mushrooms stay that way.
Mastering Long-Term Storage to Maintain Potency
You’ve successfully dehydrated your magic mushrooms—a huge milestone—but the job isn't quite finished. Proper storage is what truly locks in your hard work, making sure your harvest stays potent and safe for months, or even longer. Think of it like this: drying gets rid of the immediate threat (moisture), but storage protects against the slow-burn enemies of potency—oxygen, light, and any humidity that tries to sneak back in.
Without the right home, even perfectly cracker-dry mushrooms will slowly suck moisture from the air, eventually turning soft and spongy. That rehydration is an open invitation for degradation and spoilage. Luckily, setting up the perfect long-term storage is simple and only requires a few basic supplies.
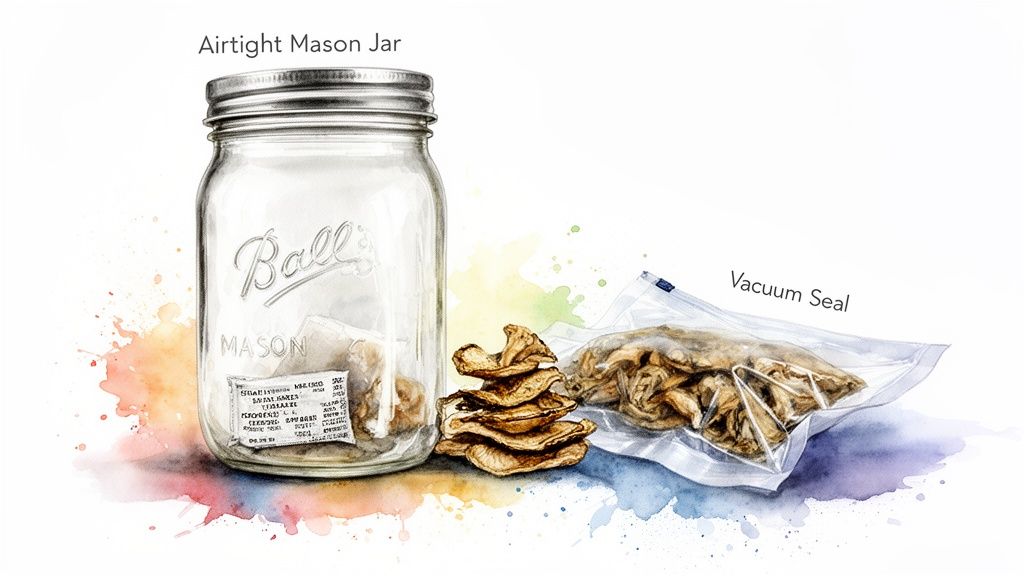
Choosing the Right Storage Container
Your number one goal here is an airtight seal. This is completely non-negotiable. It’s what keeps out both oxygen and ambient moisture, the two main things that will degrade psilocybin over time. You’ve got a couple of excellent, time-tested options that work like a charm.
Airtight Glass Jars
This is the classic choice for a good reason. Mason jars with two-piece canning lids are perfect because they create a fantastic, reliable seal. Just pack your fully cooled, dried mushrooms inside, leaving a little bit of room at the top.
- Darkness is Your Friend: Light is another factor that breaks down the active compounds. You can either tuck your clear glass jars away in a dark cupboard or closet, or level up with amber-colored jars that offer built-in UV protection.
- Pick the Right Size: Try to use a jar that’s just big enough for your batch. A half-empty jar means more trapped air, and that oxygen can contribute to oxidation over time.
Vacuum Sealing
For the absolute gold standard in long-term preservation, nothing beats a vacuum sealer. This method literally sucks almost all the oxygen out of the package, putting the mushrooms into a state of suspended animation.
If you’re planning to store your harvest for many months or even a year plus, investing in a vacuum sealer is a smart move. It offers the best possible protection against all the environmental bad guys.
Expert Tip: Whether you're using a jar or a vacuum bag, always toss in a food-grade desiccant packet (like the little silica gel packs you find in jerky). This is your insurance policy, absorbing any tiny bit of moisture left in the mushrooms or trapped in the container.
The Perfect Storage Environment
Once your mushrooms are sealed tight, where you put them is just as important as what you put them in. The ideal environment can be summed up in three simple words: cool, dark, and dry.
A kitchen cabinet, a dresser drawer, or a closet in a room with stable temperatures is perfect. You’ll want to avoid places with big temperature and humidity swings, like a garage, attic, or bathroom. When it comes to potency, stability is the name of the game.
Storage Do's and Don'ts
Here’s a quick-reference table to make sure you’re hitting all the best practices for storing your dehydrated magic mushrooms.
| Do This | Don't Do This |
|---|---|
| Use an airtight container like a Mason jar or vacuum-sealed bag. | Store them in a simple Ziploc bag, which is not truly airtight. |
| Add a food-grade desiccant packet to absorb any remaining moisture. | Forget to let mushrooms cool completely before jarring, which causes condensation. |
| Store in a cool, dark place with a stable temperature. | Leave them out on a counter where they are exposed to light. |
| Label your container with the strain and date of storage. | Mix different batches or strains in the same container. |
By following these simple storage rules, you can confidently preserve the quality and integrity of your mushrooms for a very long time. This final step ensures that all the care you put into growing and drying pays off, giving you a stable and reliable supply whenever you need it.
Dosing Dried vs. Fresh Shrooms: Why It Matters (A Lot)
If there's one thing that trips up newcomers, it's understanding the massive difference in potency between fresh and dried magic mushrooms. Nailing this concept is the secret to having a consistent, predictable, and safe journey every single time. It's why trying to eyeball a dose with fresh shrooms is a recipe for a wild ride, while using dried ones lets you be incredibly precise.
The reason for this huge shift is simple: water. A freshly picked mushroom is roughly 90% water by weight. The drying process gets rid of all that moisture, leaving you with a much lighter, more concentrated final product. It’s this concentration of the good stuff that makes dosing the two forms so wildly different.
The 10-to-1 Rule of Thumb
You’ll hear the "10-to-1 rule" thrown around a lot, and for good reason—it’s a fantastic starting point. The general guideline is that 10 grams of fresh mushrooms will dry down to about 1 gram of cracker-dry mushrooms.
Let's put that into a real-world context:
- Say you just harvested 20 grams of fresh mushrooms. You can expect to end up with something close to 2 grams once they're fully dried.
- On the flip side, if your goal is a 1.5-gram dried dose, you'd need to start with about 15 grams of freshies to get a similar effect.
This conversion is your new best friend if you're working with both fresh and dried shrooms. It’s the foundation for figuring out how much you’re actually taking. For a much deeper dive into how different doses translate to different experiences, check out our detailed psilocybin dosage guide.
Heads Up: The 10-to-1 rule is a great guideline, but it's not gospel. Things like the specific strain, how they were grown, and even the size of the mushroom can nudge the final weight one way or the other. Think of it as a solid estimate, not an exact science.
Your Digital Scale is Non-Negotiable
Because of those little variations, a reliable digital scale isn't just a nice-to-have; it's essential. It takes all the guesswork out of the equation, letting you measure your dose with pinpoint accuracy, right down to a tenth of a gram.
Trying to eyeball a dose is a classic rookie mistake. Mushrooms are all different shapes and densities—what looks like a small amount could pack a much bigger punch than you're ready for.
Using a scale gives you two huge advantages:
- Consistency: You can perfectly replicate an experience once you find a dose that works for you. No more guessing games.
- Safety: It’s the best way to make sure you don’t accidentally take way more than you intended, which helps ensure a comfortable and manageable journey.
Ultimately, dehydrating your mushrooms does more than just preserve them. It turns them into a stable, reliable product that you can dose with confidence. By understanding the 10-to-1 rule and always, always using a scale, you can approach every experience with control and the peace of mind that comes with it.
Common Questions About Dehydrating Mushrooms
Even with the best instructions, you’re bound to have questions when you start drying your own mushrooms. It's a hands-on process, and honestly, every batch seems to have its own quirks. To help you nail the finer points and troubleshoot any hiccups, I’ve put together the most common questions people run into.
These are the real-world issues that can mean the difference between a perfectly preserved harvest and a total loss. Getting these details right is how you build confidence and truly master the art of dehydration.
How Can I Tell If My Magic Mushrooms Are Fully Dehydrated?
The only real test for doneness is the texture. You’re looking for what we call "cracker-dry." This means the mushroom is so brittle and moisture-free that it literally snaps when you try to bend it. You should hear and feel a clean, crisp break.
If a mushroom bends at all, feels leathery, or has any kind of sponginess when you squeeze it, there’s still water trapped inside. Even a tiny bit of leftover moisture is a recipe for disaster in storage, creating the perfect breeding ground for mold that will ruin your entire jar.
The Foolproof Test: Grab one of the thickest mushroom stems or caps from your batch. If that single piece snaps cleanly, you can be confident that all the smaller bits are also perfectly dry. It's always, always better to over-dry them a little than to risk under-drying.
Is It Okay to Use a Higher Temperature to Speed Things Up?
I get it, it's tempting to crank up the heat to get things done faster. But this is probably the single biggest mistake you can make. The active compounds in magic mushrooms are delicate and will start to break down at higher temperatures. Patience is your best friend here.
Keeping your dehydrator in that sweet spot between 95°F and 115°F (35-45°C) is crucial for preserving as much potency as possible. Rushing the process with extra heat might dry them quicker on the outside, but you'll almost certainly sacrifice the quality and strength of your final product. Low and slow is the winning strategy, every time.
What Is the Best Way to Clean Mushrooms Before Drying?
Whatever you do, don't wash your mushrooms with water. They’re like little sponges and will soak up moisture instantly. This not only makes your drying time way longer but also dramatically increases the risk of them starting to rot before they’re fully dry.
The right way to do it is a dry clean. I use a soft-bristled brush—a pastry brush or even a new, soft toothbrush works great—to gently wipe away any substrate, vermiculite, or dirt. If you have a really stubborn spot, you can use a slightly damp paper towel, but make sure you pat the area completely dry right after. The goal is to get them clean without adding any moisture.
Why Did My Mushrooms Turn Blue After Handling Them?
Seeing your mushrooms turn blue or bluish-green can be alarming at first, but it’s completely normal. In fact, it's a good sign! This bruising is just a chemical reaction that happens when psilocin, one of the main active compounds, gets exposed to oxygen.
You’ll usually see it appear where the mushrooms were handled, cut, or picked. It can even become more obvious as they dry and shrink, concentrating the color. Think of it as a visual confirmation that your mushrooms contain the very compounds you’re trying to preserve. It has absolutely no negative impact on their potency or safety.
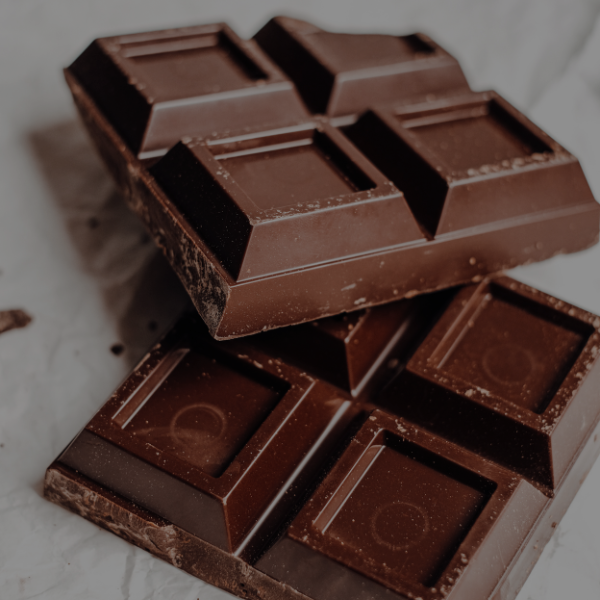
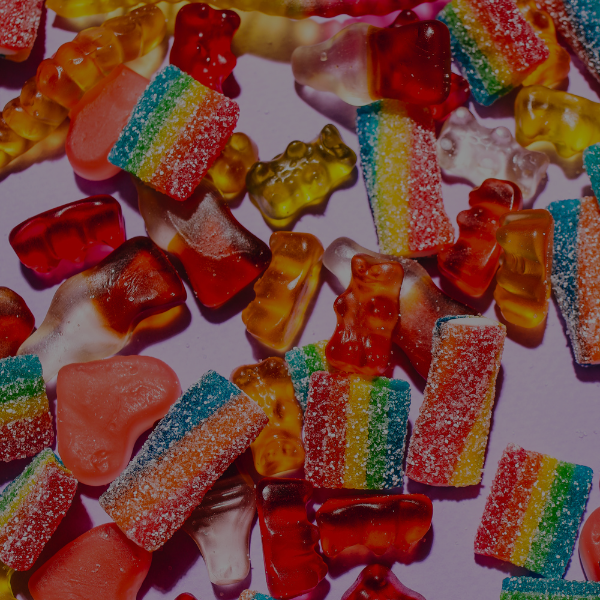
Ready to explore a curated selection of high-quality mushroom products? At The Magic Mushroom Delivery, we offer everything from premium dried mushrooms to chocolates and gummies, all delivered discreetly to your door. Browse our collection and find the perfect products for your wellness journey today at https://themagicmushroomdelivery.com.