There's something deeply satisfying about making your own mushroom-infused chocolates. It’s a process that puts you in the driver's seat, blending the simple joy of making candy with the intentional act of crafting a wellness product or a profound experience.
Why Make Your Own Mushroom Chocolate?
If you’ve found your way here, you’re likely curious about more than just a recipe. You're interested in the craft itself. The decision to start making mushroom chocolate at home usually comes from a desire for two things: total control and endless creativity.

The biggest win? Complete transparency. When you're the one making it, you know exactly what's in every single piece. You pick the chocolate, the mushrooms, and most importantly, the precise dose. This completely removes the guesswork and uncertainty that can come with buying pre-made edibles.
Control and Customization
Taking the DIY route unlocks a world of personalization that you just can't find on a store shelf. You’re not stuck with what’s available; you can create something perfectly suited to your own tastes and goals.
- Functional Focus: You could whip up a batch of daily wellness chocolates using functional mushrooms. Think Lion's Mane for a cognitive boost in the afternoon or Reishi to help you unwind in the evening.
- Intentional Experiences: For those exploring deeper, mindful journeys, using psilocybin mushrooms lets you craft chocolates for a specific purpose. You decide the potency, whether it's a subtle microdose or a more significant dose for a full experience.
- Flavor Profiles: This is where you get to play chef. A sprinkle of flaky sea salt, a dash of warm cinnamon, or even a hint of chili can elevate the dark chocolate and beautifully balance the earthy mushroom flavor.
This level of hands-on control guarantees a consistent, predictable, and enjoyable experience every single time. It's about crafting something that is truly and uniquely yours.
The real magic of making your own mushroom chocolate is in the process itself—the careful measuring, the patient melting, and the creative flair. It’s a hands-on craft that delivers a personalized and reliable result you can trust.
Your Guide to Safe and Accurate Crafting
Consider this guide your roadmap, whether you're just starting to get curious or you’ve been doing this for a while. Our goal is to arm you with all the knowledge you need to make your own mushroom chocolates safely, accurately, and enjoyably.
We'll walk through every critical detail, from picking the right ingredients and equipment to mastering the art of dosage calculation. By the time we're done, you'll feel confident enough to create your own high-quality, delicious, and effective mushroom edibles from scratch. Let's dive in.
Sourcing Your Ingredients And Gathering Essential Tools
Any good recipe starts with good ingredients, and that’s especially true when you’re making something as precise as mushroom chocolate. Using top-notch ingredients and the right tools isn't just about making something that tastes great; it's about making sure your final product is smooth, dosed correctly, and a pleasure to eat.

This whole process is pretty straightforward, but every little choice—from the mushrooms you pick to the chocolate you melt—will shape the final result. So, let's get into exactly what you’ll need to pull together before you start.
Selecting Your Mushrooms
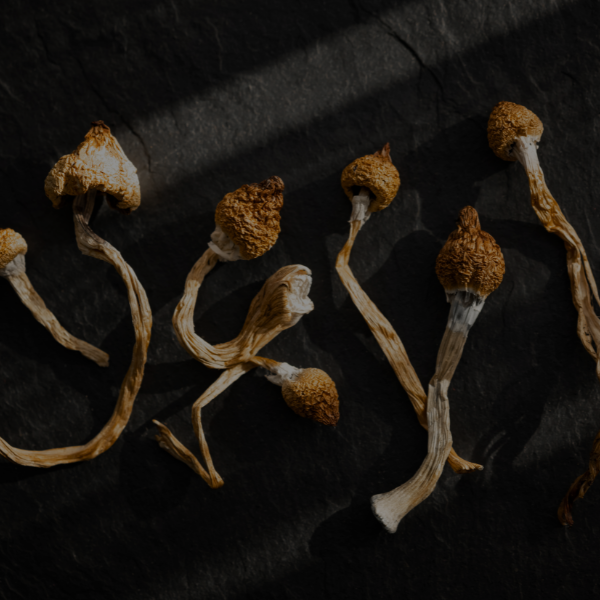
First thing's first: the mushrooms. What you choose here is entirely up to you and what you’re looking to achieve. You can go with functional mushrooms for a daily wellness boost or psilocybin mushrooms for a more intentional, profound experience.
No matter which type you pick, the prep work is the same, and it’s arguably the most important part of the entire process. Your mushrooms must be completely dry and ground into an ultra-fine powder.
I can't stress this enough. The number one mistake people make is ending up with gritty, sandy chocolate. To get that silky smooth, professional texture, you have to pulverize your dried mushrooms in a coffee or spice grinder until they’re as fine as flour.
This fine grind is what allows the mushroom powder to disappear into the melted chocolate, giving you that perfect mouthfeel and ensuring the dose is evenly distributed in every single piece.
Choosing The Right Chocolate
Once your mushroom powder is ready, it's time to pick your chocolate. You’ve got a few solid options, and each brings something different to the table when it comes to masking the earthy flavor of the mushrooms. These treats are exploding in popularity—the global market for mushroom chocolate hit an estimated USD 2.2 billion in 2025 and is expected to climb to USD 5.5 billion by 2033, largely thanks to adaptogenic varieties.
Here’s a quick rundown of your best bets:
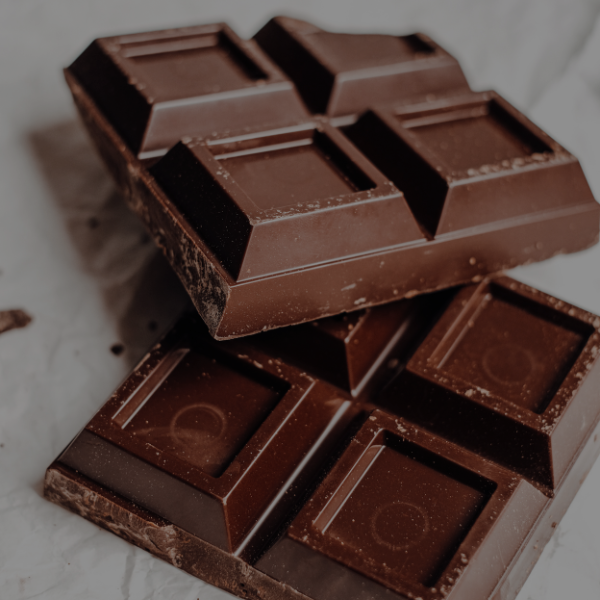
- Dark Chocolate (70% Cacao or Higher): This is my go-to recommendation. The strong, slightly bitter flavor is fantastic at covering up any mushroom taste. Plus, the high cacao content gives the finished chocolate a really satisfying "snap."
- Milk Chocolate: This one's for you if you have a sweet tooth. It’s creamier and sweeter, but its mild flavor won't hide the earthiness as well as dark chocolate does.
- White Chocolate: The sweetest option by far, white chocolate has no cocoa solids at all. It can work, but it offers almost no flavor-masking, so the mushroom taste will be more noticeable.
For the smoothest melt, I always reach for high-quality chocolate wafers or callets. They're made for melting and are so much easier to work with than trying to chop up a regular chocolate bar.
Essential Tools For The Job
You don’t need a bunch of fancy equipment, but a few specific tools will make your life a whole lot easier and your results way more consistent.
1. Digital Scale: This is non-negotiable. If you want a safe and consistent product, you have to be accurate. Get a digital scale that measures down to 0.1 grams, or even better, 0.01 grams. Do not eyeball your measurements, especially with the mushroom powder. It’s the only way to make batches that are reliable and repeatable.
2. Double Boiler: You have to melt chocolate gently to keep it from burning or seizing up. A double boiler is ideal, but you can easily rig one up yourself. Just set a heatproof bowl (glass or steel works best) over a saucepan with a bit of simmering water. The key is making sure the bowl doesn't touch the water.
3. Food-Grade Silicone Molds: Silicone molds are perfect for this. They're flexible, so you can pop your finished chocolates out without them breaking. Try to find molds with cavities that are all the same size—this is crucial for making sure every piece has the same dose.
4. Spatulas and Grinder: A good silicone spatula helps you stir everything together and scrape the bowl clean so nothing goes to waste. And, as I mentioned before, you’ll need a dedicated coffee or spice grinder to get your mushrooms into that super-fine powder.
How To Calculate Dosage For A Consistent Experience
When it comes to making your own mushroom chocolates, getting the dosage right is absolutely everything. This single step is what separates a predictable, enjoyable experience from a total guessing game. It's the key to crafting a subtle microdose for a creative boost or a more profound dose for a deeper journey. Accuracy is your best friend here.
Luckily, you don't need a math degree to get this right. The calculation is surprisingly simple and gives you complete control over the potency of every chocolate you create. It all boils down to careful measurement and making sure the magic is spread evenly.
The Simple Math For Perfect Dosing
The foundation for consistent homemade mushroom chocolates is a straightforward formula. By sticking to this, you can know the exact strength of each piece before you even think about pouring the chocolate.
Here’s the basic calculation:
(Total Weight of Mushroom Powder in Grams) ÷ (Total Number of Chocolates) = Dose Per Chocolate
Let's walk through a real-world scenario. Say you're using a chocolate mold that makes 14 individual pieces. You decide to infuse your melted chocolate with 7 grams of finely ground mushroom powder.
The math would look like this:
7 grams (mushroom powder) ÷ 14 (chocolates) = 0.5 grams per chocolate
Just like that, you know every single chocolate in your batch will contain a 0.5-gram dose. This kind of precision is what makes homemade edibles so reliable and trustworthy.
A Practical Dosage Guide For Your Chocolates
Understanding the calculation is one piece of the puzzle, but knowing what dose to aim for is another entirely. The "right" amount is deeply personal—it depends on your experience, body weight, and what kind of experience you're after.
To give you a solid starting point, we've put together a general guide for dosing your homemade chocolates.
Mushroom Chocolate Dosage Guide (Per Piece)
This table provides a general guideline for dosing your homemade chocolates. Potency can vary, so always start with a lower dose to assess your sensitivity.
| Dosage Level | Psilocybin Mushroom Amount (Grams) | Typical Experience |
|---|---|---|
| Microdose | 0.1g – 0.3g | Subtle, often sub-perceptual effects. May enhance creativity, focus, and mood without noticeable psychoactive feelings. |
| Creative Dose | 0.5g – 1.0g | A noticeable shift in perception. Expect mild euphoria, enhanced sensory experiences, and a boost in creative thinking. |
| Journey Dose | 1.5g – 3.0g+ | A significant psychedelic experience. May include strong visual patterns, deep introspection, and a profound sense of connection. |
This table can help you plan your batches. For instance, if you wanted to make chocolates with a 1-gram "creative dose" and your mold has 10 cavities, you'd need to add 10 grams of mushroom powder to your recipe. If you're new to all this, diving into a comprehensive psilocybin dosage guide can offer even more detail to help you find your sweet spot.
Why You Must Always Start Low And Go Slow
You'll hear this advice repeated over and over for a simple reason—it’s the golden rule of responsible consumption. If you're trying a new mushroom strain or it's your first time with homemade edibles, you have no baseline for how your body will react.
The "start low, go slow" principle is your safety net. You can always eat another piece of chocolate later, but you can never undo eating too much. Give your body time to respond before deciding if you want more.
A good rule of thumb for your first time with any new batch is to start with just half a piece. Wait at least 90 minutes to two full hours to see how you feel. Edibles take much longer to kick in than other methods, and it's all too easy to get impatient and take more too soon, leading to an uncomfortably intense experience.
By respecting the process and starting conservatively, you set yourself up for a positive, controlled, and amazing time with your homemade treats. This careful approach is the mark of a smart and responsible creator.
Crafting Your Chocolates From Start To Finish
You’ve got your ingredients, and you know your numbers. Now for the fun part: stepping into the kitchen to actually make your mushroom chocolates. This is where you get to be part chemist, part candy maker, transforming a few simple things into something delicious and dosed just right.
Think of it as an art and a science. The science is in the precision needed for consistent results, but the art is all about the creative touches you can add. A little prep goes a long way, so get your workspace clean and have all your tools and ingredients laid out and ready to go.
Mastering The Chocolate And Powder
First things first, let's get your two main players ready: the mushrooms and the chocolate. The final texture and consistency of your chocolates hinge entirely on getting these two steps perfect. A little patience here will pay off big time.
You need to grind your mushrooms into an incredibly fine powder. I’m talking flour-fine. A dedicated coffee or spice grinder is your best friend for this job. This isn't just about avoiding a gritty mouthfeel; a super-fine powder mixes in evenly, which is crucial for making mushroom chocolate with consistent dosing in every piece.

Once your powder is ready, set it aside and turn to the chocolate. The secret to that glossy, snap-in-your-mouth finish is melting your chocolate gently. The best way to do this is with a double boiler. If you don’t have one, no worries—just put a heat-resistant bowl (glass or metal) over a pot with an inch of simmering water. The key is making sure the bottom of the bowl doesn't touch the water.
This gentle, indirect heat is what prevents chocolate from seizing up or burning, which can happen in a flash if it gets too hot or a drop of water hits it. Keep stirring your chocolate with a silicone spatula until it's completely melted and looks like silk.
Combining And Pouring For Perfection
With your chocolate perfectly melted, it's time to bring in the mushroom powder. Take the bowl off the heat and let it cool for a minute. You don’t want to add the powder when the chocolate is scorching hot, as it can sometimes mess with the final texture.
This is probably the most important step for accurate dosing, so pay attention here. Add your pre-weighed mushroom powder to the melted chocolate and get ready to stir.
To get a truly even mix, follow these tips:
- Go in Stages: Don't just dump the powder in all at once. Sprinkle in about a third, stir it in completely, and then repeat with the remaining powder.
- Scrape Everything: Use your spatula to continuously scrape the bottom and sides of the bowl. You don't want any stray clumps of powder hiding out.
- Stir Like You Mean It: After the last of the powder is in, keep stirring for at least a full minute. You need to be absolutely positive it’s distributed evenly through the entire batch.
Once your infused chocolate is perfectly mixed, it’s time to pour. Carefully spoon or pour the chocolate into your silicone molds. I like to slightly overfill each one, then use the flat edge of my spatula to scrape across the top. This removes the excess and gives you a nice, flat bottom on your chocolates.
Pro Tip: As soon as the molds are full, give them a few firm taps on the countertop. You'll see tiny air bubbles come to the surface and pop. This one little trick is the secret to getting smooth, professional-looking chocolates without any weird air pockets.
Adding A Gourmet Twist
Look, classic mushroom chocolate is great. But adding a few extra ingredients can take your creations to the next level, turning them from simple edibles into something truly gourmet. These additions are also great for masking any of the earthy flavor from the mushrooms.
This is where you can let your creativity run wild. Just be sure to mix in any extra ingredients at the very end, right before you pour the chocolate into the molds.
Here are a few flavor combinations to get you started:
- Flaky Sea Salt: A little sprinkle on top just before the chocolate sets adds a fantastic crunch and really makes dark chocolate pop.
- A Little Heat: A tiny pinch of chili powder or cayenne pepper gives a gentle warmth that contrasts beautifully with the sweetness.
- Citrus Zest: Finely grated orange or lime zest cuts through the richness with a bright, fresh note.
- Warm Spices: A dash of cinnamon or ground ginger can add a comforting, cozy flavor that works well with the earthy mushrooms.
Don't be afraid to experiment! Start with small amounts, as a little bit of these flavors can go a long way. This is part of the fun of making mushroom chocolate at home—you get to make each batch exactly how you like it.
Proper Storage And Responsible Consumption Tips
You’ve done the hard work, and your beautiful chocolates have finally set. Now comes the final, crucial part: making sure they stay fresh and potent, and that they're enjoyed responsibly. Proper storage isn’t just a suggestion—it’s essential for protecting the active compounds in the mushrooms, which can break down when they meet light, heat, and air.
Think of it like you would a fine wine or a delicate spice. You put in the effort to create something special, and now you need to protect its character and strength. With just a few simple practices, you can keep your creations just as good as the day you made them for weeks, or even months.
Storing For Freshness And Potency
For anything you plan on enjoying in the near future, the refrigerator is your best bet. Just wrap each chocolate individually in a bit of foil or wax paper, then pop them into an airtight container. This will keep them perfect for a few weeks.
If you’re thinking longer-term, the freezer is the way to go. When you wrap and seal them correctly, your mushroom chocolates can hold onto their potency for six months or more. The real trick here is avoiding condensation when you take them out. Always let the container come to room temperature before you open it. This keeps moisture out and your chocolate in perfect condition.
Here’s a quick breakdown of your options:
- Refrigerator (Short-Term): Perfect for chocolates you'll be consuming within a few weeks. The cool, dark environment is exactly what you need.
- Freezer (Long-Term): The best choice for preserving potency for several months. Just make sure they're sealed up tight in an airtight container to prevent freezer burn.
You can dive even deeper into this topic by checking out our complete guide on how to store edibles, which has extra tips for all your homemade treats.
Proper storage is the final, crucial step in your chocolate-making journey. An airtight container in a cool, dark place isn't just a suggestion—it's the best way to protect the potency and flavor you worked so hard to create.
Chocolate has become a massively popular way to enjoy mushrooms, and the market reflects that. The functional mushroom sector was valued at USD 13.2 billion in 2026, and with North America holding a 31.1% share, it’s clear this is more than just a trend. This is partly driven by a 60% consumer preference for natural ingredients. By learning these best practices, you’re doing exactly what the best brands do: educating yourself to ensure a safe and positive experience.
Responsible Consumption And Safety
Even more important than how you store your chocolates is how you consume them. Your experience is profoundly shaped by your mindset and environment—a concept you’ll often hear called "set and setting."
- Set (Mindset): This is your internal world—your mood, your thoughts, and what you expect to happen. You’ll want to approach the experience from a calm, relaxed, and positive state of mind.
- Setting (Environment): This is all about your physical surroundings. Choose a place where you feel completely safe, comfortable, and won't be interrupted. For some, that’s a cozy living room; for others, it’s a peaceful spot in nature.
The golden rule, "start low, go slow," is absolutely non-negotiable. After you’ve had your first piece, wait at least 90 minutes—or even a full two hours—before you even think about having more. Edibles have a notoriously delayed onset, and getting impatient is the number one reason people have an experience that’s more intense than they bargained for.
Labeling Your Creations
Last but not least, we need to talk about labeling. This is one of the most critical safety steps you can take. Your homemade mushroom chocolates might look just like any other dessert, which creates a serious risk of someone—a friend, a guest, a family member—eating one by mistake.
Always use a permanent marker to clearly label the storage container. Be specific. Write down exactly what’s inside and, most importantly, the dosage per piece (for example, "Mushroom Chocolates – 0.5g each"). This simple act is a fundamental part of being a responsible creator. It ensures your chocolates are only enjoyed by those who know what they are and are choosing to do so.
Common Questions About Making Mushroom Chocolate
Once you start your journey into making your own mushroom-infused chocolates, you'll find a few common questions tend to surface. Don't worry, everyone has them! From getting the flavor just right to nailing that perfect, glossy finish, these are the little hurdles that pop up along the way.
Let's get these sorted so you can get back to the fun part: creating amazing edibles with confidence.
How Can I Mask The Taste Of The Mushrooms
Let's be real—completely erasing that earthy mushroom flavor is tough. But you can definitely dial it back so it's barely a whisper. The trick is to lean into strong, delicious flavors that complement the chocolate instead of fighting the mushroom taste.
I always recommend starting with a high-quality dark chocolate, something around 70% cacao or even higher. Its natural bitterness does a fantastic job of covering up other flavors. From there, you can get creative:
- A pinch of flaky sea salt is a game-changer. It makes the chocolate taste more, well, chocolately.
- Warm spices like cinnamon or just a hint of chili powder can introduce a whole new layer of complexity.
- Finely chopped peppermint or a single drop of mint extract is a classic power move that can easily overpower any earthiness.
And don't forget, grinding your mushrooms into the finest powder possible is key. The more like dust it is, the more seamlessly it will melt into the chocolate, which helps immensely with both the taste and the texture.
What Are The Best Molds To Use For Dosing
When it comes to consistent, trustworthy dosing, the mold you choose is more important than you might think. Food-grade silicone molds are the undisputed champion for this job. They're flexible, which means you can pop your finished chocolates out perfectly every time, with no cracking or breaking.
The most critical feature to look for in a mold is uniformity. Grab one that has identical-sized pieces, like a classic square or bar segment mold. This is how you guarantee your dose calculation is spot-on for every single piece.
Once you’ve got the basics down and feel confident in your process, feel free to get wild with fun and intricate shapes. But for starters, simple and uniform is the surest path to a predictable and safe experience.
Why Does My Chocolate Have White Streaks On It
Ah, the dreaded white streaks. This is a super common issue called "chocolate bloom," and it happens when the cocoa butter decides to separate from the cocoa solids. It’s usually a sign that the chocolate was melted too fast or cooled improperly. The good news? The chocolate is still perfectly fine and safe to eat—it just loses that beautiful, professional shine.
The easiest fix is to melt your chocolate low and slow. A double boiler is your best friend here. By melting it gently and stirring constantly, you keep the chocolate from getting too hot, which ensures the fats and solids stay happily mixed together. The result is a much more stable, glossy, and gorgeous final product.
Can I Use Mushroom Tea Instead Of Powder
This is one of those hard and fast rules in chocolate making: a firm "no." Any water-based liquid, mushroom tea included, will cause your beautiful melted chocolate to seize. Seizing is when the liquid makes the sugar and cocoa particles clump up instantly, turning your smooth, liquid chocolate into a thick, grainy, unusable mess. It’s a sad sight.
To get that perfect texture and a successful batch, you absolutely have to stick with completely dry ingredients. A super-fine mushroom powder is the most foolproof method, whether you're a first-timer or a seasoned pro. While some advanced recipes might play with tiny amounts of alcohol-based extracts, for reliability, powder is always the way to go.
Ready to skip the DIY and enjoy premium mushroom chocolates right away? Explore the curated selection at The Magic Mushroom Delivery. Find your perfect match and get it delivered discreetly to your door. Visit us at https://themagicmushroomdelivery.com to see our full range of products.