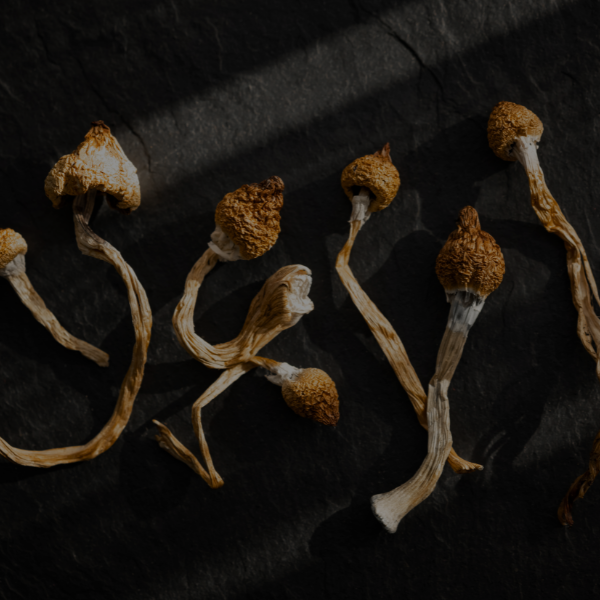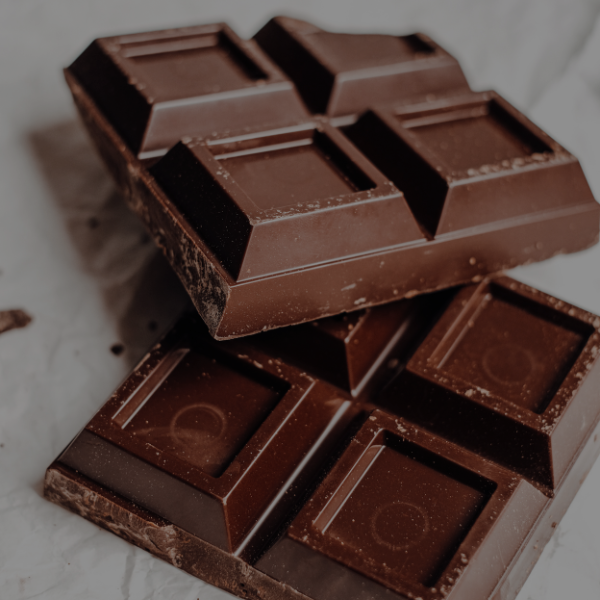
Sure, the earthy taste of dried mushrooms isn't exactly a gourmet experience. Making shroom chocolate is the classic solution, melting good-quality dark chocolate and mixing in finely ground mushrooms before chilling the whole thing in a mold. The process is simple, and it swaps that funky, dirt-like flavor for rich cacao. It’s a far more enjoyable way to go.
Why Shroom Chocolate Is the Ultimate Edible
Look, combining mushrooms and chocolate isn't just a clever trick to hide the taste. It's about creating a better, more intentional experience from the moment you decide to make them. When you craft your own edibles, you're in the driver's seat for the entire process.
This gives you total control over the ingredients you use and, most importantly, the exact potency. There’s no guesswork here. You decide precisely how much goes in, ensuring every piece aligns perfectly with the experience you're after—whether that's a gentle mood lift or a more profound journey.
The Perfect Pairing of Flavor and Function
Let's be real: most people don't enjoy the taste of dried mushrooms. That strong, earthy flavor can be pretty off-putting for some. Chocolate, especially dark chocolate with its own complex and slightly bitter notes, is the perfect partner to solve this problem.
Chocolate’s robust flavor profile does an incredible job of masking the mushroom taste. This simple culinary magic turns something you might have to choke down into a decadent treat you can actually savor.
And this isn't just some niche hobby anymore—it’s a booming market. The global demand for mushroom chocolate hit USD 142.3 million in 2024 and is on track to rocket past USD 328 million by 2033. That kind of growth shows a massive shift toward wellness products that don't force you to sacrifice enjoyment. You can discover more insights about the mushroom chocolate market and its explosive growth.
Taking Control of Your Wellness Journey
Beyond just masking the flavor, making your own shroom chocolate is empowering. You’re not just a consumer; you’re the creator. This guide is built to give you that confidence. We're going to walk through everything you need to know, from start to finish.
We'll cover:
- Ingredient Selection: How to pick the best chocolate and other key components for amazing results.
- Precise Dosing: Step-by-step math to make sure every piece has the exact potency you want.
- Flavor Pairings: Creative ideas to take your chocolate from simply good to truly gourmet.
- Safe Storage: The best techniques to keep your creations fresh and potent for months.
By the time you're done with this guide, you’ll have all the skills you need to create your own exceptional shroom chocolates right at home.
Mastering Mushroom Preparation And Dosing
Getting your shroom chocolate just right comes down to two things: how you prep your mushrooms and how you measure them out. Nail these, and you're set for a consistent, reliable experience. Mess them up, and who knows what you'll get. The goal here is simple: turn your dried shrooms into a super-fine powder that disappears into the chocolate.
Prepping The Mushrooms: Dryness Is Key
Before you even look at your chocolate, your mushrooms have to be absolutely, completely, bone-dry. This isn't just a suggestion—it's the most important rule. Any bit of moisture will make your beautiful, melted chocolate seize up into a clumpy, grainy mess.
Even more importantly, cracker-dry mushrooms grind down into a much finer powder. This is what you need for an even mix and a smooth, professional texture in your final chocolate bars.
If you're new to this part of the process, we've got a full guide covering different ways to dry and get your shrooms ready. You can check out our detailed instructions on how to prepare magic mushrooms to make sure you're starting off on the right foot.
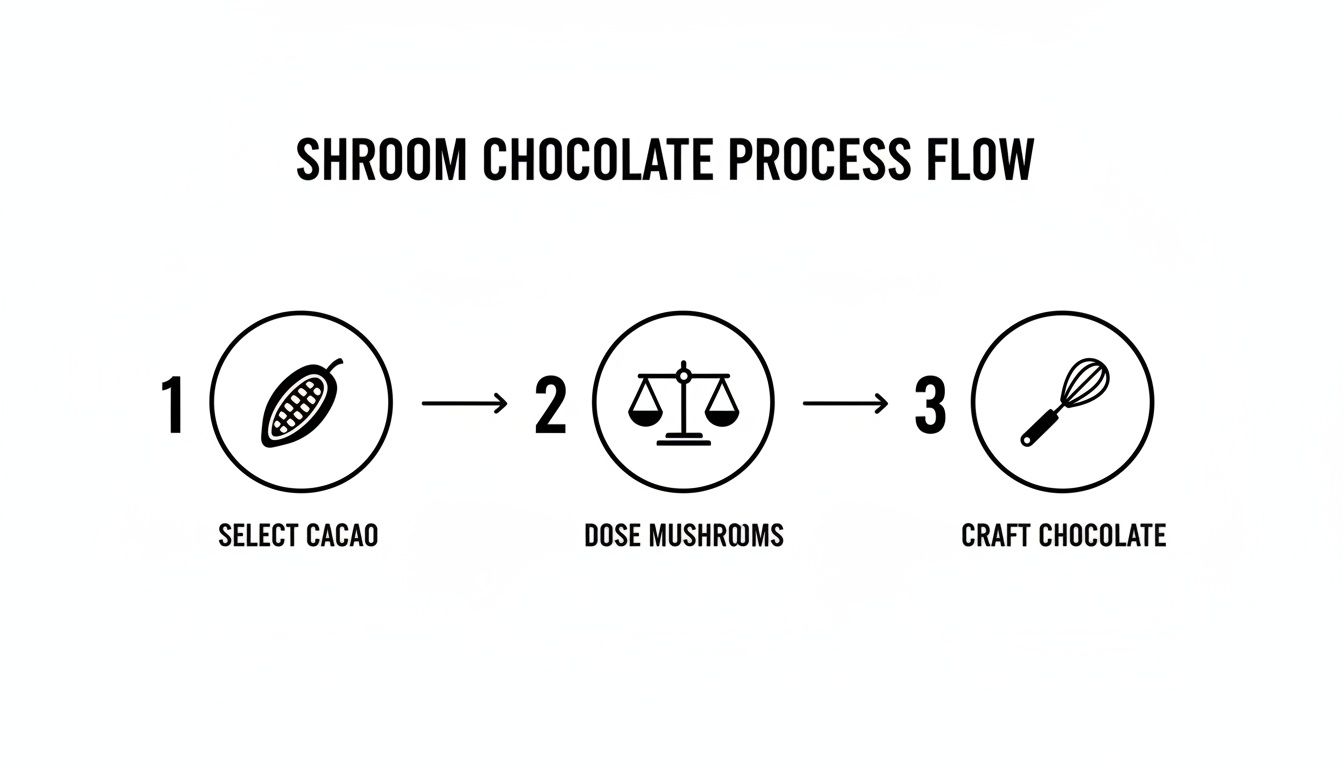
This workflow shows that making great shroom chocolate is all about balance: smart selection, precise measurement, and a little bit of craftsmanship.
Grinding For The Perfect Blend
Once your mushrooms snap like a cracker, it's time to grind them. You want to get them as powdery as possible. A coffee grinder or a good spice grinder is your best friend here. The finer the powder, the more evenly it will spread through the chocolate. This ensures every single square has a predictable dose.
A fine, consistent powder is the secret sauce for professional-quality shroom chocolate. It gets rid of any gritty texture and, critically, prevents "hot spots"—those random clumps of mushroom that can make one piece unexpectedly potent.
A fine grind also makes the final product taste way better. When the mushroom is just a dust, the rich flavor of the cacao completely masks its earthiness. Most people won't even know it's there.
The Art And Science Of Dosing
Okay, your mushroom powder is ready. Now for the most critical step: dosing. Getting this right takes all the guesswork out of your experience and puts you in the driver's seat. It's just simple math based on your total mushroom weight and how many squares are in your chocolate mold.
Here’s the formula:
Total Mushroom Weight (in grams) ÷ Number of Mold Squares = Dose Per Chocolate (in grams)
Let's run through a quick example. Say you have a standard chocolate mold with 12 squares and you decide to use 3 grams of your mushroom powder for the whole batch.
- Total Mushroom Powder: 3 grams
- Number of Chocolate Squares: 12
- The Math: 3 g ÷ 12 squares = 0.25 g per square
Just like that, you know each chocolate square will contain a perfect 0.25-gram microdose. This method lets you dial in every batch for exactly what you need, whether that's a subtle creative boost or a deeper journey.
Dosing Guide Per Chocolate Square
To make things even easier, this table breaks down how the math works out for common scenarios. Use it as a quick reference to figure out the strength of your chocolates before you even start melting.
| Total Mushroom Amount (grams) | Number of Chocolate Squares | Approximate Dose Per Square (grams) | Experience Level |
|---|---|---|---|
| 3.5g | 12 | 0.29g | Microdose |
| 6g | 12 | 0.5g | Low ("Museum") Dose |
| 12g | 12 | 1.0g | Low ("Museum") Dose |
| 6g | 6 | 1.0g | Low ("Museum") Dose |
| 10g | 10 | 1.0g | Low ("Museum") Dose |
| 15g | 10 | 1.5g | Moderate Dose |
| 20g | 10 | 2.0g | Moderate Dose |
| 30g | 10 | 3.0g | High Dose (Experienced) |
This guide helps you tailor your recipe to the exact experience you're looking for, taking all the guesswork out of the final product.
Understanding Dosing Levels
Knowing the grams per piece is one thing, but what does it actually mean? While everyone's different, there are some general guidelines you can follow to calibrate your recipe.
Here’s a quick rundown:
- Microdose (0.1g – 0.3g): This is for those subtle lifts in creativity, mood, and focus, without any real psychoactive feelings. It's a great place to start.
- Low Dose (0.5g – 1.0g): People often call this a "creative" or "museum" dose. You might feel mild euphoria, brighter colors, and a gentle shift in how you think.
- Moderate Dose (1.5g – 2.5g): This is where you'll start to notice more distinct visuals and auditory changes, along with deeper, more introspective thoughts. A solid dose for a meaningful trip.
- High Dose (3.0g+): This territory is for experienced users only. Expect powerful, immersive journeys with intense visuals and a profound connection to your inner world.
By mastering your own shroom chocolate recipe, you're tapping into a huge trend. These infused chocolates are everywhere, with 91.3% of Canadian psilocybin dispensaries carrying them. The vast majority of these recipes use Psilocybe cubensis—a strain that dominates 90% of the market—for its reliability and ease of use. Now you can make exactly what you need, whenever you want.
The Foolproof Chocolate Infusion Process
You've got your mushroom powder ready and your dose dialed in. Now comes the best part of any shroom chocolate recipe—actually making the chocolate. This is where a bit of technique turns simple ingredients into a professional-quality chocolate bar that’s smooth and glossy. Don't worry, you don’t need to be a five-star chef; it's more about understanding how chocolate behaves.
We're going to walk through tempering. It’s the key step that gives chocolate that signature "snap" and prevents it from looking dull or chalky. It sounds fancy, but it's much easier than you think, and you don’t need special equipment to nail it.
Why Tempering Chocolate Is a Game-Changer
Ever had a piece of chocolate that was weirdly soft and crumbly at room temperature? Or maybe it had those white, streaky marks on the surface? That’s what happens when chocolate isn't tempered. Tempering is just the process of heating and cooling chocolate to specific temperatures to get the cocoa butter crystals to line up perfectly.
When you get it right, your finished chocolate will be:
- Glossy and Attractive: It gives the chocolate a beautiful, professional sheen.
- Firm with a Clean Snap: This creates that satisfying crack when you break off a piece.
- Smooth and Even-Melting: It melts smoothly in your mouth, not all over your fingers.
Skipping this might save you a few minutes, but it's the difference between a decent homemade treat and a truly exceptional edible.
Tempering isn't just for looks; it’s about structure. It realigns the fat crystals in the cocoa butter, creating a stable, finished chocolate that holds its shape and texture perfectly at room temperature. Think of it as the foundation for a flawless bar.
The Double Boiler Method For Perfect Tempering
The most reliable way to temper chocolate at home is with a double boiler. No double boiler? No problem. Just place a heatproof glass or metal bowl over a saucepan with a little simmering water in it. The most important thing is to make sure the bottom of the bowl does not touch the water. You want gentle steam, not direct heat, to melt the chocolate.
Here’s the breakdown:
- Melt It Down: Put about two-thirds of your chopped chocolate or wafers into the bowl. Stir it constantly with a rubber spatula as it melts over the simmering water.
- Watch the Temperature: Grab a digital food thermometer and keep an eye on the temperature. For dark chocolate, you're aiming for 115-120°F (46-49°C).
- Cool It Off: Once it hits the target temp, take the bowl off the heat. Now, add the remaining one-third of your chocolate and stir until it's completely melted in. This is called "seeding," and it introduces stable crystals that help the whole batch cool down correctly.
- The Target Temperature: Keep stirring until the chocolate cools to about 88-90°F (31-32°C). At this point, it should be smooth, fluid, and ready for the magic.
This controlled heating and cooling is the secret to that perfect finish every single time.
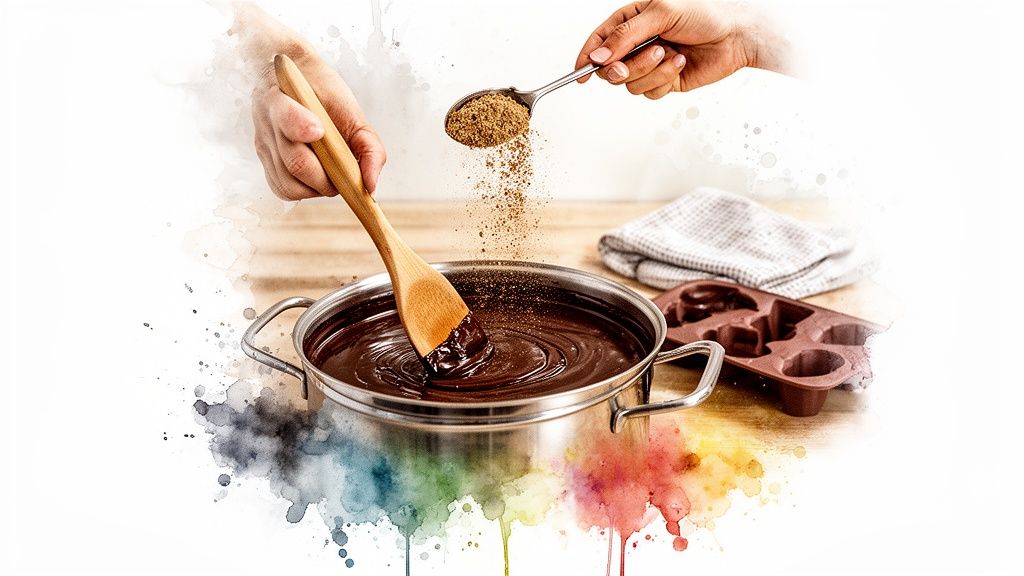
Infusing Your Mushroom Powder
With your chocolate beautifully tempered and at the perfect working temperature, it's time to bring in the mushrooms. Timing is everything here. You want to avoid adding the powder when the chocolate is scorching hot, as too much heat could potentially degrade the mushroom's delicate compounds.
Gently stir your pre-measured, finely ground mushroom powder into the tempered chocolate. Use your spatula to mix it thoroughly, making sure to scrape the sides and bottom of the bowl. The goal is a silky, even mixture with the powder completely suspended.
Want to take the flavor up a notch? This is the perfect moment to add a pinch of fine sea salt or a half-teaspoon of pure vanilla extract. These little additions do wonders, complementing the rich cacao and masking any lingering earthiness from the mushrooms.
Molding And Chilling For A Flawless Finish
Once your infusion is complete, it's time to pour and set. You need to work fairly quickly here, as tempered chocolate starts to set as it cools.
Pour the infused chocolate into your silicone molds. A spatula is your best friend here, helping you guide the chocolate and fill each section evenly. Try not to overfill them—a nice, level surface is what you're after.
Next, get rid of any trapped air bubbles. Just tap the filled mold firmly on your countertop a few times. You'll see tiny bubbles rise to the surface and pop. This little trick ensures your finished chocolates have a solid, professional look without any weird pits or holes.
Finally, slide the mold into the refrigerator for 15-20 minutes. You want a quick, efficient chill to help the chocolate set just right. Don't leave it in there for hours, as that can cause condensation. Once the chocolates are firm and have pulled away from the edges of the mold a little, they’re ready. Carefully pop them out, and you’ll have a batch of beautiful, glossy shroom chocolates that look as good as they taste.
Taking Your Shroom Chocolate to the Next Level
So, you've nailed the basic shroom chocolate recipe. You’ve got the process down, and now you’re probably thinking, "What's next?" This is where the real fun begins. Moving past the standard recipe is your chance to get creative and turn a simple edible into something truly special—a gourmet experience that's all your own.

You might be surprised to learn that the earthy, somewhat bitter notes of mushrooms go incredibly well with a whole host of other flavors. By bringing in some complementary ingredients, you can craft a chocolate that not only tastes amazing but feels more deliberate and refined. It’s like composing a piece of music, where every single element has a role to play.
Creative Flavor Pairings
The quickest way to elevate your chocolate is by layering in new flavors that work with the cacao while masking any mushroom aftertaste. The goal here is balance; you want the new additions to enhance the chocolate, not steamroll it.
Here are a few combinations that I’ve found work beautifully:
- Citrus Zest: A bit of finely grated orange or lime zest adds a bright, sharp kick that really cuts through the richness of dark chocolate. The fresh aroma is a fantastic counterpoint to the deeper, earthier tones.
- Warm Spices: Try a pinch of cinnamon, cardamom, or even a tiny dash of cayenne. These introduce a gentle warmth that builds as the chocolate melts, creating a much more dynamic flavor profile.
- Floral Notes: If you're aiming for something more delicate, a sprinkle of culinary-grade dried lavender or rose petals adds an elegant, aromatic layer that feels seriously luxurious.
- Savory Elements: A few flakes of sea salt or some finely chopped rosemary might sound odd, but they actually amplify the chocolate’s sweetness and add a sophisticated, savory twist that keeps things interesting.
When you’re ready to add these, just stir them into your tempered chocolate along with the mushroom powder. My advice? Start with less than you think you need, give it a taste, and adjust from there until you hit that perfect harmony.
Adding Texture For A Better Bite
Flavor is only half the story. Texture introduces another dimension that makes your chocolate infinitely more satisfying. A good crunch or a chewy surprise can completely change the game, turning a simple melt-in-your-mouth treat into something far more memorable.
Think about folding in ingredients like these:
- Toasted Nuts: Almonds, walnuts, or pecans are classics for a reason. They add a great crunch and nutty depth. Toasting them first is a must—it brings out their natural oils and really punches up the flavor.
- Seeds: For a similar crunch with a slightly different taste, try toasted pumpkin or sunflower seeds.
- Popped Quinoa or Crispy Rice: These are fantastic for adding a light, airy crispiness without the heaviness of nuts.
- Dried Fruit: Finely chopped dates, apricots, or cherries bring a nice chewiness and a pop of natural sweetness that plays well against bitter dark chocolate.
Here's a pro tip: The secret to adding anything textural is making sure it's bone dry. Just like with the mushrooms, any hint of moisture can cause your chocolate to seize up and become grainy. Only use ingredients that are toasted, dehydrated, or fully dried.
Advanced Chocolate Techniques
Feeling ambitious? You can start experimenting with some more advanced chocolatier techniques. These require a bit more patience, for sure, but the results are visually stunning and can deliver a much more complex eating experience.
A popular method is creating layered chocolates. This usually involves pouring and setting one layer of chocolate (say, a 70% cacao), then adding a second layer of something a little sweeter, like a 60% cacao. You could even get fancy and infuse one of the layers with a specific flavor, like mint or orange, for a multi-layered taste sensation.
Another great option is to make filled chocolates. This involves using a bonbon or praline mold to create a thin chocolate shell. Once it sets, you can fill it with anything from a soft ganache or caramel to nut butter before sealing it off with more chocolate. It's definitely more involved, but this technique unlocks endless possibilities for flavor and texture, letting you craft a shroom chocolate that is truly a work of art.
Proper Storage for Lasting Potency
You've put in all the work to create the perfect batch of shroom chocolates. Now for the final, crucial step: making sure they stay fresh and potent for as long as possible. Storing them correctly is about more than just keeping them from melting into a puddle; it’s about protecting the active compounds from breaking down and preserving that beautiful, glossy finish you worked so hard to get.
The biggest enemies of your shroom chocolate are heat, light, and air. Any of these can mess with the chocolate's texture and, more importantly, degrade the active compounds over time. The best defense is a simple one: keep your chocolates in an airtight container stashed away in a cool, dark place.
The Best Storage Methods
For short-term storage, your refrigerator is a great option. It keeps the chocolates from melting and helps them maintain that satisfying snap when you bite into them. If you’re planning to keep them around for a few months, check out our full guide on the best way to store shrooms for more in-depth techniques.
Here’s a quick breakdown of your options:
| Storage Location | Best For | Key Consideration |
|---|---|---|
| Pantry/Cupboard | Very short-term (a few days) if cool | Only works if your house stays consistently below 70°F (21°C). |
| Refrigerator | Medium-term (up to several months) | Wrap well to prevent them from picking up weird fridge smells. |
| Freezer | Long-term (6+ months) | Double-wrap to prevent freezer burn and condensation when thawing. |
If you go the freezer route for long-term storage, wrap the chocolates in plastic wrap first, then pop them into an airtight container or freezer bag. When you’re ready to have one, let it thaw in the fridge for a few hours. This slow thaw prevents condensation from forming on the surface, which can cause that weird white film known as sugar bloom.
Mindful Consumption for the Best Experience
How you store your chocolate is important, but so is how you approach the experience of eating it. A little preparation can be the difference between a good trip and a truly meaningful one.
This is where the classic wisdom of "set and setting" comes in. "Set" is all about your mindset—your thoughts, mood, and intentions going in. "Setting" is your physical environment. Getting both of these aligned can profoundly shape your journey.
Before you even unwrap a piece, take a minute to set an intention. Are you seeking creative insight, personal reflection, or simply a moment of joy? A clear intention can act as a guiding star for your journey.
This mindful approach is a huge part of why these mushrooms are having such a moment right now. In fact, the mushroom chocolate market is projected to hit USD 2.2 billion globally by 2025, and it's expected to balloon to USD 5.5 billion by 2033. This isn't just a niche hobby anymore. With 65.2% of vendors using packaging that looks like major candy brands, shroom chocolate has gone mainstream.
Guidance for a Positive Journey
Once you've got your set and setting dialed in, the final piece of the puzzle is responsible dosing. This is absolutely critical, especially when you're trying a new recipe or a batch you haven't sampled before.
- Start Low and Go Slow: Always, always begin with a single, low-dose piece from any new batch. It's the only real way to know how potent it is.
- Be Patient with Onset: Edibles have a reputation for sneaking up on you for a reason. It can take anywhere from 30 minutes to two hours to feel the full effects.
- Wait Before Redosing: Resist the urge to eat more if you don't feel anything right away. Give it at least two full hours before you even think about having another piece.
By following these simple storage and consumption tips, you’re not just protecting your hard work—you’re setting yourself up for a positive, respectful, and deeply rewarding experience from start to finish.
Got Questions About Your Shroom Chocolates?
Even the best recipe can leave you with a few head-scratchers, especially when you’re chasing that perfect batch. Let’s clear up some of the most common questions so you can get back to crafting your chocolates with confidence.
What Kind of Chocolate Should I Use?
For the best flavor and texture, you really want to reach for high-quality dark chocolate with 60% to 75% cacao. Its rich, slightly bitter notes do a fantastic job of balancing out the earthy taste of the mushrooms. Plus, good dark chocolate is just easier to temper, which is your secret to getting that satisfying snap and glossy, professional finish.
I’d stay far away from standard chocolate chips. They’re packed with stabilizers designed to help them hold their shape in cookies, which means they fight you every step of the way when you try to melt them down smoothly. This can leave you with a clumpy, grainy mess. Stick to quality chocolate bars or couverture wafers—they’re made for melting.
Why Did My Chocolates Turn Chalky or White?
Ah, the dreaded "bloom." That chalky, streaky film is a common headache for anyone making chocolate at home. It’s either fat bloom (from wonky tempering) or sugar bloom (from moisture). While your chocolates are still perfectly safe to eat, they just won't have that beautiful look or silky mouthfeel you were going for.
Fortunately, preventing it comes down to being extra careful with two things:
- Nail the Tempering: Follow the tempering steps to the letter. This ensures the cocoa butter crystals form a stable, uniform structure.
- Stay Dry: Make absolutely certain your molds, bowls, and spatulas are bone-dry. Even a single drop of water can cause the sugar to seize up and bloom.
How Long Will My Shroom Chocolates Last?
When you store them right, your homemade chocolates will hold their potency for several months. The biggest enemies of your active compounds are heat, light, and air. The best defense is simple: keep them in an airtight container in a cool, dark spot.
The fridge is a great option for keeping them firm and fresh. If you want to store them for the long haul—say, six months or more—the freezer is your friend. Just wrap them tightly in plastic wrap before putting them in a freezer-safe bag to ward off freezer burn. And always, always label the container with the date and dose per piece.
Can I Just Stir the Mushroom Powder into Hot Melted Chocolate?
You'll want to avoid adding the powder directly to scorching hot chocolate. Too much heat for too long can potentially degrade the active compounds, which is the last thing you want. The trick is to manage the temperature.
The best way to do it is to melt and temper your chocolate first. Let it cool down just a bit—you want it liquid, but not blazing hot. Then, stir in your mushroom powder until it’s completely blended, right before you pour it all into the molds.
This little extra step ensures everything is mixed evenly while protecting the potency of your key ingredient. Getting these details right is what separates a decent batch from a truly great one. If you want to dive deeper into how all this comes together, our guide to mushroom chocolate effects is a great next read.
Ready to skip the kitchen work and get straight to the good part? The Magic Mushroom Delivery offers a premium selection of expertly crafted mushroom chocolates, gummies, and more, all made with high-quality, organic ingredients. Enjoy fast, discreet shipping right to your door.